
Having an indoor golf simulator in your basement can be a great way to enjoy the game all year round. From perfecting your swing to spending quality time with family and friends, it is also a fun activity you can enjoy indoors. You can set up a golf simulator in your basement by taking advantage of some simple tools and equipment.
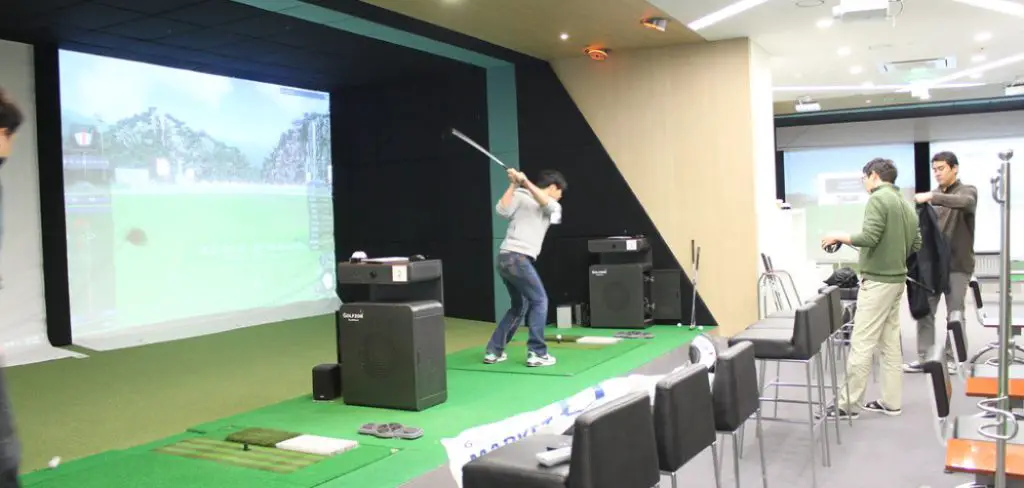
Building an indoor golf simulator is a great way to enjoy the game all year round, regardless of the weather. It also allows you to practice and perfect your swing without having to leave home. You will not have to spend a fortune either. Here’s a step-by-step guide on how to build indoor golf simulator in basement.
Necessary Items
First, you will need some basic items to start building a golf simulator in your basement. These include:
- Golf mat
- Turf material or artificial grass
- Frame and netting system of your choice
- Projector/Monitor for the screen
- Impact sensors/cameras to track the ball flight path and spin data.
10 Steps on How to Build Indoor Golf Simulator in Basement
Step 1: Prepare the Space
The first step to building an indoor golf simulator in your basement is to prepare the space for setup. Begin by measuring the dimensions of your basement so you can accurately plan out where to place the equipment and components. Designate a specific area free from any obstructions or obstacles that could interfere with your game.
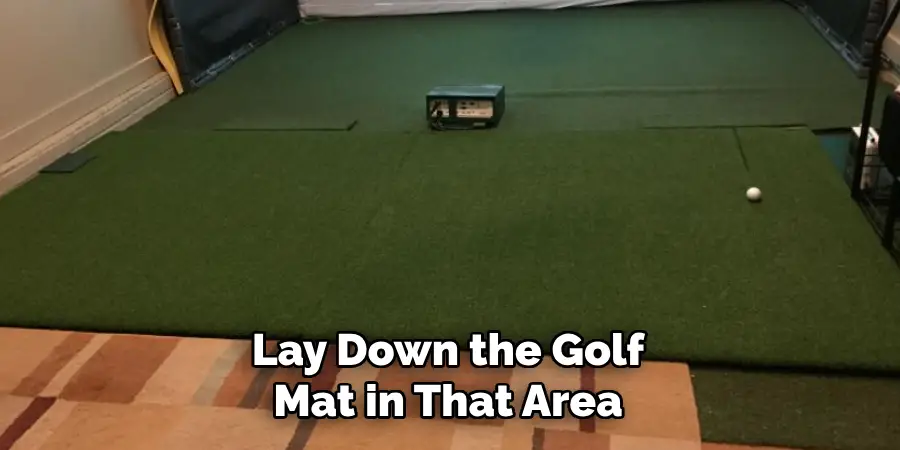
Step 2: Install the Mat
Once you have identified a suitable space, lay down the golf mat in that area. Make sure it is secured to the floor using nails or adhesive tape. You can also use padding beneath the golf mat if desired.
Step 3: Cover with Turf or Artificial Grass
The next step is to cover the golf mat with turf or artificial grass. This will simulate a real-world golf course and help you practice your swing even more realistically. Be sure to lay the turf correctly to stay in place during play.
Step 4: Assemble Frame and Netting System
You will need a frame and netting system to place around the mat and turf. This will keep your ball in play and protect any nearby walls or furniture from damage. Choose a frame that is easy to assemble and also offers sufficient protection against stray balls.
Step 5: Mount Projector/Monitor
Now it’s time to mount the projector or monitor for the screen. This will allow you to view the virtual golf course and practice your game even more realistically. Make sure the projector/monitor is securely mounted and positioned correctly so it won’t interfere with gameplay.
Step 6: Add Impact Sensors or Cameras
Add impact sensors or cameras to the setup to get a more accurate reading of ball flight path and spin data. These will help you fine-tune your swing and achieve greater accuracy in the game.
Step 7: Connect Components
Once all the components have been installed, it’s time to connect them. Using the necessary cords and cables, link the projector/monitor, impact sensors/cameras, and other components together in the correct order.
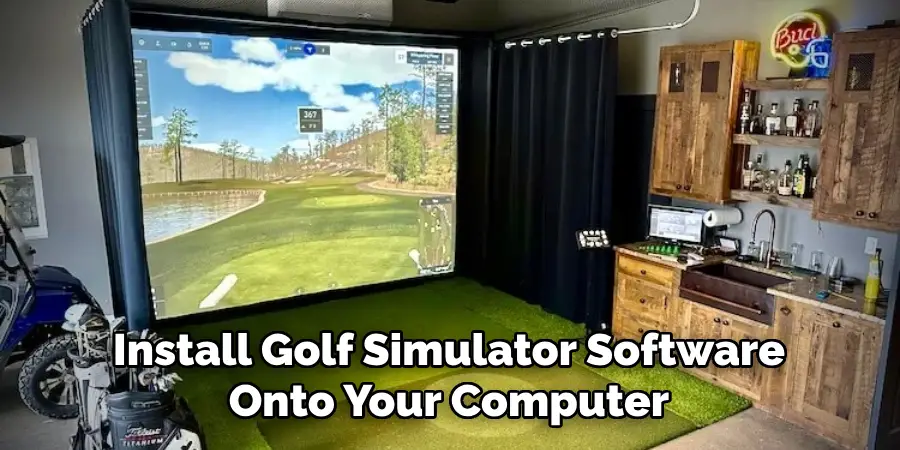
Step 8: Install Golf Simulator Software
Now you’ll need to install golf simulator software onto your computer or device. This will allow you to view the course and make adjustments to the setup as needed. Follow the instructions on the package carefully to ensure a successful installation.
Step 9: Calibrate the Simulator
Once the software has been installed, you will need to calibrate the simulator. This process involves adjusting the angles and distances of each component for an optimal environment. Refer to the user manual for instructions on how to do this correctly.
Step 10: Start Enjoying your Golf Simulator!
You’re now ready to enjoy your golf simulator! Start by taking a few practice swings with the club of your choice. Monitor the ball flight path and spin data, and make adjustments as needed for an even better experience. Try playing against friends or family members for an extra challenge and some friendly competition.
You can easily build an indoor golf simulator in your basement with these simple steps. Have fun perfecting your swing even during the cold winter months! With a golf simulator, you can enjoy all the benefits of playing outdoors without worrying about the weather. So what are you waiting for? Get started on building your own indoor golf simulator today!
8 Mistakes You Might Make When Building an Indoor Golf Simulator
1. Not Double-checking Measurements:
Taking accurate measurements is key for building a successful golf simulator in your basement. Double-check each component’s dimensions to ensure everything fits together correctly.
2. Not Securing the Mat Properly:
Make sure to securely fasten the golf mat to the floor using nails or adhesive tape. This will keep it in place when you start playing, so you don’t have to worry about it slipping during your swing.
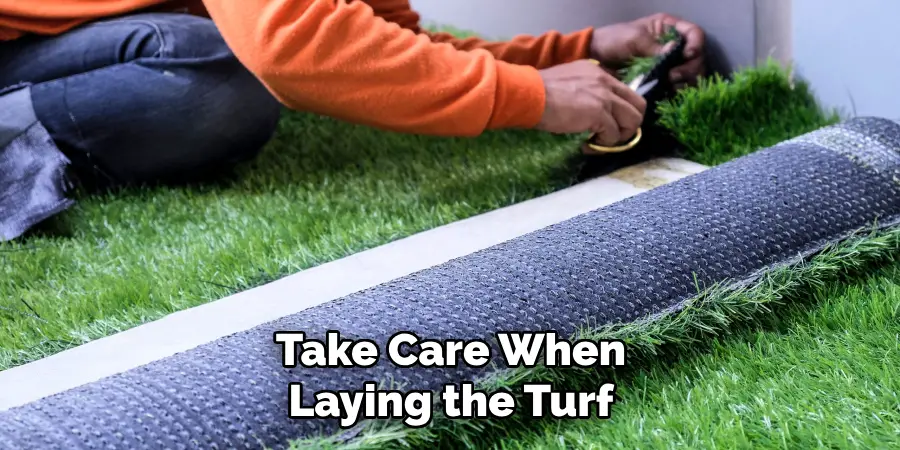
3. Installing Turf Improperly:
Take care when laying the turf or artificial grass. This will help to keep it firmly in place during play, so make sure you lay it correctly. Otherwise, it might move around or bunch up during gameplay.
4. Using a Low-quality Frame and Netting System:
Choose a high-quality frame and netting system for the golf simulator. A durable setup will ensure that your ball remains in play while also protecting nearby walls and furniture from damage.
5. Not Choosing the Right Frame:
Choose a frame and netting system that is easy to assemble and provides sufficient protection against stray balls. Make sure it’s also the right size for your space. If you choose a frame that is too large or small, it might interfere with your game.
6. Not Mounting Projector/Monitor Securely:
Be sure to mount the projector/monitor securely and in the right position. Otherwise, it could move around during gameplay, making it hard for you to focus on the virtual course. Adjusting settings will also be difficult if the projector/monitor isn’t mounted properly.
7. Not Installing Impact Sensors or Cameras:
Install impact sensors or cameras into the setup for a more accurate reading of ball flight path and spin data. This will help you fine-tune your swing and get even more out of your game.
8. Not Calibrating the Simulator:
Once the software has been installed, you must calibrate the simulator. This involves adjusting the angles and distances of each component for an optimal environment. Take your time and follow the instructions carefully for the best results.
Building an indoor golf simulator in your basement can be a challenging task. But by following these steps and avoiding common mistakes, you can create an immersive experience that will have you playing like a pro in no time. So start building your own golf simulator, and start perfecting your swing today!
Frequently Asked Questions
What Materials Do I Need to Build a Golf Simulator?
You will need a frame and netting system, golf mat, turf or artificial grass, projector or monitor, impact sensors or cameras, and golf simulator software. The exact materials you’ll need will depend on the size of your setup and the type of simulator you’re building.
Does a Golf Simulator Require A Lot Of Space?
The amount of space needed for a golf simulator can vary depending on what type of setup you’re creating. Generally speaking, you will need at least 10 feet by 10 feet to fit all of the components together properly.
What Is The Best Software To Use For A Golf Simulator?
The best software for a golf simulator depends on your individual needs. It should be able to accurately capture your ball flight path and spin data and provide an immersive virtual experience. Several software packages are available, so do your research and pick the one that best fits your requirements.

How Long Does It Take To Build A Golf Simulator?
The time it takes to build a golf simulator depends on the size and complexity of the setup. However, if you follow the steps carefully and have all of the necessary materials on hand, you should be able to build a basic simulator in around three to four hours.
Conclusion
Building an indoor golf simulator in your basement is a great way to practice and perfect your swing all year long. With the right materials and steps, you can easily create an immersive experience that will have you playing like a pro in no time. With the right materials and patience, you can create a realistic golf experience without worrying about the weather.
So don’t wait any longer – gather the necessary materials, follow the steps on how to build indoor golf simulator in basement, and start enjoying your indoor golf simulator today; accurately track ball flight path and spin data.