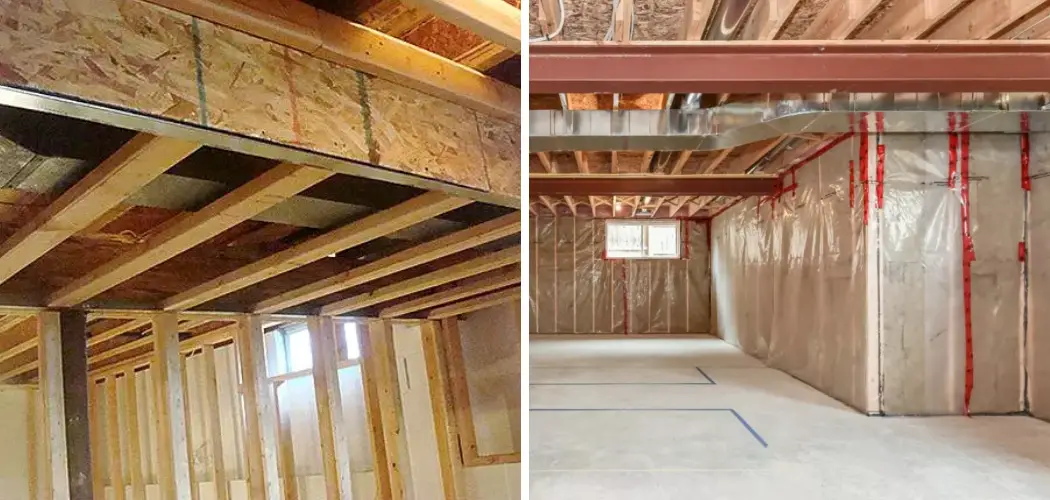
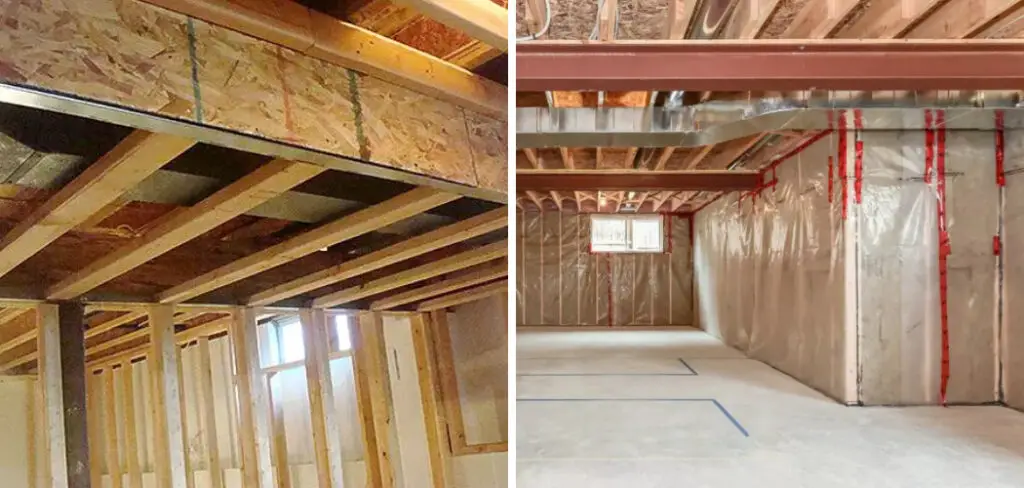
If you have exposed ductwork in your home, you may find it unsightly and disruptive to the overall aesthetic of your living space. One solution to this problem is to build a soffit around the ductwork.
A soffit is essentially a dropped ceiling that encloses the ductwork while also providing a smooth, finished surface. Building a soffit around ductwork requires careful planning and execution, but with the right tools and techniques, it can be a relatively simple and rewarding DIY project.
In this article, we will explore how to build soffit around ductwork. We will discuss the tools and materials you will need, as well as provide step-by-step instructions for planning, framing, and finishing the soffit. With these tips, you can transform your unsightly ductwork into a seamless part of your home’s design.
What Is a Soffit for Ductwork?
A soffit is a type of material used to cover the underside of a structure such as an overhang, porch roof, or other feature. It’s typically made of metal, wood, vinyl, or other durable material and is installed directly beneath ductwork to provide additional protection against outside elements and weathering. Soffits also offer aesthetic appeal, as they hide unsightly ductwork and provide a more uniform look to the outside of your home.
When installing a soffit around ductwork, it’s important that you use the correct materials in order to ensure a secure fit. Metal or vinyl soffits are the most common choice for this purpose, as these materials are both durable and weather-resistant. Additionally, when cutting metal or vinyl soffit for installation, be sure to use tin snips (not scissors) for a clean cut and an even fit.
After cutting panels of soffit material to size and shape, attach them securely with screws or nails. Be careful not to overdo it – too many fasteners may cause the material to buckle or warp. Also, be sure to leave a gap between each piece of soffit and the ductwork in order for air to flow freely. When finished, caulk around any gaps or seams for added protection and an overall cleaner look.
Why Is It Called a Soffit?
The word “soffit” is of French origin and literally translates to “something fixed underneath.” This term is often used in the context of construction or renovation, which refers to a structure that encloses ductwork or an area beneath the ceiling.
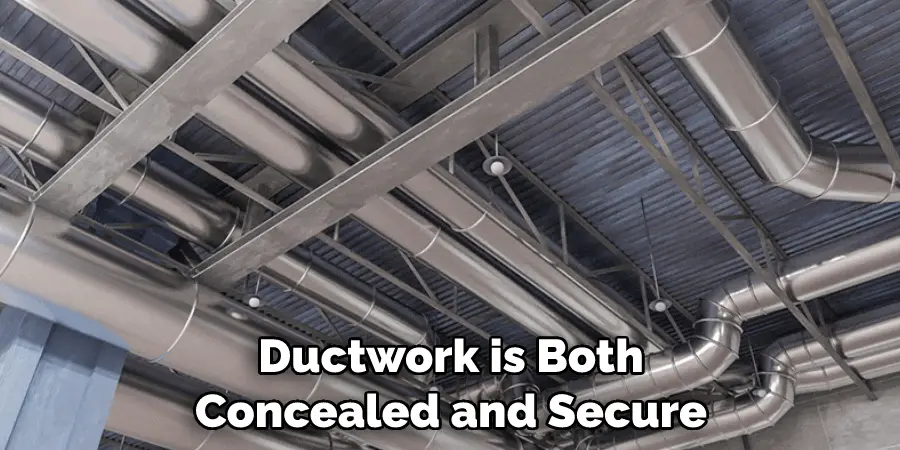
The soffit creates a finished look to cover up these unsightly features. Because of the nature of soffits, they need to be custom-made in order to fit properly. This ensures that your ductwork is both concealed and secure while creating a beautiful look for your home or business.
It’s important to note that soffit installation should only be done by an experienced contractor or carpenter. If not installed properly, there may be gaps that allow air loss from your HVAC system. Additionally, if the soffit is made out of low-quality material, it could easily become damaged over time.
Investing in high-quality material and professional installation will ensure you get the most out of your soffit and provide protection against potential issues down the line. With proper planning and advice from an industry expert, you can create a beautiful soffit that will make your home or business look great and function properly.
Your next step is to learn about the different materials available for building soffits. They come in a variety of styles and finishes, such as wood, aluminum, vinyl, fiber cement board, and more. Each type has its own advantages and disadvantages, depending on its application.
Researching the various options will be essential in finding the perfect material for your project. Additionally, it’s important to consider any potential local codes or regulations when selecting your materials. This will ensure compliance with all applicable laws before construction begins.
10 Methods How to Build Soffit Around Ductwork
1. Plan the Design and Layout
The first step in building a soffit around ductwork is to plan the design and layout. You will need to measure the ductwork to determine the size and shape of the soffit. Decide on the height, depth, and width of the soffit, as well as the materials you will use.
Keep in mind that the soffit should blend seamlessly with the rest of your home’s design. If you are using pre-fabricated soffit boards, measure and cut them to the appropriate size.
2. Gather the Necessary Tools and Materials
To build a soffit around ductwork, you will need a variety of tools and materials. Some of the necessary tools include a measuring tape, circular saw, jigsaw, hammer, nails, screws, drill, and drywall saw. The materials you will need include drywall, lumber, screws, drywall tape, joint compound, and paint.

3. Frame the Soffit
Once you have planned the design and gathered the necessary tools and materials, you can begin framing the soffit. Start by installing a frame around the ductwork using 2×4 lumber. The frame should be level and flush with the ceiling. To ensure accuracy, make sure to use a level when framing.
Next, install the back plate of the soffit. This should be a piece of wood that matches the size and shape of the frame. Make sure to secure it with screws into the wall studs and joists, as well as the frame you just installed.
4. Install Drywall
After framing the soffit, you can install drywall to create a finished surface. Cut the drywall to size using a drywall saw and attach it to the frame using screws. Be sure to leave an access panel to allow for future maintenance or repairs.
After attaching the drywall, add joint compound to seal any seams and fill any nail holes. Then sand down the filled areas and paint or stain the drywall to match the surrounding walls.
5. Add Insulation
If your ductwork is located in an area with extreme temperatures, you may want to add insulation to the soffit. This will help regulate the temperature of the air flowing through the ducts and prevent energy loss.
Use fiberglass batt insulation to insulate the soffit. Cut the insulation to fit between the framing studs and nail it into place with 1-inch nails. If you are using spray foam insulation, apply it in a thick layer to the soffit.
6. Finish the Drywall
Once the drywall is installed, you will need to finish it by applying joint compound and drywall tape. This will create a seamless surface that blends with the rest of your home’s design. Sand the joint compound smoothly and prime the surface for painting.

Allow the drywall to set overnight before proceeding. If you need to cut any holes for outlets or vents, use a drywall saw. While many pieces of drywall can be cut with a utility knife, it is not recommended for cutting corners.
7. Install Trim
After the drywall is finished and painted, you can install trim around the soffit to create a polished look. Use crown molding or baseboard trim to create a finished edge around the soffit. You can also use corner trim pieces or quarter-round to create a seamless connection between the soffit and wall.
To install the trim, you will need a miter saw and finishing nails. Cut the trim to length and position it against the wall. Secure it in place with nails or screws, and be sure to fill any holes with wood filler or spackle.
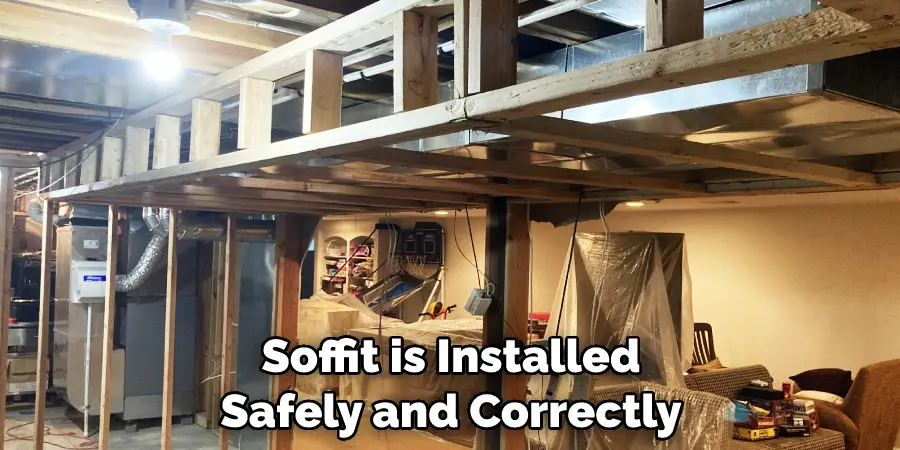
8. Install Lighting
To add extra ambiance to your living space, you can install lighting inside the soffit. You can install recessed lighting or LED strips to create a warm and inviting atmosphere. Be sure to hire an electrician to ensure that the lighting is installed safely and correctly.
If you’re using LED strips, it may be easier to install them before the soffit is put into place. Once the lights are in place and connected to the electricity supply, you can enjoy the soft and inviting lighting in your living space.
9. Conceal the Soffit with Decorative Elements
If you want to conceal the soffit even further, you can use decorative elements such as curtains or artwork to draw attention away from the ductwork. This will create a cohesive and polished look in your living space. You can also use other materials, such as paint, wallpaper or fabric to give your soffit a unique look.
10. Hire a Professional
If you are not comfortable with DIY projects or if the ductwork is located in a difficult-to-reach area, you may want to consider hiring a professional. A professional contractor can ensure that the soffit is installed safely and correctly while also providing advice on design and materials.
Conclusion
Our guide has shown the technique for properly building soffit around ductwork. Ensuring that you precisely measure and cut the material according to our outlined steps, your new soffit will be complete in no time. This DIY project is relatively simple, but it can be tricky if right steps are not followed.
We hope with the help of this article, you are confident in your abilities to get the job done without any extra hiccups. If you still feel overwhelmed at any point during construction, don’t hesitate to contact a professional contractor for assistance. Thanks for reading, and we hope this has given you some inspiration on how to build soffit around ductwork!