Are you the proud owner of a newly-acquired property with an extra special feature? Congratulations – and welcome to a unique cleaning challenge! A century-old basement, with its cobwebbed corners, decades of dust, and layers upon layers of collected debris, can be intimidating.
But learning how to clean a 100 year old basement might just prove easier than you think. From assessing items for removal to getting creative with safe storage solutions, we’re here to give you the ultimate guide on how to clean up your inherited antique space in no time. It’s time to explore that forgotten room underneath it all!
What Is the Best Product to Clean Basement Floor?
When it comes to cleaning the basement floor of a 100-year-old home, there are many products available. Depending on the type of dirt and grime covering the basement floor, certain products may work better than others.
For example, if you’re dealing with oil-based material on your basement floor, you should use a degreaser such as Krud Kutter or Simple Green All-Purpose Cleaner. These products can quickly break down oil and grease, leaving behind a clean surface.
If you’re dealing with dirt and dust, it’s best to use a basic broom and dustpan. An electric broom is also an option if you want to get the job done faster.
Finally, if your basement floor is covered with mildew and mold, it’s important to use a product designed specifically for this purpose. A mixture of one-part bleach and nine parts water should do the trick. Make sure to ventilate the room while using bleach, as it can be hazardous to your health.
At the end of the day, it’s important to use a product that is designed for the type of material you’re dealing with on your basement floor. Depending on what you find, each product may offer different results when cleaning 100-year-old floors.
10 Methods on How to Clean a 100 Year Old Basement
1. Inspect the Basement for Damage:
Before cleaning up the basement, inspect it for moisture and structural damage. This will help you identify areas of the basement that may need extra attention during the cleaning process. Also, ensure the area is well-ventilated before beginning. Although a 100-year-old basement is likely to have dust and dirt, it’s important that you are able to breathe properly while cleaning.
2. Remove Standing Water:
If there is standing water in the basement, use a wet/dry vacuum to remove it as soon as possible to avoid further damage. Use a fan or dehumidifier to help dry out the area afterward. If the water is coming from a broken pipe, make sure to shut off the main water supply and contact a plumber right away. If it’s caused by flooding, you may need to call a water mitigation specialist.
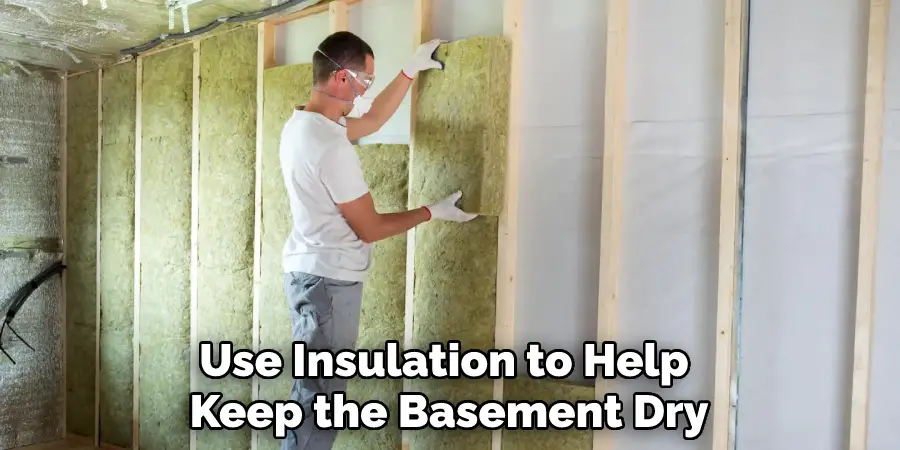
However, if the water is coming from condensation, you may be able to fix it yourself with a few simple steps. Invest in a dehumidifier, install an exhaust fan and use insulation to help keep the basement dry. Lastly, check for any cracks or openings in the walls that may be letting in moisture. Caulk or seal off any openings you find to prevent water from entering the basement.
3. Clean Mold and Mildew:
Clean mold and mildew with a mixture of half water and half bleach. Be sure to wear gloves, safety glasses, and face mask protection when cleaning areas where mold is present. Soak any areas prone to mold with the mixture and let it sit for 10 minutes before scrubbing. After scrubbing, rinse the area with clean water and let it dry completely.
Don’t forget to open windows or use a fan to help with ventilation. Any mold you cannot remove should be handled by a professional. If the mold reappears, seek further advice from a professional to determine the cause of the problem and find solutions.
4. Vacuum the Basement:
Use a vacuum cleaner to remove dirt, dust, cobwebs, and other debris from hard-to-reach places. Use an appropriate attachment for corners or crevices that are difficult to reach with regular vacuums.
Be sure to vacuum slowly and deliberately. Pay special attention to the corners and crevices of the basement, as these areas tend to accumulate dirt, dust, and debris over time. If possible, move furniture and other items out of the way in order to thoroughly vacuum the area. Make sure to empty the vacuum bag or canister regularly.
5. Clean Surfaces:
Clean walls, ceilings, floors, windowsills, baseboards, pipes, and other surfaces in the basement with an all-purpose cleaner and a damp cloth. Be sure to rinse off any remaining residue afterward.
If the basement is especially dirty, consider using a steam cleaner to loosen dirt and grime from walls, floors, and other surfaces. For the toughest stains, use a mixture of baking soda and white vinegar. However, be careful when using baking soda and vinegar on older surfaces, as they can be abrasive and could cause damage.
6. Clear Clutter:
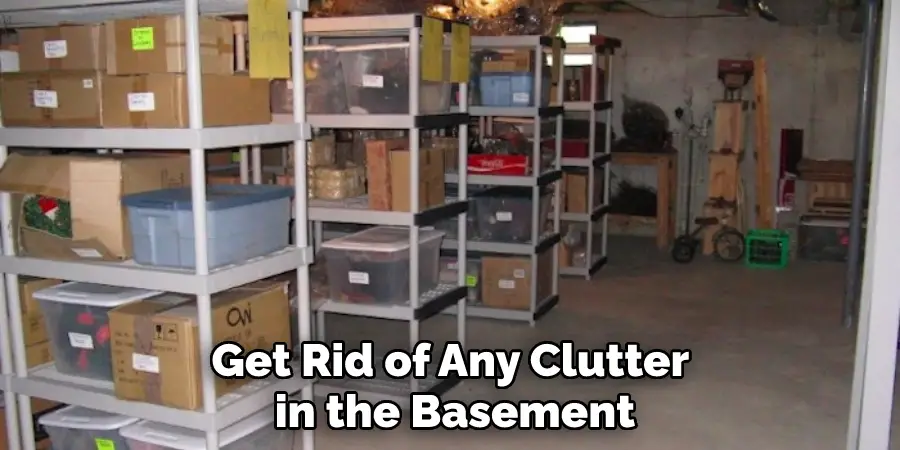
Get rid of any clutter in the basement. This will help to make the area easier to clean and more enjoyable when you spend time there. Discard any items that are beyond repair or won’t be used again. If you have items that you want to keep, but don’t use often, consider storing them elsewhere. However, if you’re trying to save space, look for items that can be hung on the walls or stored in shelving units. Make sure to keep the basement as organized and clutter-free as possible.
7. Sanitize Appliances:
Sanitize appliances such as refrigerators, stoves, and dishwashers with an appropriate cleaner to eliminate bacteria and germs that may be present in these areas. Clean the insides of appliances with soapy water to get rid of any dirt or dust that has built up over time.
Make sure to also wipe down the outside of appliances with a damp cloth to remove any dirt or grime. Then, spray any crevices and areas where bacteria can hide with a disinfectant and let it air-dry. Finally, remove any old food particles or debris from the bottom of appliances with a vacuum cleaner.
8. Wash Windows:
Clean windows inside and out with a glass cleaner or soapy solution to remove dirt, dust, and grime buildup. Use a squeegee or cloth for best results. To prevent further damage, wood frames should be regularly sealed and caulked.
While cleaning the windows, check to make sure they are properly sealed and insulated. If not, seal them with caulk or weatherproofing tape. Although the windows should be opened occasionally to air out the basement, make sure they are securely closed when not in use.
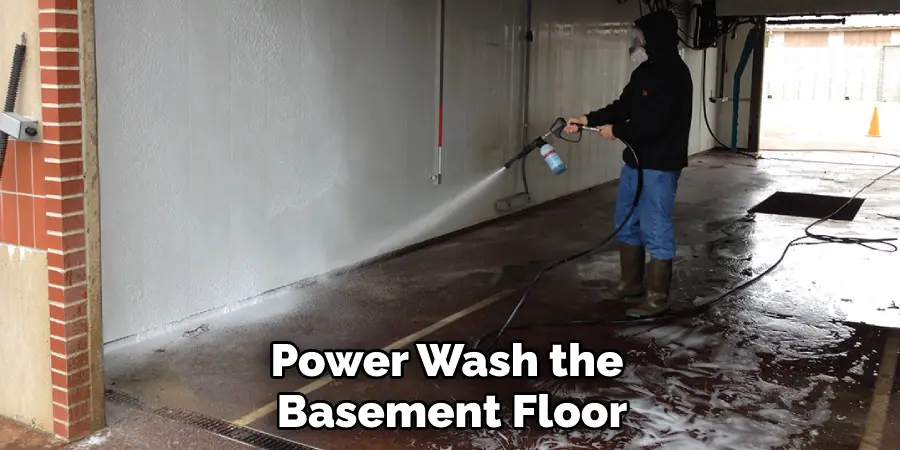
9. Power Wash the Floor:
Power wash the basement floor with a pressure washer to remove dirt, dust, and grime from tile and concrete surfaces. Be sure to use the correct pressure setting for your floor type. Make sure you keep the pressure washer at least six feet away from any walls, furniture, or other objects. Allow the floor to dry completely before moving on to the next step.
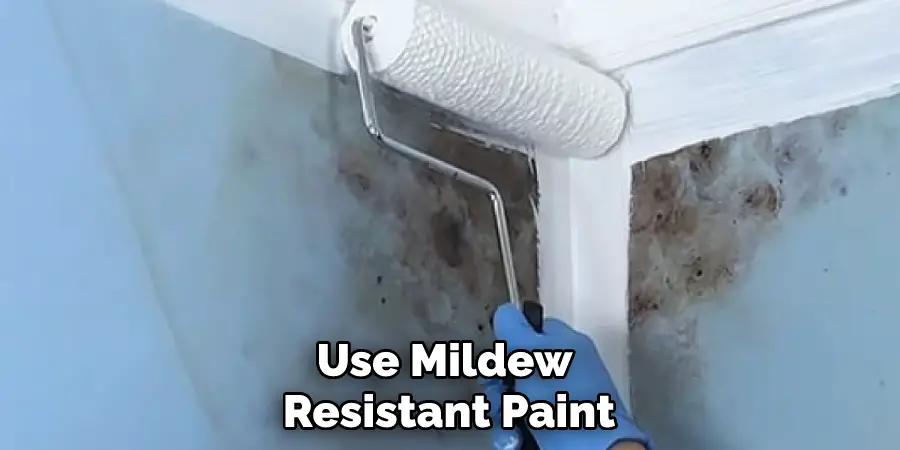
10. Apply a Fresh Coat of Paint:
Give the basement a fresh look with a coat of paint. Make sure to use a primer before applying the paint and allow ample time for it to dry before using the area again. Use mildew-resistant paint if possible to help keep moisture out of the basement. If you don’t want to paint the walls, you can always refresh them with a new coat of sealant. This will help protect the walls and keep moisture and dirt out of the basement.
Following these steps should help you to clean your 100-year-old basement and make it a safe and comfortable place for anyone who may use the area. Remember to use caution when working with old basements and to wear protective gear while cleaning.
When in doubt, it is always advised to contact a professional for more information or assistance. With the right knowledge and prep, you will be able to restore your basement in no time!
Conclusion
There are many ways to clean a 100-year-old basement, but the most important thing is to be careful and take your time. The best way to clean a 100-year-old basement is to start with the basics: remove all of the dirt, dust, and grime. Once you have done that, you can then move on to more difficult tasks, such as removing stains or mold.
Be sure to use the proper cleaners and protective gear when cleaning a 100-year-old basement so that you do not damage the integrity of the home. With a little bit of elbow grease and some patience, you will be able to clean a 100-year-old basement in no time!
We hope this guide on how to clean a 100 year old basement was helpful. Please share it with your friends on social media if you find it useful. And be sure to check back here soon for more informative guides like this one.
