Are you looking for a way to save money on your energy bills, keep your basement comfortably warm year-round, and gain better control over how much heat or cold air is in the area? Installing a wireless thermostat in your basement is one of the best ways to achieve all of those objectives!
It’s an economical solution that offers many benefits, but it can also be a daunting task. In this blog post, we will provide step-by-step instructions on how to install a wireless thermostat in basement so that you can take advantage of all its advantages without feeling overwhelmed. Let’s get started!
Can I Install My Own Wireless Thermostat?
Yes, you can install your own wireless thermostat in the basement. It is a fairly simple process that doesn’t require any special tools or knowledge. All you need to do is locate the appropriate area for placement; ensure all wiring connections are up-to-code and secure; mount the thermostat; follow the manufacturer’s instructions for programming; and test the thermostat to make sure it operates correctly.
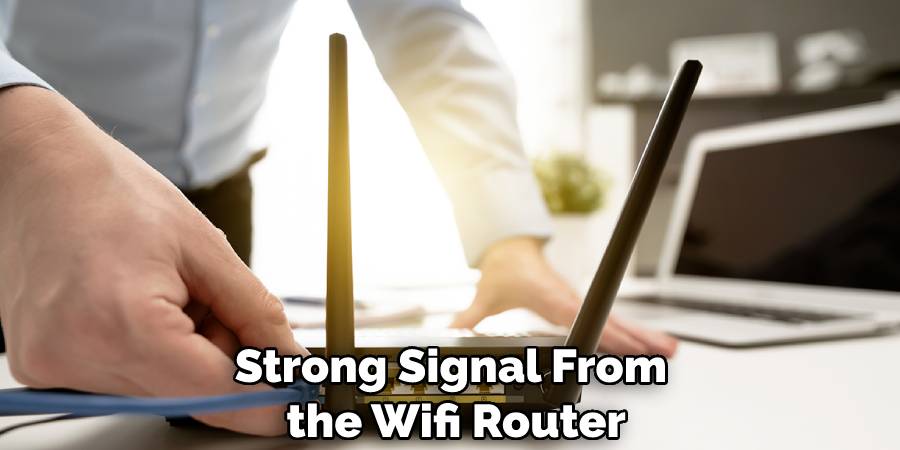
When selecting an area where you will install your wireless thermostat, keep in mind that most models require a strong signal from the WiFi router or hub in order to function properly; it is best to install it close enough so that you don’t have trouble receiving a good signal but far enough away so that any interference from other devices won’t interfere with its connection. If necessary, use an extension cord or a power-line bridge to extend the range of the signal.
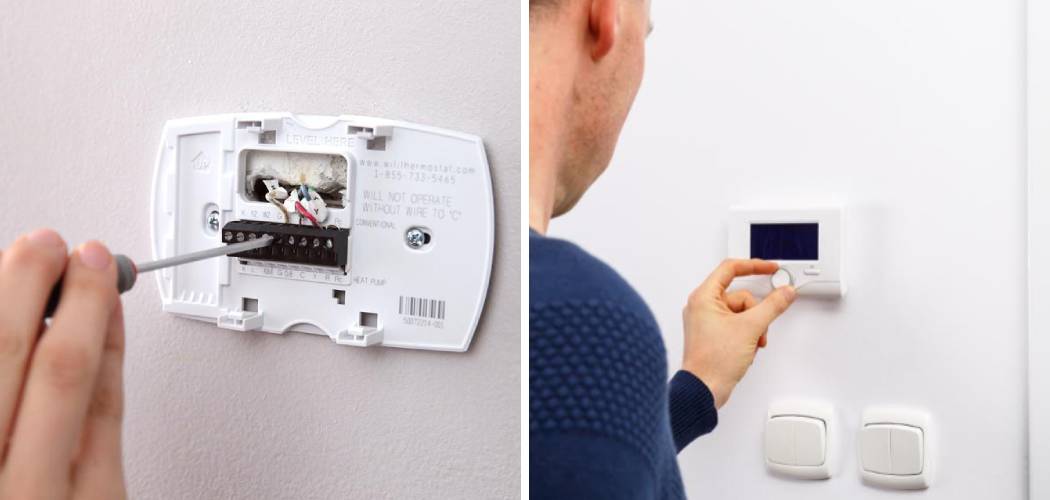
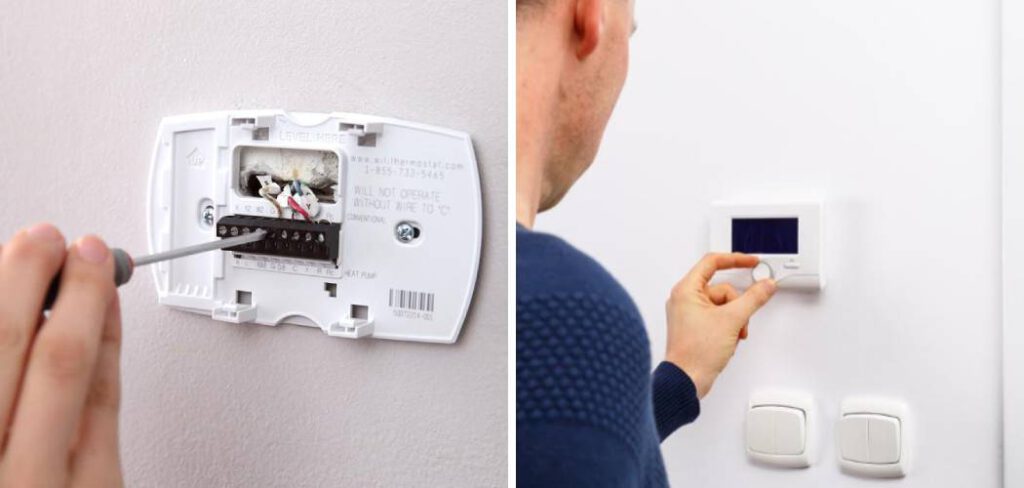
Before installing your wireless thermostat in the basement, inspect all existing wiring connections to ensure they are up-to-code and secure. If you are unsure of any wiring, don’t hesitate to contact a licensed electrician for help.
When all connections have been verified as secure and up-to-code, it is time to mount the thermostat. Most models require either a keyhole screwdriver or an adhesive mounting kit to attach the device to its desired location.
Once your wireless thermostat has been installed, you will need to program it according to the manufacturer’s instructions. This involves setting options such as temperature range and control type (heat/cool/fan).
Once programming is complete, test your thermostat by manually adjusting settings and checking that they are registered on the app or web page associated with your device. If everything is working correctly, you are ready to enjoy the convenience of having a wireless thermostat in your basement.
10 Methods How to Install a Wireless Thermostat in Basement
1. Choose the Right Location for Your Thermostat.
The first step in installing your wireless thermostat is to choose the right location for it. You’ll want to place it in a spot that is not too hot or too cold and where it will not be exposed to direct sunlight or drafts. It should also be close to the HVAC system’s thermostat wiring.
If you’re not sure where to place it, consult your HVAC technician for help locating the best spot. However, if your basement is finished and you don’t have access to the wiring, you may need to install the thermostat elsewhere.
2. Mount the Thermostat Base.
Once you’ve chosen the perfect spot for your thermostat, the next step is to mount the thermostat base. This can be done by screwing it into a wall or by using adhesive strips. If you’re mounting the thermostat onto a concrete wall, make sure to use the correct anchors and screws.

Once the thermostat base is mounted, attach the wiring to it according to the manufacturer’s instructions. Make sure all wires are securely connected. However, do not overtighten the screws.
3. Install the Batteries in the Thermostat.
Most wireless thermostats use AA batteries, which will need to be installed in the thermostat before it can be used. Consult your user manual for specific instructions on how to do this. If the thermostat is hard-wired, skip this step and proceed to the next one. Although the batteries are not required for the thermostat to work, it will allow you to move the thermostat from one location to another without having to reconnect it to the HVAC system.
4. Pair the Thermostat with Its Base Station.
Once the batteries are installed, you’ll need to pair the thermostat with its base station. This is typically done by pressing a button on both devices. Refer to your user manual for specific instructions on how to do this. Once the two devices are paired, you can begin setting up your thermostat. While this is happening, make sure your router is turned on and connected to the internet. If the router is not connected, the thermostat will not be able to send information over the internet.
5. Place the Thermostat on Its Base Station.
After the thermostat is paired with its base station, you’ll need to place it on the station. Make sure that it is properly aligned so that it can charge properly. Make sure that it is firmly placed on the station and does not move or wobble.
Though some thermostats are powered by batteries, it is highly recommended to keep the thermostat connected to the base station at all times. However, if you do decide to use batteries, make sure to replace them regularly.
6. Configure the Thermostat Settings.
Now that your thermostat is installed and charging, you’ll need to configure the settings to suit your needs. This includes setting the temperature, schedule, and other preferences. Refer to your user manual for specific instructions on how to do this. Many thermostats even allow you to control them remotely via a smartphone app.
Once your settings are configured, it’s time to test it out by turning on the heat or air conditioning. If everything works as intended, then your new thermostat is ready to use! It’s a good idea to check in periodically to make sure your settings are up-to-date and that your system is performing as expected.
7. Test the Thermostat’s Operation.
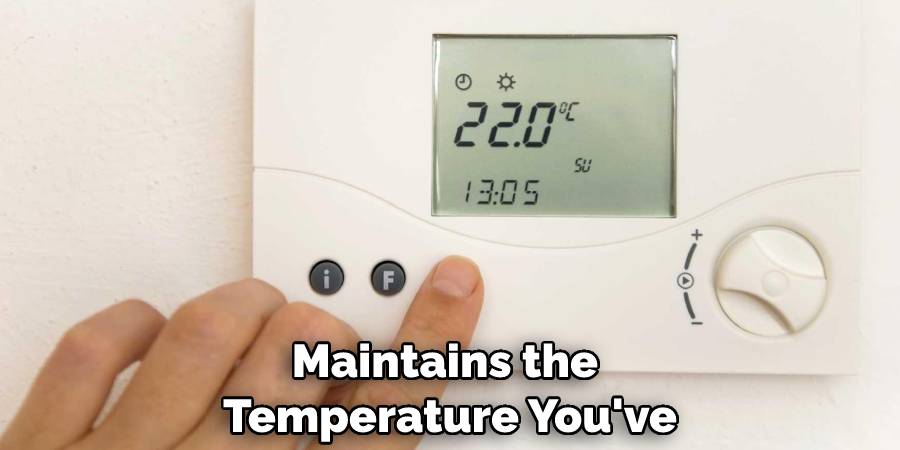
Once you’ve configured the settings, it’s time to test out your new wireless thermostat! Place it in various locations around your home and see how well it maintains the temperature you’ve set it to. Be sure to also test out any other features that you’ve configured, such as scheduling and remote access (if applicable).
Make any necessary tweaks to the settings to ensure your thermostat performs exactly as needed. With a functional wireless thermostat, you’ll have complete control over your home’s temperature no matter where you are!
8. Make Sure the Thermostat Is Securely Mounted.
Once you’re confident that your thermostat is working properly, make sure that it is securely mounted. This will help ensure that it stays in place and won’t be damaged by any knocks or bumps. Use screws or other mounting hardware to make sure that it is firmly attached.
Check periodically to make sure the screws have not come loose over time. While you’re at it, make sure that the wiring connections are secure and not loose. Make sure the wires are not pinched and don’t have any frayed or broken strands.
9. Connect the Thermostat to Your Home’s HVAC System.
The next step is to connect the thermostat to your home’s HVAC system. This typically involves wiring the unit directly into the furnace, air conditioner, or other connected devices. Refer to your user manual for specific instructions on how to do this.
Once the thermostat is connected, you can program it with your desired temperature settings. You can also use this opportunity to set up any additional features, such as scheduling, energy monitoring, and automated climate control.
10. Configure Remote Access, if Applicable.
Finally, if you have a wireless thermostat with remote access, you’ll need to configure it. This allows you to control your thermostat from a distance, such as when you leave for vacation or at the office. First, download your thermostat’s app from the App Store (iPhone) or Play Store (Android). Follow the instructions in the app to connect your thermostat to your home network.

Once connected, you’re able to access and control it from anywhere with an internet connection.
You’ve now successfully installed a wireless thermostat in your basement! With the right setup and precautions, you’ll be able to enjoy a comfortable temperature in all areas of your home for years to come.
Is There a Completely Wireless Thermostat?
Many people are looking for an entirely wireless thermostat to install in their basement. Unfortunately, there is no such thing as a completely wireless thermostat. Even the most advanced wireless models require at least one wire connection to power them up. However, these models offer significantly fewer wires than traditional wired thermostats and can still be installed in basements.
The key components of a wireless thermostat are the base unit and the remote sensors. The base unit is typically mounted on the wall near or in the basement, while the remote sensors can be placed throughout the home to monitor temperature from different locations. In order for these systems to work properly, they must be powered by a reliable power source.
Conclusion
With just a few simple steps on how to install a wireless thermostat in basement, you can have a thermostat that’s hassle-free and adaptable. You can even get creative and customize the settings as much or as little as you like. The bottom line is that taking the time to install a wireless thermostat in your basement is an investment worth making in the comfort of your home. So don’t hesitate any longer – start your installation project today for the ultimate convenience during all seasons.
You Can Check It Out to Build a Sauna in Your Basement