Installing a vapor barrier on an exterior wall is essential for a properly functioning home. This protective layer helps to prevent moisture from seeping in and damaging the insulation, walls, and other surfaces. It also keeps out pests and dust that may otherwise contaminate indoor air quality. Installing the right type of vapor barrier is key to ensuring optimal performance.
Installing a vapor barrier on the exterior walls of your home offers numerous advantages, including improved energy efficiency and increased protection from drafts. It also helps to reduce noise pollution by providing additional insulation. With a properly installed vapor barrier, you can enjoy a more comfortable living environment all year round. Read this blog post to learn how to install vapor barrier on exterior wall correctly.
Step-by-step Instructions for How to Install Vapor Barrier on Exterior Wall
Step 1: Inspect the Wall
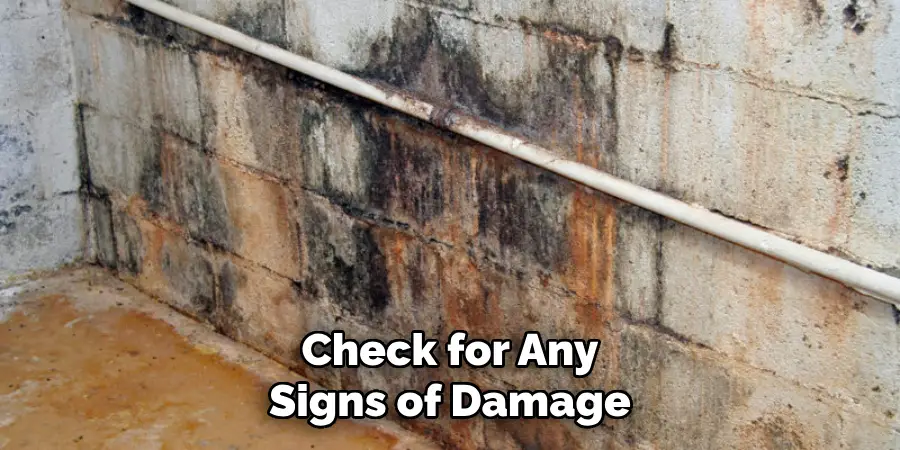
Before starting the installation, scrutinize the exterior wall to check for any signs of damage or moisture. Ensure no gaps exist in the existing vapor barrier membrane or insulation.
Step 2: Choose Materials
Choose a suitable vapor barrier material for your specific application. Options include plastic sheeting, fiberglass reinforced plastic (FRP), and styrene-butadiene-styrene (SBS) modified bitumen. Before starting the installation, prepare the area by cleaning and removing any debris from the exterior wall surface. Make sure that the walls are dry before applying the vapor barrier.
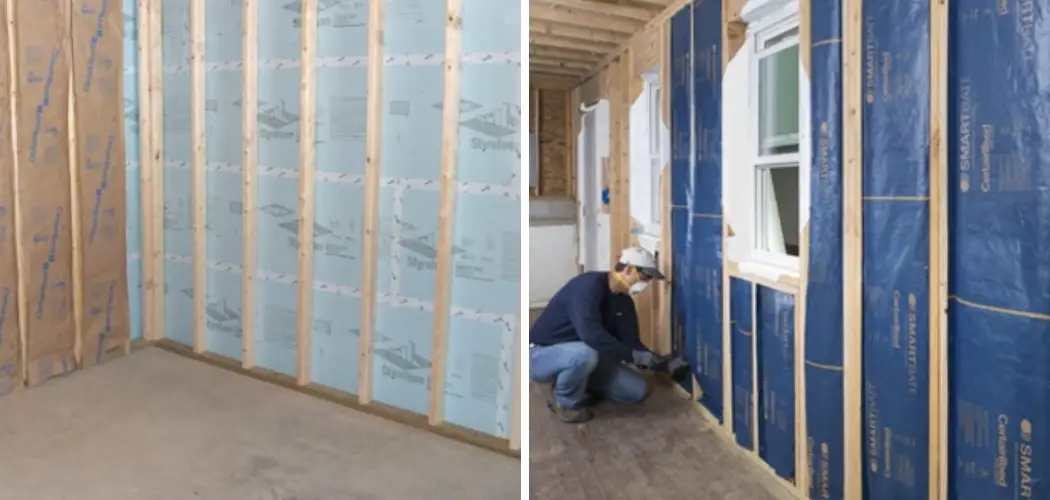
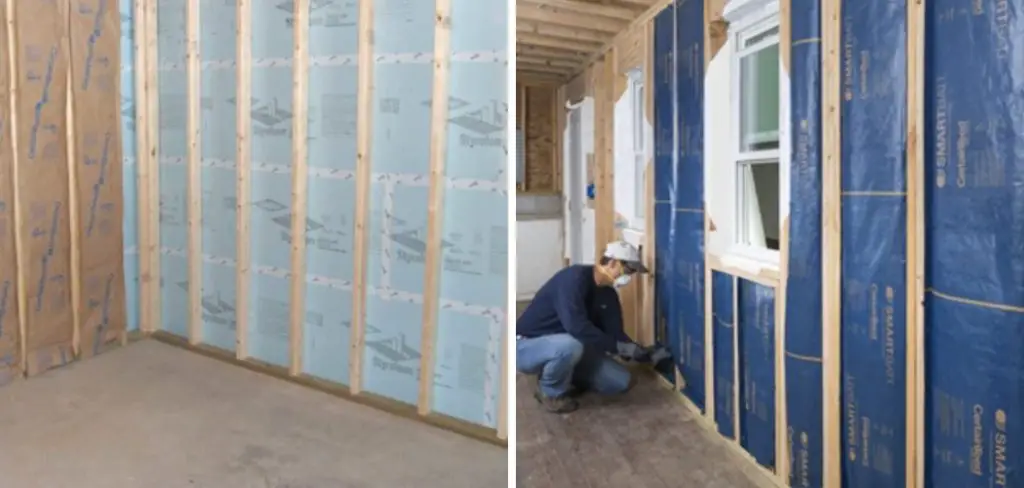
Step 3: Install the Vapor Barrier
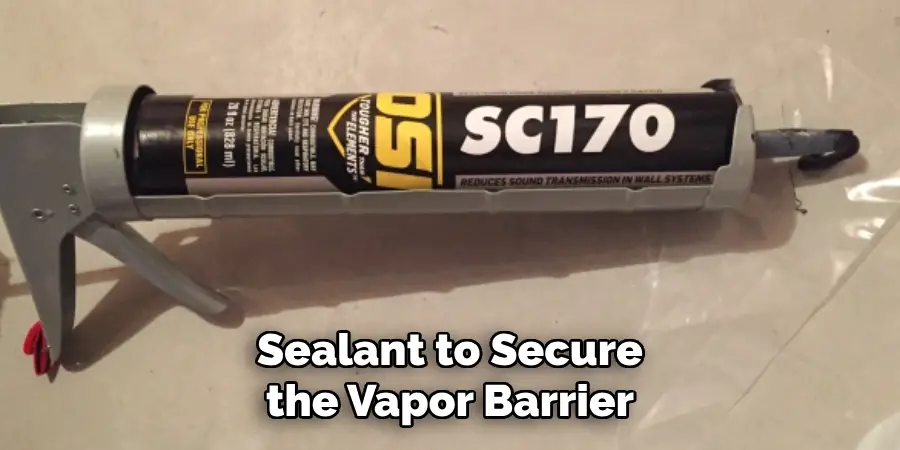
Start at one end of the wall and work to the other. Follow the manufacturer’s instructions for installing the vapor barrier material onto the exterior wall surface. Once installed, use tape or a sealant to secure the vapor barrier at all seams and corners. Make sure that each seam is sealed tightly.
Step 4: Insulate the Wall
After installing the vapor barrier, use insulation to fill in any gaps between the wall and the vapor barrier. Install enough insulation so there is a minimum of 1 inch of air space between the two materials. Reinforce the vapor barrier with a netting material to prevent sagging or tearing. Secure the netting around the edges of the wall and ensure enough overlap between pieces for added strength.
Step 5: Seal Around Windows and Doors
Seal all gaps around windows and doors where moisture could enter. Use caulk or foam sealant to create an airtight seal. Install weather stripping around each window and door frame to prevent warm, moist air from entering the building.
Step 6: Insulate Any Exposed Piping
Insulate any exposed pipes or ductwork with fiberglass insulation to prevent condensation buildup and ensure the vapor barrier works properly.
Following these steps will help you successfully install a vapor barrier on your exterior wall and ensure that it remains effective in preventing moisture from entering the building. It’s important to inspect the wall before installation and check for any signs of damage or moisture.
Safety Tips for How to Install Vapor Barrier on Exterior Wall
- Wear protective gear such as goggles, gloves, and a dust mask when handling insulation or vapor barrier materials.
- Make sure to keep children and pets away from the area during installation.
- Do not use nails or staples to attach the vapor barrier material – only tape and sealants should be used.
- Ensure the vapor barrier material is sealed tightly at all seams and corners to prevent moisture from seeping in.
- Before starting installation, check for any signs of damage, and do not proceed with a damaged wall or vapor barrier membrane.
- Insulate any exposed pipes or ductwork with fiberglass insulation to reduce the risk of condensation buildup.
Following these safety tips will ensure that the vapor barrier is installed correctly and safely and will help protect your home from potential moisture damage. Scrutinize the wall before installing and check for any signs of damage or moisture.
What Type of Vapor Barrier Do You Need for an Exterior Wall?
The type of vapor barrier you need for an exterior wall will depend on the climate, type of building, and any existing insulation. Generally, plastic sheeting is the most common option as it offers good moisture protection at a low cost. Other options include fiberglass-reinforced plastic (FRP) and styrene-butadiene-styrene (SBS) modified bitumen. These materials are more expensive but offer better moisture and air infiltration protection.
When choosing a vapor barrier material for an exterior wall, it’s important to consider the climate and any existing insulation to choose the best option for your specific application. Make sure to inspect the walls before starting installation and check for signs of damage or moisture. These steps will help you install the right vapor barrier material and protect your home from potential moisture damage.
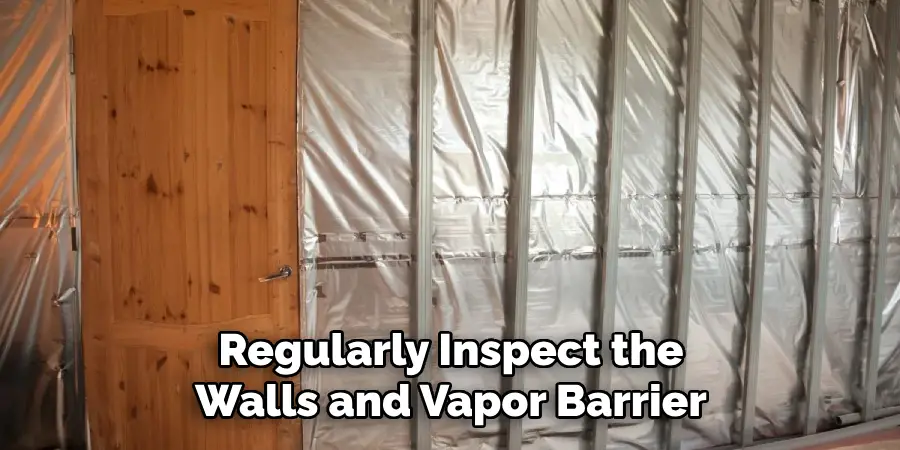
How to Maintain Your Vapor Barrier on Exterior Wall?
Once you’ve installed a vapor barrier on your exterior wall, it’s important to maintain it to keep it effective. Here are some tips to keep in mind:
- Regularly inspect the walls and vapor barrier membrane for any signs of damage or moisture.
- Re-seal any gaps or seams that may have opened up over time with caulk or foam sealant.
- Replace weather stripping around windows and doors to ensure an airtight seal.
- Netting material reinforces the vapor barrier and prevents sagging or tearing.
- Clean any debris from the wall surface before installing insulation or the vapor barrier membrane.
Maintaining your exterior wall and vapor barrier will help ensure that it remains effective in preventing moisture from entering your home. Inspect the wall and vapor barrier before starting any installation or repair work.
How Should You Prepare the Surface of the Wall Before Installing the Vapor Barrier?
Before installing a vapor barrier on the exterior wall, it is important to ensure that the surface of your wall is free from debris. Any dirt or other particles present can create pockets where condensation and moisture can accumulate and compromise the effectiveness of your vapor barrier. To prepare for installation, clean the surface with a damp cloth to remove dust or residue. After cleaning, you can apply a sealant to the wall to protect it and remove any moisture. Once your surface is prepared, you can install your vapor barrier.
Are There Any Special Considerations for Installing a Vapor Barrier on an Exterior Wall, Such as Cold or Hot Climates?
When installing a vapor barrier on an exterior wall in cold or hot climates, certain considerations must be considered. For example, suppose you are located in a colder climate. In that case, ensuring your vapor barrier installation provides adequate insulation and protects the wall from excessive heat loss is important.
On the other hand, if you are in a hot climate, your vapor barrier should be designed to prevent the wall from absorbing too much heat. Additionally, in both climates, it is important to ensure that air can flow freely through the vapor barrier to reduce condensation and maintain an effective seal. Considering these considerations, you can ensure that you have a properly installed vapor barrier that will effectively protect your exterior walls from any potential damage.
How Often Should You Check for Damage or Leaks in Your Installed Vapor Barrier?
It is important to regularly check for any signs of damage or leaks in your installed vapor barrier. Even if you have taken all the necessary precautions during installation, unexpected changes in the weather can cause wear and tear on your vapor barrier over time.
Therefore, inspecting your vapor barrier every few months is best to ensure everything is functioning properly and no water or moisture seeps through. If you do find any signs of damage, be sure to take steps to repair them immediately, as this will help ensure your vapor barrier remains effective in protecting your exterior walls.
What Are Some Common Mistakes That People Make When Installing a Vapor Barrier?
One common mistake that people make when installing a vapor barrier is not properly sealing the edges. If the edges of your vapor barrier are not sealed tightly against the walls, air and moisture can still get through, which will reduce its effectiveness. Additionally, people may need to remember to add insulation or other protective layers underneath the vapor barrier, decreasing its ability to protect against moisture damage.
Finally, use a high-quality vapor barrier material to withstand harsh temperatures and other environmental conditions. By avoiding these common mistakes, you can ensure your vapor barrier is properly installed and provides optimal protection for your exterior walls.

Conclusion
The primary disadvantage of installing a vapor barrier on an exterior wall is that it can be costly due to the additional materials and labor required. Additionally, if not installed correctly, moisture and air can still make its way through the barrier and cause damage to your wall. Finally, improper maintenance or repair of a damaged vapor barrier can lead to further damage or even complete failure.
In conclusion, installing vapor barriers on exterior walls protects your home from moisture damage. It can help keep humidity levels balanced and reduce the potential for mold growth. Installing a vapor barrier properly lets you rest easy, knowing that your walls are well protected and ready to withstand whatever Mother Nature throws their way. This article has been beneficial for learning how to install vapor barrier on exterior wall. Make Sure the preventive measures are followed chronologically.