Are you looking for extra space in your home? Whether you need more storage room or want to create a cozy place to relax, making use of the basement can be an excellent option. With the right planning and resources, it’s surprisingly easy to turn neglected corners into fully functional rooms – all without undertaking a major renovation. In this blog post on how to make a room in a basement, we’ll explore some tips and tricks that can help you take advantage of basement space like a pro.

From understanding basics such as insulation requirements and moisture control to finding ways to make the most out of limited square footage – no matter what your individual needs are, there is something here for everyone! So let’s get started transforming your unfinished basement into something special!
Why Do You Need to Make a Room in the Basement?
Before taking any steps towards making a room in the basement, it’s important to think carefully about why you want to do so. Depending on your needs and goals, you may find that other solutions are more suitable for your situation. For example, if you don’t need additional livable space but simply need an extra storage area, it may be more cost-effective to install shelving units, build extra closets, or even rent a storage unit.
Necessary Materials
Below is a list of materials you will need to make a room in the basement:
Insulation:
Insulation is important for keeping the basement warm in the winter and cool in the summer. The type of insulation you will need will depend on your climate and financial resources, but typically fiberglass or foam panels are sufficient.
Flooring:
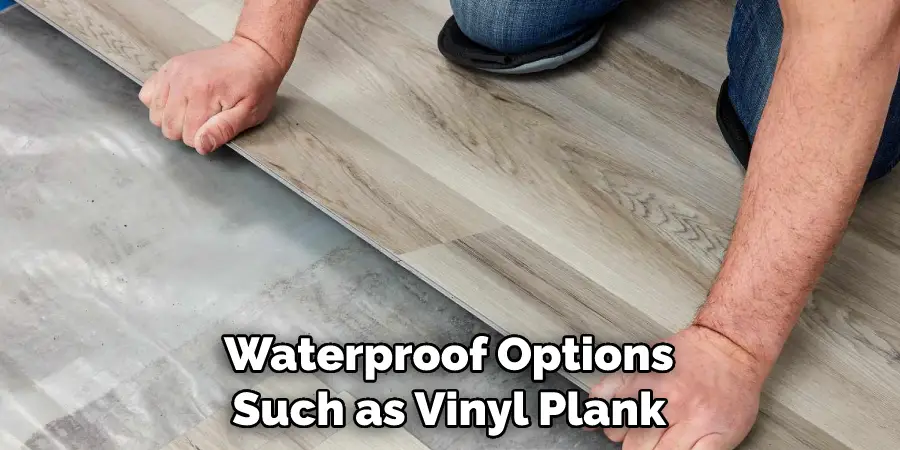
When it comes to flooring, waterproof options such as vinyl plank or tile are best since they can handle rain and moisture.

Ventilation:
To ensure the room is well-ventilated, it’s important to install a ventilation system such as an exhaust fan or air conditioner.
Lighting:
It’s best to use LED lighting in the basement since it uses less energy than other types of lighting.
Furniture:
Finally, you will need to find suitable furniture for your basement room.
Safety Precautions
When making a room in the basement, there are several safety precautions you need to take. The first and most important step is to make sure the area is structurally sound; this means checking for any signs of water damage, cracks, or other issues that could make the room unsafe. It’s also important to inspect for mold or mildew and make sure all appliances are installed correctly.
Finally, if you want to use the room as a living space, it’s essential to have access to an emergency exit in case of fire or other emergencies.
12 Simple Steps on How to Make a Room in a Basement
Step 1: Assess the Basement
Before you start any renovation, it’s important to make sure there are no major issues such structural damage or moisture problems that need to be addressed before proceeding. It’s also not a bad idea to check for rodents, mold, or other signs of infestation. But if everything looks good, you can move on to the next step. Please don’t forget to check for electrical issues! It is important to make sure the wiring is up-to-date and that it meets local codes.

Step 2: Plan Out the Room
Before you start any work, it’s best to draw up a plan of the room you want to create. This will help you visualize the space and plan out how much of each material you’ll need. If possible, it’s also a good idea to consult an architect who can help you optimize the layout. This can be especially helpful if you’re trying to make the most out of a limited space.
Step 3: Install Insulation
Once you’ve drawn up a plan, it’s time to install insulation in the walls and ceiling. This will help keep the room warm or cool depending on the season. If you’re unsure how to install insulation, it’s best to consult a professional. But if you’re confident in your skills, you can follow instructions found online. However, it’s important to wear protective gear and follow safety precautions.
Step 4: Lay Down Flooring
The next step is to lay down floorings such as vinyl plank or tile. Not only does this waterproof the surface, but it also adds an extra layer of insulation. It’s also important to make sure the floor is level and that all seams have been sealed properly. However, if you’re not sure how to lay down flooring, it’s best to hire a professional. It’s also important to note that ceramic tile is not suitable for use in basements.
Step 5: Install the Ventilation System
To ensure your basement stays properly ventilated, you’ll need to install a ventilation system such as an exhaust fan or air conditioner. This will help keep moisture levels under control and reduce musty odors from forming. It’s important to make sure the system is properly installed and that all air ducts are sealed off. The last thing you want is for air to be leaking out of the basement.
Step 6: Add Lighting
Adding lighting fixtures such as LED bulbs will help the room feel more inviting and make it easier to see. It’s important to make sure all wiring is done properly and that the bulbs are not too bright or dim. This will ensure the lighting is both functional and aesthetically pleasing. If you’re not sure how to install lighting, it’s best to consult a professional.
Step 7: Install Electrical Outlets
If you want to be able to plug in any appliances or electronics, you’ll need to install electrical outlets as well. There are a few different ways to do this depending on your particular needs. Moreover, it’s important to make sure the wiring is done correctly and that all outlets are properly grounded. If you’re not confident in your skills, it’s best to hire a professional.

Step 8: Add Furniture
Once all the other elements are in place, it’s time to add furniture such as couches, chairs, tables, and shelves. This is the fun part since you can really let your creativity shine! This is also an opportunity to add pops of color and texture to the room. Always make sure to measure the space before you purchase any furniture. If you’re looking for an extra challenge, you can even build your own furniture.
Step 9: Paint the Room
Once all the major components of the room have been installed, it’s time to paint. This can really help liven up the space and make it feel more inviting. You can choose any paint color you like, but it’s best to go with lighter colors since they tend to make the room appear larger. If you’re feeling adventurous, you can even add a few accent walls for more visual interest. Make sure to use the proper paint for your project and follow all safety precautions.
Step 10: Hang Decorations
To complete the finishing touches, you may want to hang decorations such as wall hangings or artwork. Adding these elements can really add a personal touch to any room. It’s important to make sure all decorations are securely hung and that they’re not too heavy for the wall. Otherwise, you may end up with a big hole in your wall! That’s why it’s best to use appropriate hooks and nails.
Step 11: Install Window Treatments
Installing window treatments such as curtains or blinds is another great way to finish off the look of your basement room. This will also give you privacy and control over how much light comes in during different times of day. Always measure your windows before purchasing window treatments. This will ensure they fit properly and don’t look too bulky or small. If you’re not sure how to install them, it’s best to consult a professional.
Step 12: Enjoy!
Now that everything has been put together, it’s time to enjoy your newly-created basement room. With the right combination of elements, you can easily transform an otherwise dark and dreary space into a cozy and inviting living area! Remember to always safety first and follow instructions carefully when completing any DIY projects. Now get ready to enjoy your new basement room!

Following these steps on how to make a room in a basement will ensure that you have a safe and comfortable space in your basement. It may take some time, but the end result will be worth it!
Conclusion
Thanks for reading this article on how to make a room in a basement. In conclusion, making a room in your basement can seem like an intimidating feat, but with the right tools, information, and knowledge it can become a reality. With careful planning and proper layout setup, you can create the perfect space that serves both your aesthetic and functional needs.
Plus, taking on projects like these will give you a sense of accomplishment and pride at completion! Whether you’re looking to create an extra bedroom or a craft area for yourself – finding ways to cleverly utilize the basement is key.
This said, don’t forget to take important safety measures such as waterproofing or sealing any cracks or exposed surfaces to ensure your project stays safe for years to come. Lastly, remember that having ample preparation and research can save you from making any costly mistakes – so make sure to prepare before diving in!


