If you’ve recently decided to add a bathroom to your basement, plumbing is one of the most important aspects that need to be thoughtfully planned out and carefully ventilated. Venting plumbing fixtures in the basement can be challenging due to unique circumstances, but it doesn’t have to be intimidating!
With some simple instruction, calculation, and preparation work ahead of time, you’ll be well on your way toward creating a safe environment for all users and ensuring proper usage of water supplies.
In this blog post, we’ll provide an overview of how to vent basement bathroom plumbing with recommendations on materials needed as well as ideas on ventilation strategies.
Tools and Materials You Will Need to Vent Basement Bathroom Plumbing
- PVC pipe and fittings
- Ventilation fan (depending on the size of your basement)
- Compressor or pressure pump
- Drainage pipe for sink, shower, and toilet drains
- Vent pipes for air circulation between fixtures
- Waterproofing sealant to protect pipes from moisture damage
- Power drill with appropriate bits
Step-by-step Guide on How to Vent Basement Bathroom Plumbing
Step 1: Calculate the Amount of Air Needed
The first step in venting basement bathroom plumbing is to calculate the necessary amount of air needed. Fresh air must be supplied to all fixtures and exhaust air removed in order for a system to function properly. This can be done using an HVAC calculator or by consulting a professional plumber/HVAC technician.
Step 2: Install the Ventilation Fan

Once you’ve determined how much air your basement needs, you can install a ventilation fan to ensure proper airflow. This should be installed in the same room as the bathroom fixtures and wired into an electric outlet. Installing a fan that is larger than necessary will provide additional air circulation and help prevent moisture buildup.
Step 3: Connect Pipes
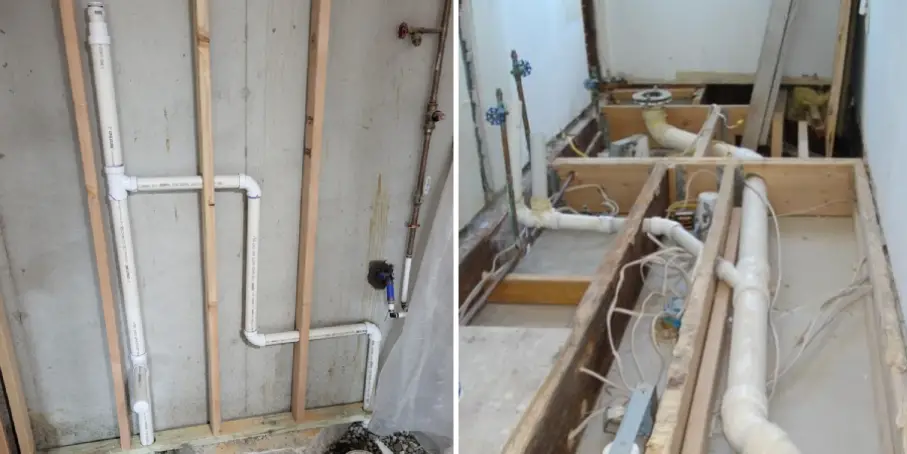
Next, connect PVC pipes to the bathroom fixtures. This includes connecting the sink and shower drains, as well as any other toilet or bathtub fixtures. The pipes should be attached with a waterproof sealant in order to protect them from water damage. While connecting the pipes, make sure to use appropriate fittings and elbows.
Step 4: Install Vent Pipes
Install vent pipes between each fixture in order to allow air circulation around the basement. These pipes should be connected to a compressor or pressure pump, which will help push air through the system more quickly. Make sure that each pipe joint is properly sealed with waterproof sealant.
Step 5: Install a Compressor or Pressure Pump
In order to ensure air is properly circulated throughout the basement bathroom plumbing system, you’ll need to install either a compressor or pressure pump. This will help regulate the air pressure inside the pipes and ensure water flows correctly throughout all fixtures. This step is especially important for basements with low ceilings or little air circulation.
Step 6: Test and Inspect
Once all of the plumbing has been installed, test and inspect the system to make sure it is functioning properly. This includes flushing toilets, running water in the sink or shower, and checking to see if any leaks occur. If any issues arise, make sure to fix them before using the system.
By following the steps outlined above, you can successfully install a vent for your basement bathroom plumbing system and ensure it runs efficiently. With the right planning and preparation, you’ll be able to create a safe environment in which water flows freely through all of your fixtures! Good luck!

Additional Tips and Tricks to Vent Basement Bathroom Plumbing
1. Properly venting a basement bathroom is essential for proper plumbing. Make sure to check local codes and regulations before beginning your project to ensure that you are in compliance with all relevant laws.
2. Before starting any work, familiarize yourself with the layout of the existing plumbing systems in the house—especially if there are multiple bathrooms or fixtures in the basement. This will ensure that you are aware of how the new plumbing should be connected to the existing system.
3. Be sure to install all vents correctly and securely. Properly sealing them is necessary for preventing water infiltration, as well as any other damages caused by improper installation.
4. Make sure that all vents have the proper slope and are installed at the correct height. Slopes should be 1/4 inch per foot of pipe and vents should be installed between 5 and 6 feet above the ground.
5. Use appropriate pipes for venting—schedule 40 pipes or ABS (acrylonitrile-butadiene-styrene) for drain lines and type L or type M copper pipe for vent lines.
6. If possible, choose a route that is as direct as possible to avoid any unnecessary turns or bends in the pipes. This will help ensure proper airflow and ventilation.
7. Use a wet-dry vacuum to clean out all of the lines before installing new vents, which will help ensure that all connections are tight and secure.
8. Finally, it’s important to test the system after installation. Run water through all of the fixtures and check for any leaks or other issues with the plumbing. This will help you identify any potential problems before they become a larger issue down the line.
By following these tips and tricks, you will be well on your way to successfully venting a basement bathroom. With the right tools and knowledge, you can ensure that your plumbing system is properly installed and functioning correctly. Good luck!
Things You Should Consider to Vent Basement Bathroom Plumbing
1. Location of the Vent:
The most important part of venting a basement bathroom is making sure that the location of the vent allows for proper airflow. To ensure successful plumbing, you should make sure to locate your vent pipe somewhere near the bathroom fixtures. This will ensure adequate airflow and ensure that no moisture or unpleasant odors can build up in the bathroom.
2. Size and Type of Vent Pipe:
You’ll also need to consider the type and size of vent pipe you’ll be using for your basement bathroom. For example, if you’re venting a toilet or sink, then you should use a 3-inch diameter PVC pipe with an air admittance valve. This type of pipe is specifically designed to handle wastewater and create an airtight seal when properly installed.
3. Vent Pipe Length:
It’s also important to consider the length of your vent pipe when installing it in your basement bathroom. The longer the vent pipe, the more difficult it will be for proper airflow to occur. Ideally, you should keep your vent pipe as short as possible to ensure proper airflow and avoid any plumbing issues.
4. Installation:
Finally, it’s important that you take the time to properly install your basement bathroom vent pipe. This means making sure all of the joints are sealed with the plumber’s putty and that the pipe is properly secured to the wall. Taking your time during installation will help ensure that there won’t be any leaks or other problems down the road.
Venting a basement bathroom can seem like an intimidating job at first, but with the right knowledge and tools, it can be done quickly and easily. Make sure to consider all of the factors discussed above to ensure a successful plumbing job.
Frequently Asked Questions
What Are The Benefits of Venting Basement Bathroom Plumbing?
Venting your basement bathroom plumbing system is beneficial for a number of reasons. It helps prevent wastewater from backing up into the home, reduces unpleasant odors, and prevents sewer gasses from entering your living spaces. In addition, it can help reduce the risk of clogs in the plumbing system due to air bubbles that are created when water moves through the pipes.
What Types of Pipes Can Be Used to Vent Basement Bathroom Plumbing?
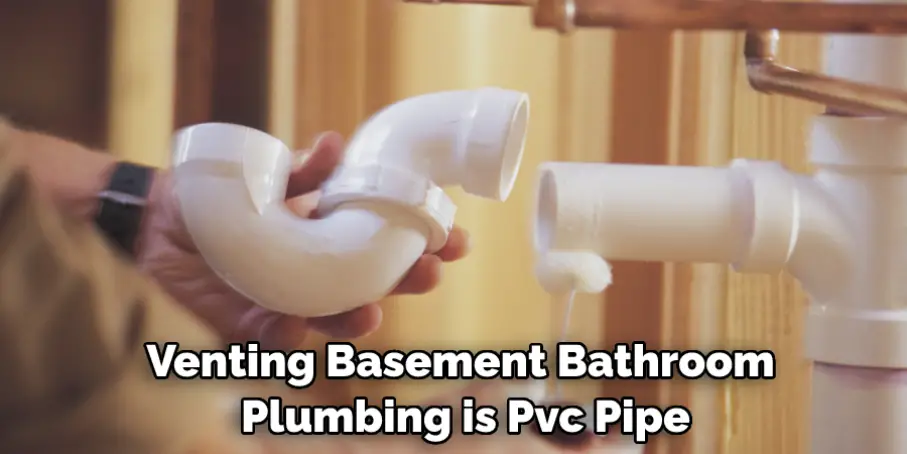
The most common type of pipe used for venting basement bathroom plumbing is PVC pipe. This type of pipe is lightweight, easy to install, and cost-effective. It’s important to check local building codes before choosing a material for your plumbing vents, as some areas may require more specialized materials.
How Do I Vent the Basement Bathroom Plumbing Correctly?
Venting basement bathroom plumbing correctly is essential to ensure that the system works properly and safely. When venting, make sure to use a minimum two-inch diameter pipe with an appropriate slope so that it can carry wastewater away without backing up. Additionally, you’ll want to make sure the vent termination is at least 12 inches above the ground for optimal performance. It’s also important to include a vent near each fixture in your basement bathroom and install a P-trap with an appropriate water seal so that wastewater can move freely without creating air bubbles.
Conclusion
Congratulations on making it to the end of this blog post! By now you should have an in-depth understanding of how to vent basement bathroom plumbing system. Remember, if you’re ever stuck or feeling unsure, don’t be afraid to seek help from a professional plumber. There’s nothing wrong with asking for assistance.
Furthermore, while it may feel tedious to go step-by-step through the process at first, taking your time and ensuring accuracy during each step is key to having your basement bathroom make sure that everything is installed correctly and functions according to safe plumbing standards. Best of luck with venting your basement bathroom’s plumbing system — I’m sure you will find success in your venture!