
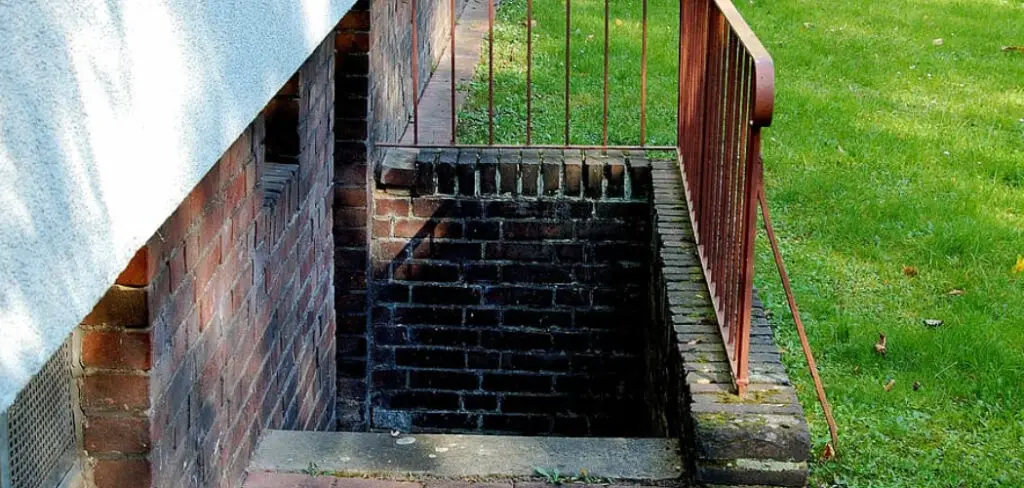
Have you ever been in the middle of a basement project and wished there was an easier way to get inside? Have you thought about creating an exterior entrance to your basement but not known where to start? Look no further! This blog post will provide all the information needed for constructing your exterior basement entrance.
Whether you’re an experienced DIYer or a novice, this guide will walk you through the process step-by-step. Always be sure to check local building codes and follow safety guidelines.
We’ll discuss what parts and tools are needed, go through each step of construction from beginning to end, and offer suggestions on how best to customize this front door feature for maximum security. So let’s get started– read on for all the details on how to build exterior basement entrance.
What are the Benefits of an Exterior Basement Entrance?
There are numerous benefits to having an exterior entrance to your basement. First and foremost, it’s a convenience factor – no more climbing up and down stairs or ladders! An outside door also means easy access for deliveries, guests, tradespeople, etc., who don’t need to stroll through the house every time.
Security is also an important factor. Having an exterior door means one less entry point for potential burglars and better control over who comes and goes into your property. It also looks neat and tidy from outside your home, adding to its overall aesthetic appeal.
What Will You Need?
Before you can begin construction, there are a few things to gather:
- A door frame with hinges
- Exterior grade door
- Weather stripping or insulation foam for the door jamb
- Masonry anchors and screws
- An offset hinge to allow the door to swing open wider than your existing doorway is wide
- Mortar mix (for brick walls) or concrete mix (for cinder block walls)
- Caulk and sealant to keep air and water out of your basement.
Once you have all the materials in place, it’s time to start building.
10 Easy Steps on How to Build Exterior Basement Entrance
Step 1: Frame the Doorway
Using your measurements from earlier, mark out where you would like the doorway to be on your wall. Use a level and chalk line to outline the frame for your door. If you’re using brick or cinder block, use a masonry bit to drill holes for the anchors and screws.

Step 2: Cut and Install Door Jambs
Cut the horizontal pieces to size from your doorframe kit, considering that an offset hinge will be placed at the top when you install it later. Place them within the chalk line on your wall, ensuring they are level and square. Secure them with masonry anchors or screws.
Step 3: Apply Weather Stripping or Insulation Foam
To insulate your exterior basement entrance, apply weather stripping or insulation foam along each side of the jamb where it meets the wall. This helps prevent cold air and water from entering through gaps in the doorway. You can also use caulk and sealant around the jambs as an added measure.
Step 4: Hang The Door
Place the door in the doorway frame and secure it to the jambs using your offset hinge. Be sure to leave enough room for the hinge pin to turn freely. Remember to add the door handle and lock.
Step 5: Caulk And Seal The Door Frame
Using a caulking gun, apply a generous amount of caulk along each side of your door frame where it meets the wall. This will help create an airtight seal and ensure maximum energy efficiency. Apply sealant over any exposed screws or nails as well.
Step 6: Finish with Mortar or Concrete Mix
To complete your exterior basement entrance, fill in any gaps with mortar mix (for brick walls) or concrete mix (for cinder block walls). This will help prevent water from entering through cracks in the wall. Additionally, it will provide extra stability for your door frame.

Step 7: Install Hardware and Lockset
Once your mortar or concrete mix has had time to set, you can install your hardware and lockset. If you’ve opted for an exterior grade door, it likely came with a pre-drilled hole for the knob or handle. Otherwise, drill the necessary holes yourself using a masonry bit.
Step 8: Test The Door For Fit And Function
After installing the door, test it to ensure it fits properly and swings open/closed easily. Adjust as necessary if needed. Check for any air leaks if you’ve used weather stripping or insulation foam.
Step 9: Paint Or Stain The Exterior Basement Entrance
You can paint or stain your exterior basement entrance for aesthetic purposes and to protect it from the elements. As always, follow instructions on any products you’re using. Remember that paint will need to be reapplied every few years, while stain can last up to 10 years.
Step 10: Enjoy Your New Exterior Basement Entrance!
At last- your new exterior basement entrance is complete! Enjoy this feature’s extra security and convenience, and bask in the knowledge that you did it all yourself. Congratulations!
Building an exterior basement entrance is a great way to increase access and security. With careful planning and these easy steps, you can have your custom entrance installed in no time. So get started today and enjoy the benefits of having an outdoor entrance to your basement!
5 Additional Tips and Tricks
- Use a good quality caulking compound to ensure a draft-proof and watertight seal around your new entrance frame.
- If you are building an exterior door to replace an existing one, ensure the new door is the same size as the old one so it fits in the same space without any structural modifications.
- Ensure all components fit together securely before making any permanent attachments.
- Consider using weather stripping between sections of siding or wallboard and along cracks/joints around windows and doors for additional insulation and protection from drafts.
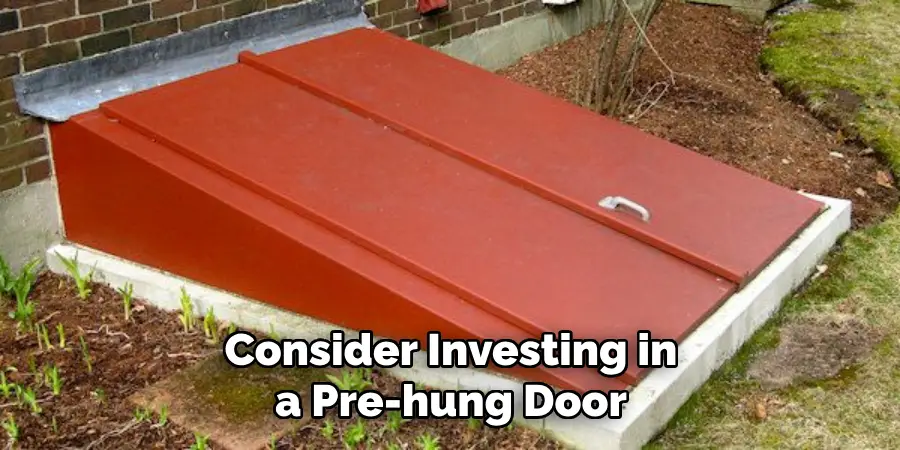
- Finally, consider investing in a pre-hung door if you don’t have much experience with construction – this will help reduce the time and energy needed to build a secure, waterproof exterior basement entrance.

Following these tips will help you build an efficient and effective exterior basement entrance that will stand the test of time. With the right materials and tools, you can create a safe and secure entryway for your home.
5 Things You Should Avoid
- Don’t forget to check local building codes before starting your project.
- Avoid using cheap or inferior materials, as these can generate problems down the line.
- Try not to rush the job – take time to ensure that each step has been done properly for maximum efficiency and safety.
- Ensure all fasteners are tightly sealed against moisture infiltration and air leaks.
- Avoid cutting corners when it comes to caulking or weather stripping – a well-sealed entrance will be more secure and last longer than one with gaps or cracks in its structure.
By following basic construction principles and creating an efficient, secure entrance, you can ensure that your exterior basement entrance is safe and reliable for years to come.
How Do You Seal Exterior Basement Walls?
Once you have your entrance installed, it’s important to take the time to seal the exterior basement walls against moisture and air infiltration. This can be done by using a special waterproofing compound on any exposed masonry surfaces and any cracks or crevices that could let water in.
Additionally, apply weather stripping or caulking between sections of the siding and wallboard for extra insulation and protection from drafts. Consider installing drain tile around your home’s foundation if it is not already present, as this will help keep groundwater away from your basement walls.
With these steps taken, you can rest easy knowing that your exterior basement is sealed up tight!
How Do You Waterproof an Exterior Basement Door?
The best way to waterproof an exterior basement door is with good drainage around the outside of the house, proper flashing and sealants, and high-quality weather stripping. Use a good-quality caulking compound to ensure a watertight seal around your new entrance frame. You should also consider investing in a pre-hung door if you don’t have much experience with construction – this will help reduce the time and energy needed to build an effective exterior basement door that won’t allow moisture in.
In addition, pay close attention to any cracks or gaps between walls and doors that could let water seep in. Finally, ensure all fasteners are tightly sealed against moisture infiltration and air leaks for maximum protection from drafts.
Conclusion
How to build exterior basement entrance is a great way to make exiting and entering the basement easier and safer for everyone in your home. It’s also an excellent DIY project that will raise the value of your property exponentially – all it takes is a bit of elbow grease, some simple tools, and a few essential supplies!
Additionally, if you’re careful with measurements and pay close attention while installing each component, you can create an entrance that looks as good as one professionally made. With a little hard work and patience, you will surely be rewarded with an inspiring entrance that will last for years.
So what are you waiting for? Start on your exciting exterior basement entrance install today – after all, there’s nothing quite like creating something with your own two hands!