Are you thinking of transforming your dreary basement into a vibrant living space? One great way to create an interesting focal point in any room is by adding a drop ceiling. Whether you’re looking for a simple and sleek aesthetic or something with unique detailing, drop ceilings are both budget-friendly and relatively easy to install.
Keep reading on how to do drop ceiling in basement to discover how to do it yourself without missing out on the quality assurance that comes from professional installation services!
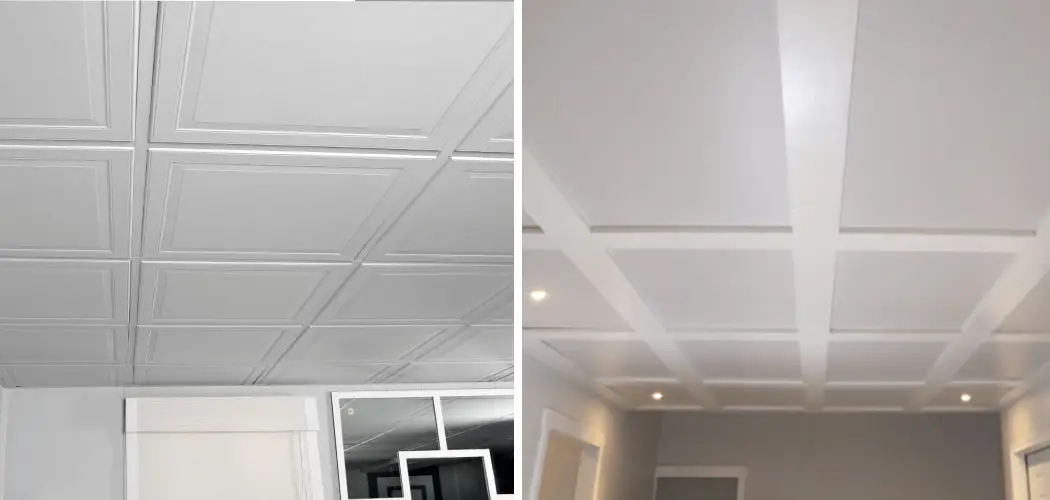
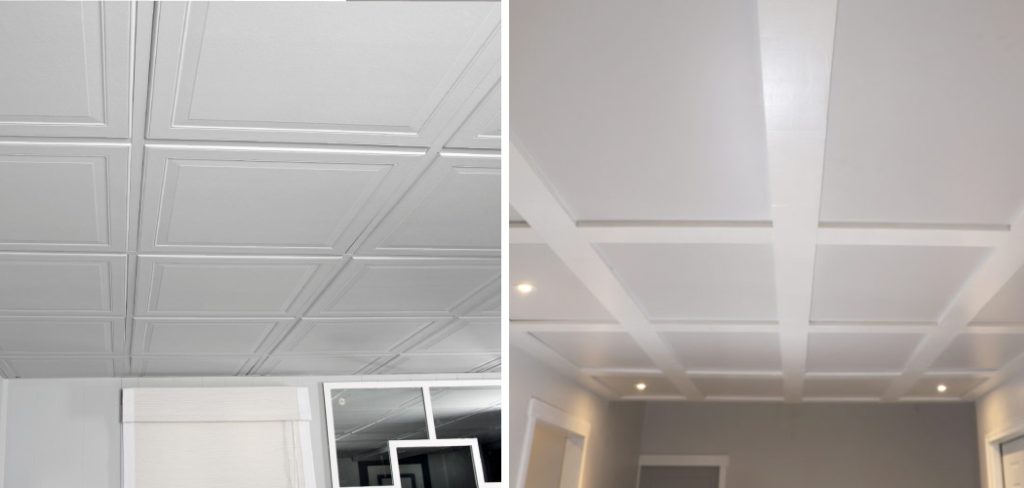
What is Drop Ceiling in the Basement?
A drop ceiling, also known as a suspended or false ceiling, is a great way to hide plumbing, electrical wires and ductwork. It’s composed of two main components: the tiles which are visible when installed and the grid system that helps keep everything together. The tiles come in different colors, sizes and shapes allowing you to customize your space for a unique look.
Needed Materials
Given below are the necessary materials you’ll need to get started on your drop ceiling project:
- The Suspension System of Choice
- Cross Tees and Main Runners
- Ceiling Tiles
- Cement Board or Other Insulation Material
- Utility Knives, Tin Snips, and Saws
- Drill With Bits for Metal Pieces
- Level
- Cable and Wire Hangers
- Putty Knife
- Joint Compound
- Paint or Wallpaper
11 Step-by-step Guidelines on How to Do Drop Ceiling in Basement
Step 1: Install the Ceiling Grid
The first step to installing a drop ceiling in your basement is to purchase the suspension system of your choice and attach it to the joists or wall studs. This process requires you to measure the space accurately and cut any pieces that don’t fit correctly. It is important to ensure that the frame is securely fastened with self-tapping screws and stronger metal hangers.

Step 2: Attach Cross Tees
Once the frame has been installed, you can begin attaching cross tees and main runners to form a grid pattern for the ceiling tiles. Make sure you measure each piece carefully and use tin snips or utility knives to trim any pieces that are too long. Otherwise, you may end up with an unevenly spaced grid. It’s also a good idea to use a level tool to ensure that each piece is perfectly straight before securing it with screws.
Step 3: Lay Down the Insulation Material
Before placing your ceiling tiles, you must lay down a layer of insulation material to prevent the noise from outside echoing in the room. The most common type of insulation material used is cement board, however, acoustic tiles may also be used in some cases. But make sure you check with local building codes before making any decisions. This material should be laid out in a single sheet to cover the entire ceiling area.
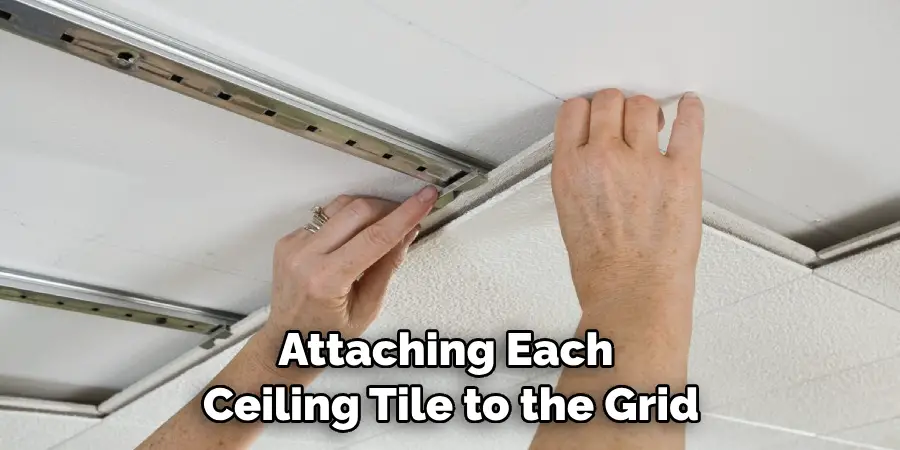
Step 4: Install the Ceiling Tiles
Once you have laid down insulation material, you can begin attaching each ceiling tile to the grid pattern you created earlier. Make sure each tile is secure and flush with the surrounding tiles for an even finish. Otherwise, some tiles might stick out more than others making the ceiling look uneven.
Step 5: Add Accessories and Moldings
To give your drop ceiling a more customized look, you can add accessories and moldings to the frame. This includes adding decorative panels or corner pieces to create visual interest. You may also opt for electrical lighting fixtures such as recessed pot lights or track lighting that will be attached to the grid.
Step 6: Paint or Wallpaper the Ceiling
If you want to take your drop ceiling to the next level, consider painting or wallpapering it. This is a great way to add color and texture to the room without breaking the budget. It can also be used to tie in any existing décor in the space. It’s important to note that any paint or wallpaper should be applied to the tiles before they are attached to the grid. You can even use adhesive wallpaper for an easier and faster installation process.
Step 7: Install Electrical Wiring
In order to hang the lighting fixtures, you will need to run electrical wiring within the grid. Make sure you consult a professional electrician for this part if you are not familiar with electrical work. But if you want to tackle this project yourself, be sure to follow all safety precautions and local building codes when running any kind of wiring. It’s also important to use the correct type of cable or wire hangers to hang the lighting fixtures securely.
Step 8: Hang Your Lighting Fixtures
Once your wiring is set up, it’s time to hang your light fixtures following the manufacturer’s instructions. Make sure each fixture is flush with the ceiling and secured properly for safety reasons. This step will also require some drilling and cutting, so be sure to use the right type of tools. It’s also a good idea to wear protective goggles and gloves when handling sharp tools.
Step 9: Place Joint Compound
After all of your lighting fixtures have been installed, you will need to fill in any gaps between the tiles with a joint compound. This will ensure there are no places where sound can escape or get trapped. It’s important to use the right type of compound for the job and apply it evenly with a putty knife. But make sure you wait for it to dry completely before continuing onto the next step.

Step 10: Prime and Paint (Optional)
If you chose to wallpaper your ceiling, you will need to prime it with a latex primer before hanging the paper. This will help seal any gaps and create a smoother surface for better adhesion of the wallpaper. If you opted for paint, make sure you do two coats in order to achieve an even finish. This step is completely optional, but it’s a great way to add color and texture to an otherwise plain ceiling.
Step 11: Re-check Your Work
The last step is to make sure all your work has been completed correctly and that all fixtures are secure. This includes double-checking the wiring, insulation material, ceiling tiles, and any other accessories you have added. It is also a good idea to do a test run of any lighting fixtures you have installed. This will help ensure everything works properly and that your drop ceiling is ready to be enjoyed.
Congratulations! You now know how to do drop ceiling in basement. With these easy steps, you can create a beautiful and functional living space for your home. Now all that’s left to do is enjoy the transformation!
Following these steps will ensure that your drop ceiling is installed correctly and that all necessary safety precautions are taken. If you’re ever in doubt, don’t forget to consult a qualified professional to help guide you through the process. Good luck!
Frequently Asked Questions
Q: What Are the Benefits of a Drop Ceiling?
A: Drop ceilings offer several benefits including soundproofing, improved aesthetics, and energy efficiency. They also make it easier to repair or replace wiring and access any pipes that may be located in the ceiling.
Q: How Much Does It Cost to Install a Drop Ceiling?
A: The cost of installation varies depending on the size of your basement and the materials you choose to use. Generally, you can expect to pay anywhere from $1.50 to $3.00 per square foot for installation.
Q: How Long Does It Take to Install a Drop Ceiling?
A: The time it takes to install a drop ceiling depends on the size of your basement and the complexity of the project. As a general rule, most projects should take between one and two days to complete.

Q: Are Drop Ceilings Fire-Proof?
A: Yes, drop ceilings are fire-proof and can help inhibit the spread of flames in case of a fire. However, it is important to make sure that the installation process is done correctly to ensure maximum safety.
Conclusion
After following the steps outlined here on how to do drop ceiling in basement, you can finally check off “do drop ceilings in the basement” from your To-Do list. You now have a great home improvement project to show for yourself! Not only is it easier to maintain with ceiling tiles and frames as opposed to plain sheetrock, but you also get an extra layer of insulation between your living space and the pests and weather elements below.
Whether you choose a basic white or colored tile design, your investment in the drop ceiling can make a world of difference in both soundproofing and aesthetics. What’s more, doing it on your own gives you bragging rights among companies that may not be so handy with DIY projects. So go ahead – give yourself a pat on the back for taking on this challenge, and enjoy all the wonderful benefits that come along with it!
