
Are you looking for an effective way to get in shape and relieve stress at home? Maybe you have even considered hanging a punching bag in your basement. But the thought of putting up a large, potentially damaging equipment piece can be daunting – especially if you aren’t sure how to hang a punching bag properly or safely.

With the right supports and materials, having a punching bag in your basement can provide several benefits without sacrificing stability or safety. In this post, we’ll cover how to hang a punching bag in basement and what type of surfaces are best when installing a punching bag. Ready to learn more? Let’s jump into our guide on how to hang a punching bag in your basement!
What are the Uses of a Punching Bag?
Punching bags provide a great full body workout. They help to burn calories, strengthen your coordination and timing and improve flexibility. Plus, they can be used as an effective stress reliever! You can throw your energy into punching or kicking the bag to release built-up emotions or tension.
Additionally, because punching bags are freestanding, they take up far less space than a treadmill or weight rack would. This makes them ideal for basements and smaller spaces for a home gym setup.
What are You Need to Hang a Punching Bag in the Basement?
To get started hanging your punching bag in the basement, you’ll need some basic supplies:
- An eye bolt or heavy duty suspension hook
- A ceiling joist or beam near the center of the room
- A hammer drill and masonry bit
- Lag screws and washers
- Wall anchors (if necessary)
You’ll also need a helper, as punching bags can be very large and difficult to manage alone. Having an extra person around to help you lift, position and secure your punching bag is essential for safety purposes.
10 Easy Steps on How to Hang a Punching Bag in Basement
Once you have all the necessary materials, it’s time to hang up your punching bag. Here are some tips on how to do so safely and correctly:
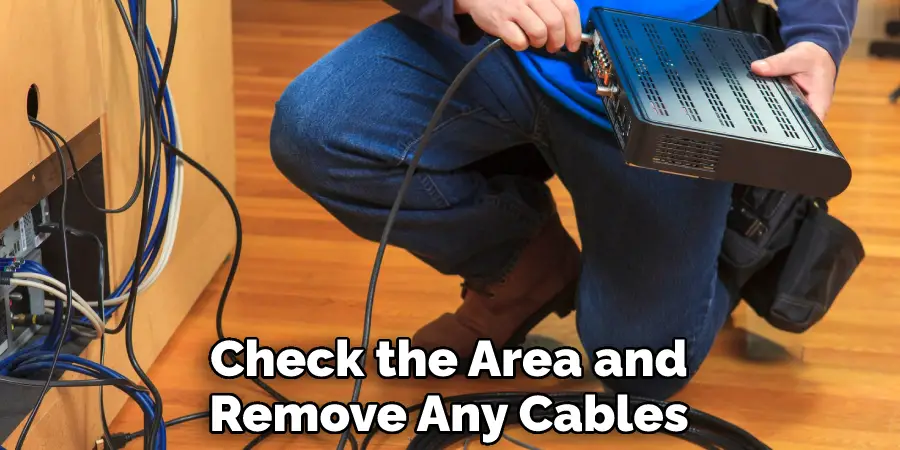
1. Remove Electrical Cables:
Before you start, make sure to check the area and remove any cables or wires that could be near the hanging point. It is important to ensure that your punching bag won’t interfere with the safety of any electrical equipment. Otherwise, you risk damaging the equipment or creating a dangerous situation.
2. Find a Suitable Spot:
Look for a spot in your basement that is suitable for swinging, and make sure to install the eye bolt or suspension hook at least seven feet from the ground and away from furniture, walls, or other items that could be damaged by contact with the punch bag. Because punching bags can be very heavy when filled with sand, water, or some other material, it’s important that you install the eye bolt into
3. Drill Pilot Holes:
Using the hammer drill and masonry bit, drill two pilot holes into your ceiling joist or beam at appropriate points where you can attach your eye bolt or suspension hook. The hole size will depend on the fastener you use (check product instructions). If the joist or beam is not accessible, use wall anchors to secure the hook.
4. Attach Eye Bolt or Suspension Hook:
Take the eye bolt or suspension hook and attach it to the ceiling joist or beam with lag screws. Make sure they are fastened securely so your punching bag won’t loose while in use. Don’t forget to attach the washers as well.
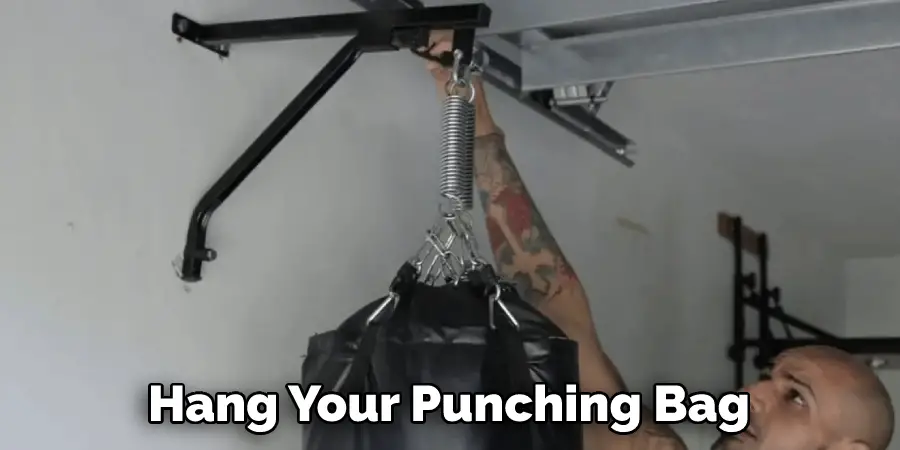
5. Hang Punching Bag:
Lift the punching bag up and hang the chain onto the eye bolt or suspension hook. Make sure that it is properly secured before you start using it. You can also hang the punching bag from a separate chain, which will help reduce the stress on the eye bolt or suspension hook.
6. Test for Stability:
Swing or punch the bag gently to test its stability on its mount, making any necessary adjustments for maximum stability before using it at full force. Use caution when testing the bag, and make sure that you’re standing back far enough to avoid getting hit by it if it should come loose. And always wear protective gear when training with a punching bag.
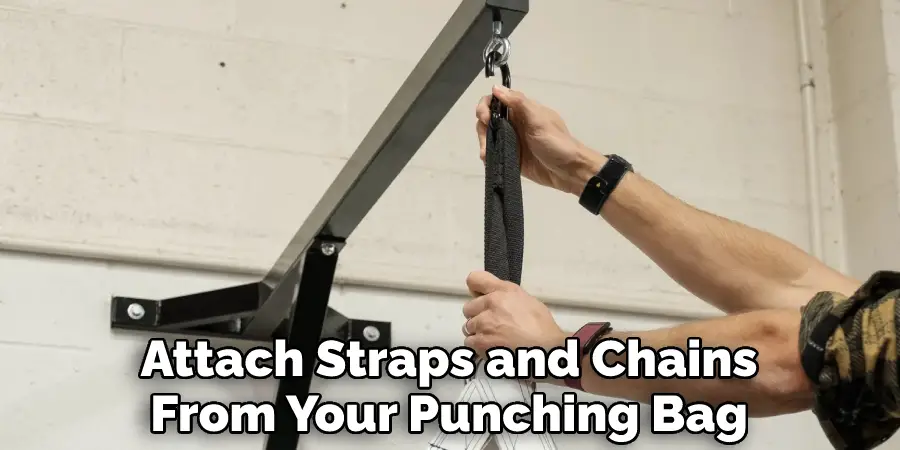
7. Attach Straps and Chains:
Attach straps and chains from your punching bag to secure support in the basement, such as a wall or ceiling joist, to ensure that it will stay in place while you’re using it. This is especially important if your punching bag is filled with water or sand and is particularly heavy. Another option is to use a stand, providing an extra layer of stability.
8. Secure All Fixtures:
Double-check all fixtures and fastenings to ensure everything is secure before using your punching bag. If you’re using a stand, ensure it is properly leveled and secured to the floor so that it won’t move or slip during use. Also, check the eye bolt or suspension hook to ensure that it is properly fastened and won’t come loose over time from the weight of the punching bag.
9. Fill Your Punching Bag:
Fill your punching bag with whatever material you choose (sand, foam stuffing, etc.) for optimal training performance. Make sure not to overfill the bag. Otherwise, it could become unstable and pose a safety hazard during use.
10. Enjoy Your Training!
You’re now ready to start training with your punching bag in the basement! Make sure you stay safe and have fun as you hone your skills. Because punching bags provide a great workout, you’ll be feeling the benefits in no time.
Now that you have all the necessary information on hanging a punching bag in your basement, it’s time to start your training journey! With these steps, you’ll be able to set up your punching bag safely and securely to enjoy your workouts worry-free. Have fun and stay safe while working out with your new punching bag!
5 Additional Tips and Tricks
- Hang your punching bag so that it is in a sturdy place. Make sure it is not too close to any walls, ceilings or furniture.
- Use heavy-duty hardware and lag screws when attaching the hanging bracket to the joists of your ceiling. This will ensure that the bracket can hold up against even powerful punches.
- Be sure to use a secure chain or rope to suspend the punching bag, as this will reduce swaying and increase safety for those using it.
- If you plan on using a speedbag platform with your punching bag, make sure to also attach it securely onto the joists of your basement ceiling by using lag screws and other appropriate hardware.
- Finally, be sure to wear appropriate protection when using your punching bags, such as gloves, mouth guards, and headgear. This will help prevent injuries from occurring due to heavy impact or accidental falls.
By following these tips and tricks, you’ll be sure to succeed in hanging a punching bag in the basement!
5 Things You Should Avoid
- Don’t hang your punching bag on a flimsy wall. Make sure the walls are strong enough to support the weight of the punching bag, and it won’t move when you hit it.
- Don’t use nails or screws that will puncture through drywall, as this can cause damage to your basement walls and ceiling.
- Don’t hang a heavy punching bag from exposed wiring, piping or ducts because these may not be strong enough to hold the weight of the punching bag and could potentially break, causing injury or damage to property.
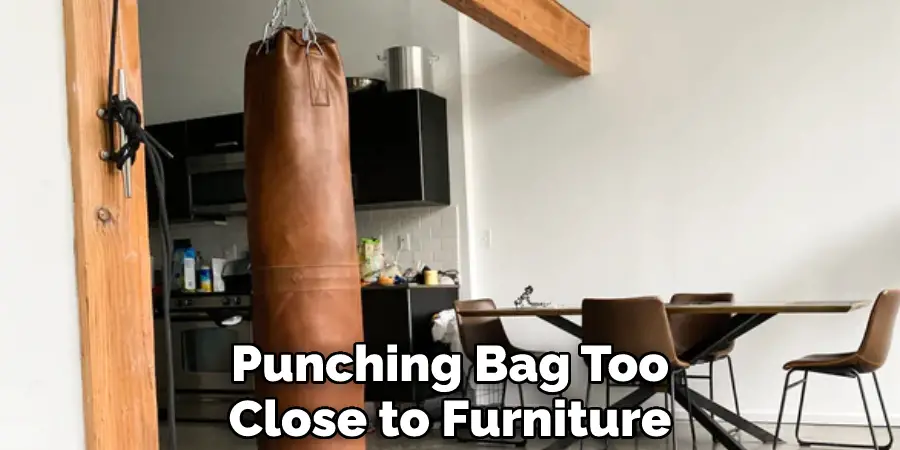
- Don’t mount the punching bag too close to furniture pieces that could get damaged during use – like bookshelves, tables or other items in your basement such as a pool table.
- Don’t hang the punching bag too low, as this could be a safety hazard if you miss and hit your head on the ceiling when throwing punches.
In summary, it is important to ensure that you choose the right place in your basement to hang your punching bag so you can practice safely and without any damages or injuries. Do your research first, so you get the best results!
Conclusion
There you have it! These are the four main ways to hang a punching bag in your basement. Basements can be great places to set up a home gym, and adding a punching bag is a great way to get started.
You can also use this to get some bonding time with your kids if they’re old enough to help. Be sure to follow the instructions carefully and take all necessary precautions before beginning any project. With a little time and effort, you’ll have your very own boxing setup at home in no time!
Hopefully, the article on how to hang a punching bag in basement has provided you with all the information you need to get started. Have fun and stay safe as you begin your new training journey! Good luck and happy training!
