
Are you looking to upgrade the insulation in your interior concrete walls? Are you overwhelmed at the prospect of insulating your concrete walls? You’re not alone! Installing rigid foam insulation is one of the most effective ways to improve energy efficiency, reduce noise pollution, and keep moisture out.
This guide on how to install rigid foam insulation on interior concrete walls will teach you how to install this specialized type of foam insulation in a safe and efficient manner. From pre-planning steps like checking for electrical wiring and choosing the right thickness of foam board to properly installing it with appropriate caulking or adhesive, follow these instructions carefully for best results!
Read on to find out how easy it is to get started with installing rigid foam insulation on your interior concrete walls!
Why Do You Need to Install Rigid Foam Insulation on Interior Concrete Walls?
1. To Keep the Heat Inside
It’s important to understand why it is so important to install rigid foam insulation on interior concrete walls. Concrete is a porous material, which means that heat can easily escape through the walls and cause your home to have higher energy bills.
Additionally, sound from outside sources can penetrate the concrete and make its way into your home. Installing rigid foam insulation on interior walls helps to create an airtight barrier between your living space and the outside world, thus helping to lower energy bills and keep sound out.
2. To Prevent Moisture Problems
In addition to keeping heat in, installing rigid foam insulation on interior concrete walls also helps to keep moisture out. The insulated air pocket created by the foam board protects against the intrusion of moisture, which can cause mold and mildew growth as well as physical damage to the interior walls. Properly installed rigid foam insulation prevents these issues and keeps your concrete walls in top condition.
Required Items for Installing Rigid Foam Insulation on Interior Concrete Walls
Before getting started, make sure you have all the necessary items on hand. This includes:
- Rigid foam board insulation
- Adhesive or caulk to secure the foam board in place
- Utility knife and straightedge to cut the foam board to size
- Protective gear such as goggles, gloves, and masks
- Nails or screws to secure the foam board in place
10 Step-by-Step Instructions How to Install Rigid Foam Insulation on Interior Concrete Walls
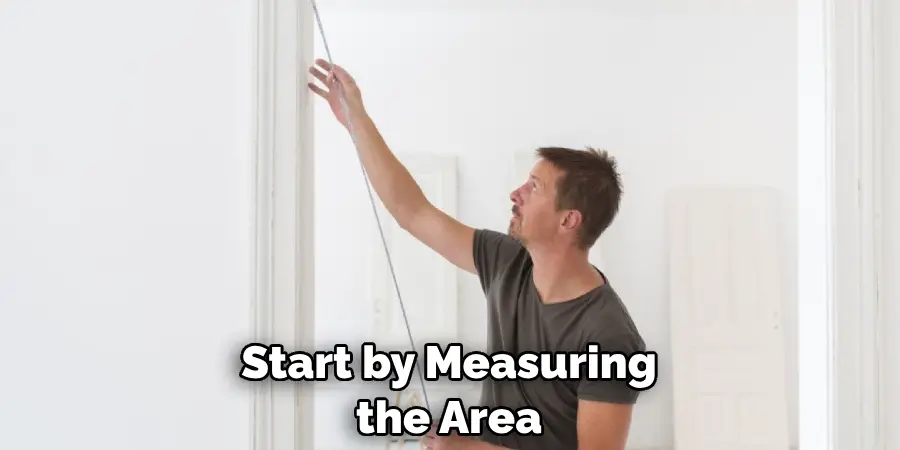
Step 1:Measure Your Wall Area
Start by measuring the area of your interior concrete wall that you plan to insulate. This will help you determine the size and number of foam board insulation pieces you’ll need to purchase.
Step 2:Check for Electrical Wiring
Before installing any type of insulation, it’s important to check for electrical wiring that may be present in your walls. Use a stud finder to detect any wires and mark them with a piece of masking tape.
Step 3:Choose the Right Thickness
When selecting your rigid foam board insulation, make sure to choose the proper thickness for your project. The thicker foam boards will provide more insulation than the thinner varieties.
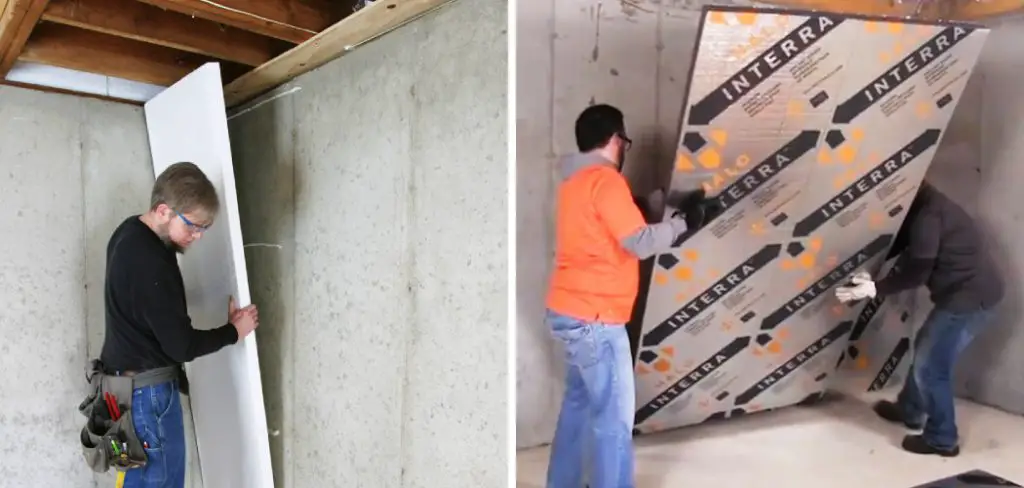
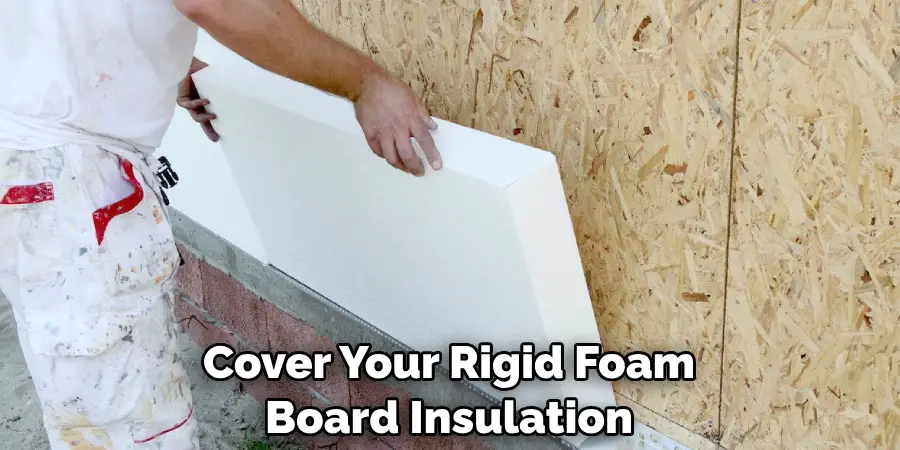
Step 4:Cut to Size
Once you’ve chosen the right thickness, use a utility knife and straightedge to cut your foam board to size. Make sure that each piece fits snugly in the wall area before moving on to the next step.
Step 5:Secure with Adhesive or Caulk
Now it’s time to secure the foam board pieces in place using either adhesive or caulk. For most projects, adhesive is the stronger and more effective option, but it can be difficult to work with. If you’d prefer an easier method of installation, caulking the foam board in place is a viable alternative.
Step 6:Nail or Screw Into Place
Once your rigid foam board insulation has been secured in place with adhesive or caulk, you’ll want to nail or screw it into the wall. This will help keep it securely in place and ensure that your insulation remains effective over time.
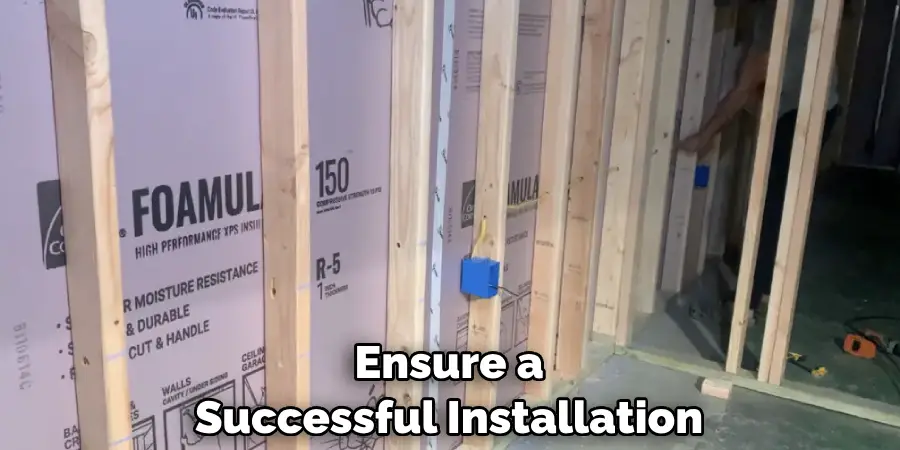
Step 7:Fill Any Gaps and Cracks
Once your foam board pieces are in place, take a look for any gaps or cracks that need to be filled. If you find any, use expanding foam insulation to fill them in and create an airtight seal.
Step 8:Cover with Drywall
Now it’s time to cover your rigid foam board insulation with drywall. Be sure to cut the pieces of drywall so that they fit snugly against the wall and foam board, and use nails or screws to secure them in place.
Step 9:Apply Caulk or Sealant
Once you have your drywall in place, apply a layer of caulk or sealant along the edges where the wall and insulation meet. This will help to create an airtight seal that will keep moisture out and provide even more energy efficiency for your home.
Step 10:Enjoy Your New Insulation
Now that you’ve successfully completed the installation of your rigid foam board insulation, sit back and enjoy the many benefits that it provides. You’ll now have improved energy efficiency, reduced noise pollution, and a better seal against moisture. What more could you ask for?
Congratulations! Now you know how to install rigid foam insulation on interior concrete walls like a pro. With just a few simple steps, you can improve your home’s energy efficiency and reduce your heating and cooling costs. Get started today and enjoy the many benefits of having an insulated home!
8 Safety Precautions to Follow When Installing Rigid Foam Insulation on Interior Concrete Walls
When installing rigid foam insulation on interior concrete walls, safety should be a top priority. To make sure that the installation process is done safely and correctly, here are 8 safety precautions to take:
- Wear protective gear. when installing insulation, it’s important to wear protective gear such as face protection, long sleeves, gloves, and pants. It will help protect you from any potential hazards that may arise.
- Ensure the area is well-ventilated. When installing insulation, it’s important to make sure the work area is well-ventilated. The fumes from certain types of insulation can be toxic and dangerous if inhaled in large quantities, so having proper ventilation is key.
- Make sure the area is clean. Before installing insulation, make sure to clear away any debris or dirt that may be present in the work area. This will help ensure a safe and successful installation.
- Use the right tools. To make sure that the insulation is installed correctly, make sure to use the correct tools for the job. This may include a saw, drill, level, and other necessary items to ensure a successful installation.
- Check for loose material on walls. Before installing insulation, it’s important to check the concrete wall and make sure there are no pieces of debris or loose material that could interfere with the installation process.
- Measure twice, and cut once. It’s important to be precise when cutting insulation boards. To ensure accuracy, measure twice before cutting. This will help ensure the insulation fits properly and is installed as intended.
- Work in a logical order. When installing foam insulation, it’s important to work in a logical order to make sure that everything is properly aligned and secured correctly. Start at one end of the wall and work your way around systematically.
- Follow instructions carefully. When installing insulation, make sure to follow the manufacturer’s instructions carefully. This will help ensure a successful installation and that everything is done correctly.
Following these steps can help you to install rigid foam insulation on interior concrete walls safely and correctly. Be sure to take all necessary safety precautions when working with insulation, as it can be dangerous if not handled correctly. Always wear protective gear and be sure to read all instructions carefully before beginning any installation process. With the right safety precautions, you can successfully install rigid foam insulation on interior concrete walls.
Tips for Installing Rigid Foam Insulation on Interior Concrete Walls
- Make sure all edges of the insulation boards fit snugly against one another. This will help ensure that no air or moisture can get in between them and cause any issues.
- Use an adhesive sealant to secure the insulation boards to the wall. This will help ensure a tight seal that won’t come loose over time.
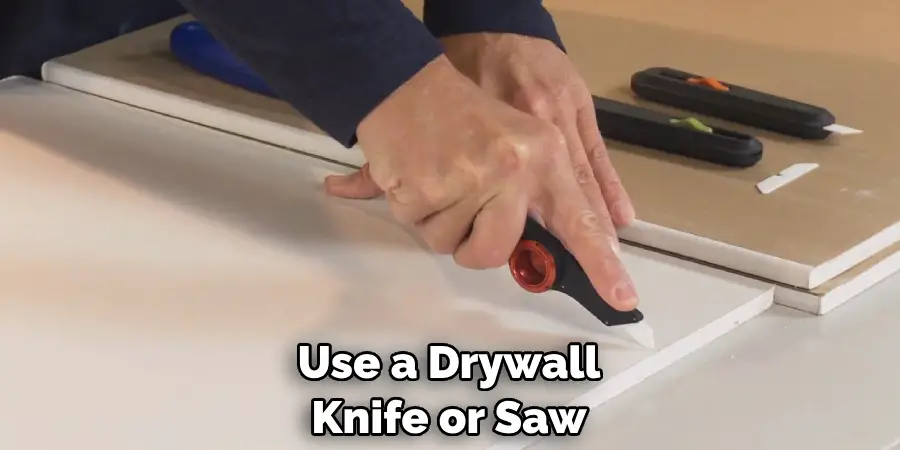
- Use a drywall knife or saw to cut any large pieces of foam insulation into smaller sizes if necessary.
Conclusion
Installing rigid foam insulation on concrete walls is a great way to reduce energy costs and make your home more comfortable. Not only does it help keep the temperature inside your home constant, but it also provides soundproofing and protection against moisture and mold buildup. It’s simple to install and gives your walls a stylish look once finished.
Best of all, rigid foam insulation can last up to 20 years with minimal maintenance. Whether you need to add a layer of insulation or replace an old one, this straightforward project is one you can easily complete yourself in no time. With the right tools and some careful planning on how to install rigid foam insulation on interior concrete walls, you’ll be enjoying the warmth and comfort that rigid foam insulation offers for years to come!
