Are you looking to level a concrete floor with mortar? If so, you’ve come to the right place! In this blog post, we’ll walk you through the steps necessary for leveling your concrete floor and provide step-by-step instructions on how to level a concrete floor with mortar. Through careful preparation and the correct combination of materials, you can have a level concrete surface in no time.
Along with that knowledge comes improved safety in your home or business; when floors are uneven, there’s an increased risk for slips and falls – something nobody wants. So let’s get started learning about what we need and how to go about leveling our surfaces.
How Do You Level a Very Uneven Concrete Floor?
When a concrete floor is severely uneven or sloped, it can be difficult to get the surface perfectly level. In these cases, it is important to take steps to prepare the surface before attempting to apply mortar and level the floor.
The first step in preparing an extremely uneven concrete floor is to remove any high points that may be present. This can be achieved using a combination of power tools, such as an angle grinder and hammer drill, as well as manual tools like chisels and shovels. The goal is to remove any large bumps or uneven areas so that the surface is relatively smooth before you begin applying mortar.
Once the floor has been cleared of high points, you will need to fill in any depressions or low points. This can be done by packing a mixture of sand and concrete into the depression and allowing it to harden.
Finally, apply mortar over the entire surface of the floor with a trowel. Make sure that you evenly spread the mortar across all areas to ensure a smooth, level surface. After the mortar has dried, you can then apply a sealant to protect the floor from damage and provide a more polished look.
10 Methods How to Level a Concrete Floor with Mortar
1. Remove Any Existing Flooring Material.
If you are starting with an existing concrete floor, it is important to remove any carpeting, tile, or other floor coverings that may be present. This will allow you to ensure that the new mortar is laid directly on the concrete surface. If there is any debris remaining on the surface, it should be removed with a broom or vacuum. Although this may seem like an extra step, it is essential to ensure that the mortar lays evenly and adheres properly.

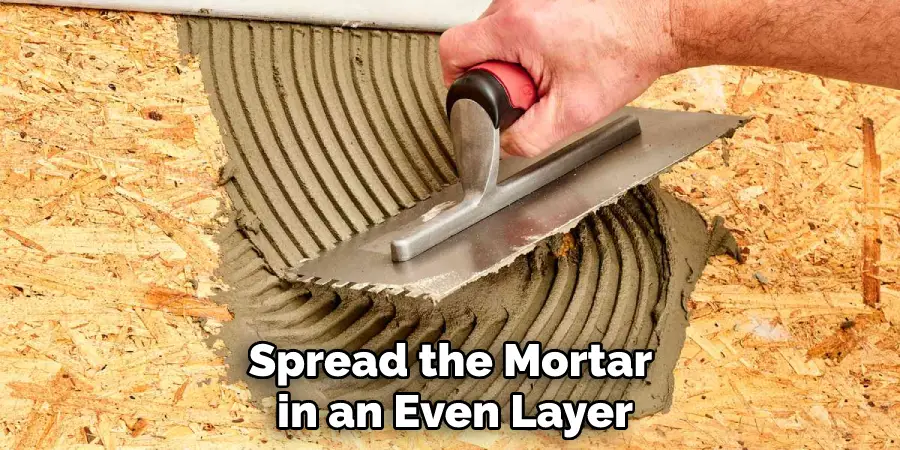
2. Pour and Spread Mortar into Depression Areas.
Using a trowel or putty knife, spread the mortar evenly over any low areas of the surface until it is level with the surrounding areas. If the depression areas are too deep to do this, trowel more mortar into them. Then, to ensure a level surface, use a leveling tool like a straight edge. Run the level across the recently filled-in depression areas and adjust as necessary to make the mortar even with the rest of the floor. Once finished, allow the mortar to dry completely before moving on to the next step.
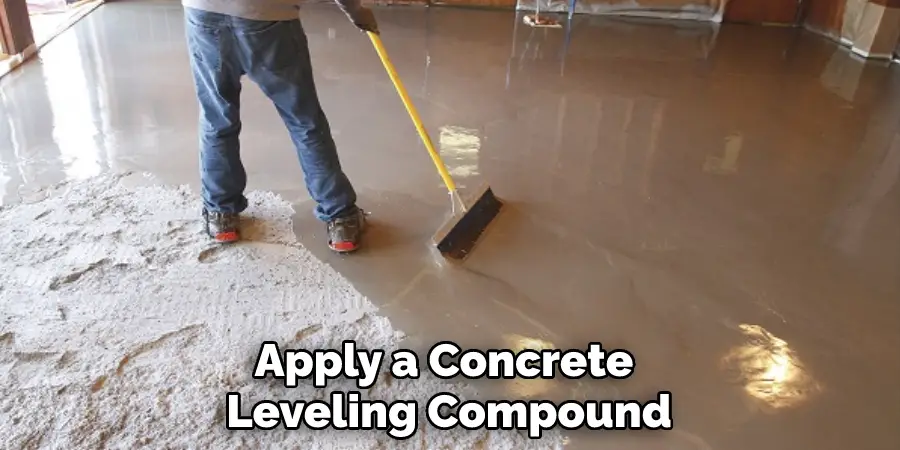
3. Apply a Leveling Compound.
Once you have finished filling in low spots, apply a concrete leveling compound to fill in any small depressions or minor unevenness that remains on the surface. Make sure you choose a compound that is appropriate for the type of material that your concrete floor is made from. Generally, it will be either a sand-based or an acrylic-based compound.
To apply the leveling compound, use a long trowel to spread it over the entire surface, ensuring that you fill any gaps. Allow it to sit for at least 24 hours before continuing the process.
4. Use a Floor Scraper to Remove High Spots.
Using a floor scraper, remove high points from the surface of the concrete floor until it is relatively even and flat. Begin in the corner of the room and work your way out. If the scraper does not completely remove the high spots, you may need to use a chisel and hammer. Place the chisel onto the spot and tap it lightly with the hammer. Start at one end and work your way to the other until all of the high spots are gone.
5. Smooth out Uneven Areas With Sandpaper or Abrasive Pads.
If there are still some minor bumps or imperfections remaining, use sandpaper or abrasive pads to smooth them out until they are evenly spread throughout the entire floor. Be sure to go carefully so as not to scratch the surface of the concrete. You may want to use a vacuum cleaner or damp cloth to wipe away any dust created by the sanding process. Once the area is smooth, it is time to apply the mortar and begin leveling out the floor.
While the surface must be even, you should not use too much mortar as it will make the area slippery and difficult to walk on. Furthermore, excess mortar can cause the concrete to crack or weaken in certain spots.
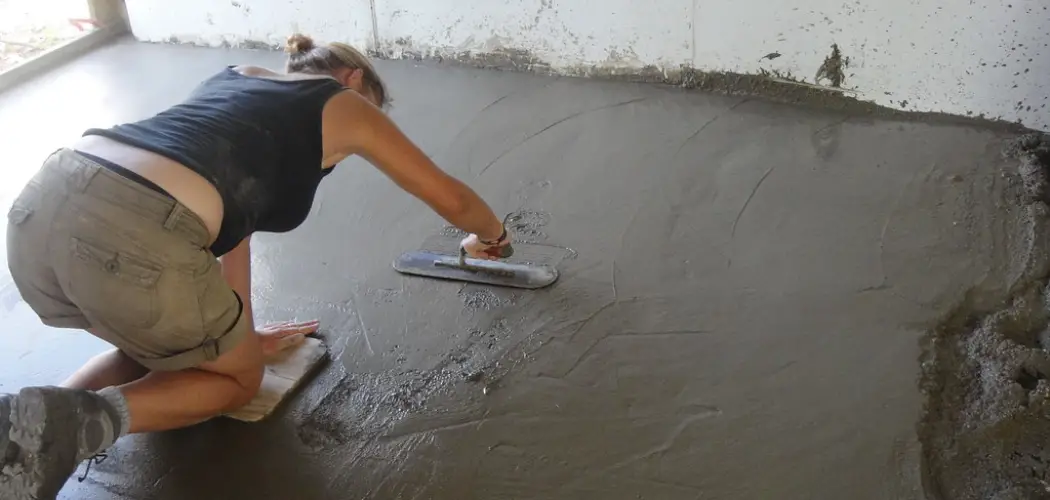
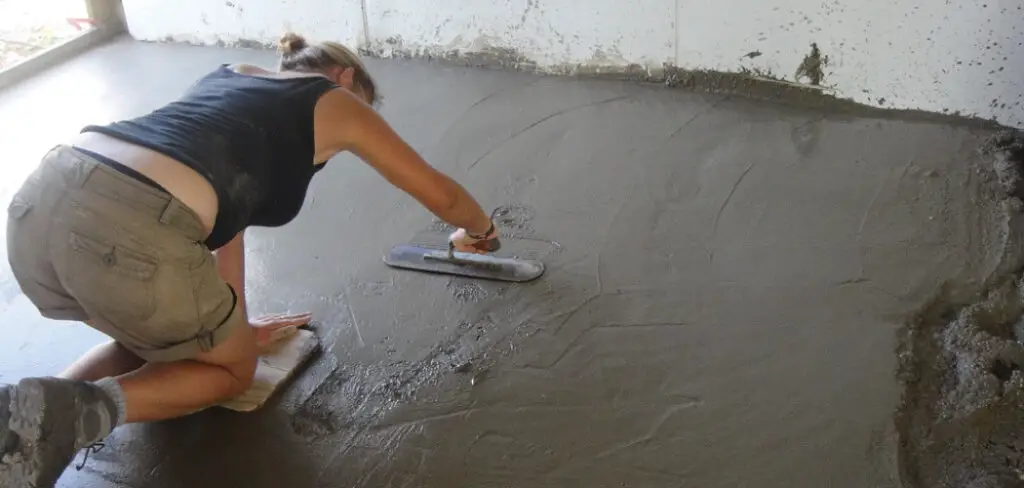
6. Trowel or Screed the Mortar to Even Out the Surface.
Using a trowel or screed, spread the mortar in an even layer across the entire floor surface until it is level and smooth. Make sure to keep the mortar from oozing out from underneath the edges of the concrete blocks. If you need to make any adjustments, use a long straightedge to level off any high spots or low spots in the mortar. Once the mortar is even and level, allow it to dry completely before proceeding to the next step.
7. Allow the Mortar to Dry for 24 Hours.
Once you have finished spreading the mortar, allow it to dry for at least 24 hours before continuing with any further steps. During this time, keep the area well-ventilated and protected from the elements. You may also want to use plastic sheeting or a tarp over the area to ensure that the mortar is able to dry properly. After 24 hours, check the mortar to make sure it has fully dried and hardened before continuing. However, if the mortar is still soft and pliable, you may need to allow it to dry for an additional 24 hours.
8. Apply Epoxy Primer and Floor Paint on Top of The Mortar.
Once the mortar has had time to dry, apply a coat of epoxy primer over the entire floor surface, followed by two coats of floor paint as desired. This will help to seal and protect the mortar from moisture and wear and tear. Allow each coat to dry fully before applying the next one. If you’re using colored mortar, you may not need to use floor paint. Allow the concrete floor to cure for at least 48 hours before walking or driving on it. You may also want to seal the mortar with a sealant or wax for added protection and shine.
9. Smooth Out Any Uneven Areas With Sandpaper or Abrasive Pads.
If you have any areas of the floor that are still not perfectly level after the epoxy and paint have dried, use sandpaper or abrasive pads to smooth them out until they match with the rest of the floor surface. Make sure to wear a dust mask and safety glasses when using sandpaper or abrasive pads, as the particles created during this process can be dangerous if they come into contact with your eyes or lungs. Once you have sanded and smoothed out any uneven areas, clean up any dust and debris left behind.
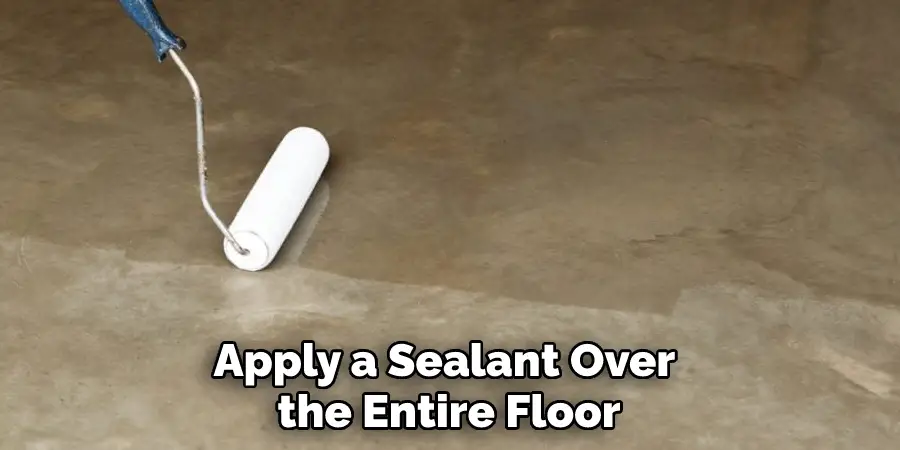
10. Apply a Sealant Over The Entire Floor Surface.
Finally, apply a sealant over the entire floor surface to protect it from damage and provide a more polished finish. This will help keep your concrete floor looking good for years to come. Be sure to read all of the instructions on the sealant you use to ensure proper application. Allow the sealant to dry completely before allowing anyone to walk on the surface. Following these steps will ensure you have a beautiful and level concrete floor that will last for years to come.
What Is the Easiest Way to Level a Concrete Floor?
The easiest way to level a concrete floor is using mortar, which is a cement-based product that acts as an adhesive. Mortar can be used to fill in any low spots or depressions in the concrete and can provide a smooth, level surface. Applying mortar is a straightforward process that requires minimal tools and materials.
Before beginning the leveling process, it’s important to make sure the surface of the concrete floor is clean and free of dirt and debris. This can be achieved by sweeping or vacuuming the area and then washing it with a mild detergent solution. Once the floor is clean and dry, you’ll want to inspect for any cracks or other damage that may need to be repaired before leveling.
Conclusion
Now that you know how to level a concrete floor with mortar, you can get started on your home improvement project right away. This process is not difficult, but it does take some time and patience. Be sure to follow the instructions carefully and always wear protective gear when working with harsh chemicals. With a little effort, you’ll have a beautiful new floor in no time!