
Radon is a naturally occurring gas that can become a serious health hazard if left unchecked in the home. It is odorless, colorless and tasteless so it’s hard to identify. While elevated levels of radon can occur anywhere, they are particularly common in basements due to their proximity to the ground where radon often originates.
Therefore, it’s important for homeowners to know how to properly test for and remediate radon from their basement spaces. In this blog post on how to remediate radon in basement we will cover everything you need to know about testing for radon and what steps you should take to reduce and remediate its presence if necessary.
12 Step-by-step Guidelines on How to Remediate Radon in Basement
Step 1: Test for Radon
The first step in mitigating radon is to test the basement space for its concentration. This can be done with a do-it-yourself radon test kit, which will measure the amount of radon in a given space. If you have any questions or concerns on how to use a testing kit properly, seek out advice from your local health department or environmental specialist. It’s important to know the level of radon presence in your basement before taking any other steps.
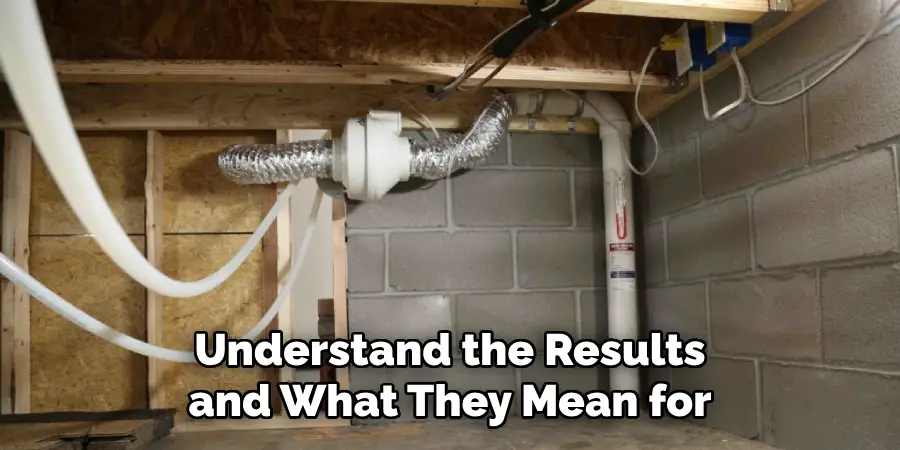
Step 2: Understand Your Results
Once you’ve completed the test, it’s important to understand the results and what they mean for your safety. The EPA recommends that any home with a radon level greater than 4pCi/L take action to reduce its presence because this can be dangerous. If your levels are higher than this, then it’s time to remediate.
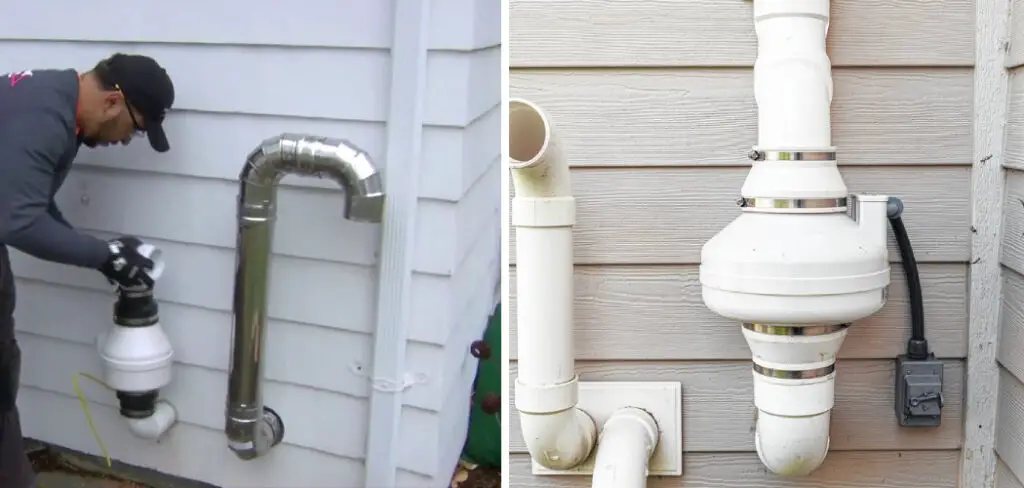
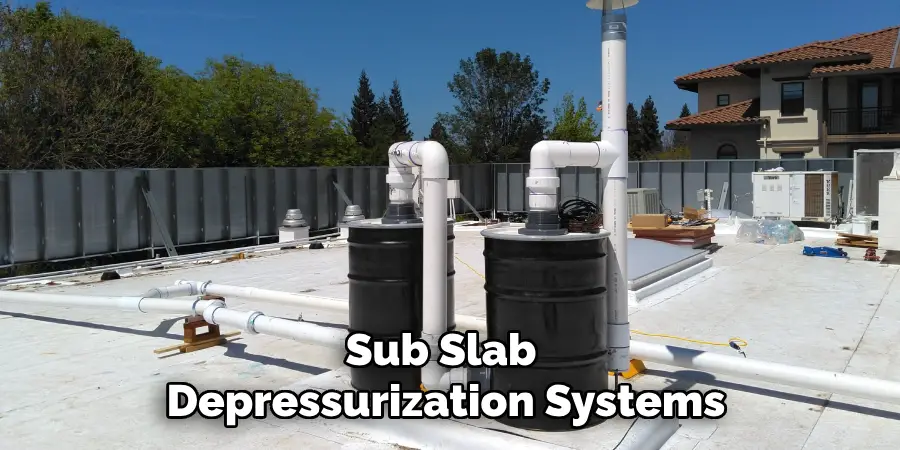
Step 3: Use Sub Slab Depressurization Systems
Sub slab depressurization systems are one of the most effective ways to remediate radon in a basement space. This system consists of a fan that is installed beneath the concrete floor and a pipe that runs up through the ceiling, connected to an exhaust port on the roof. The fan pulls air from beneath the concrete and vents it outside, reducing radon levels indoors.
Step 4: Sealing Cracks and Leaks
Another important part of mitigating radon is to make sure there aren’t any cracks or leaks in your home that could be allowing more gas into your living space. To do this, use caulking foam or expanding foam to seal up any gaps around windows, doors, pipes, wires, etc. It’s also important to seal around sump pumps and other points of entry.
Step 5: Ventilation Systems
Ventilation systems such as window fans, attic fans and exhaust fans can be used to help reduce radon levels in a basement. This is especially helpful for reducing moisture, which can increase the presence of radon due to its heavier weight compared to air. It’s important to make sure these fans are properly installed and vented outside of the home for maximum effect. This type of system does not require professional installation, though it’s always best to seek advice and assistance if you’re unsure.
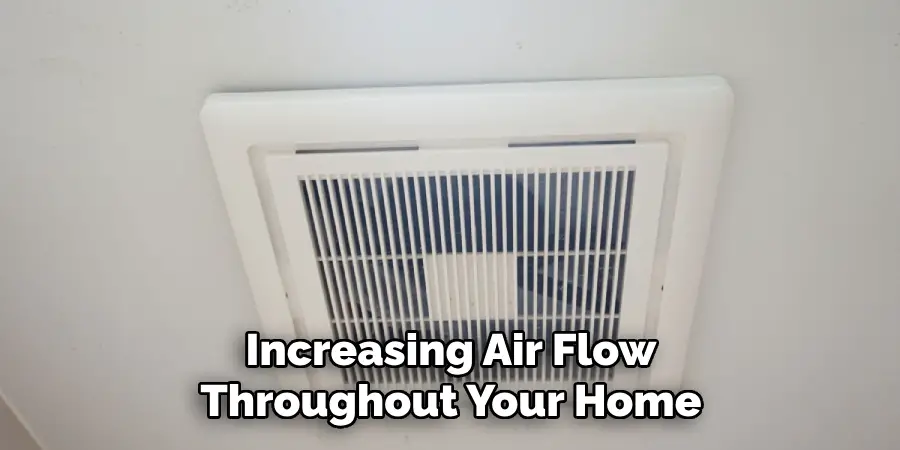
Step 6: Increase Air Flow
Increasing air flow throughout your home can also be beneficial in reducing radon levels since it will help push the gas back outdoors. Make sure to open windows periodically, use ceiling or portable fans during summer months and try running your HVAC system occasionally to keep air circulating indoors. But make sure you’re not running the fan continuously or for long periods of time as this can increase your utility bills.
Step 7: Install a Radon Mitigation System
If the above steps don’t reduce your radon levels to a safe range, then it may be necessary to install a radon mitigation system. This is usually done by drilling into the concrete structure of the home and running a pipe up through an exterior wall or through the roof. The fan in this system will actively draw air from beneath the foundation and vent it outdoors. It’s important to have this system professionally installed, as improper installation can reduce its effectiveness.
Step 8: Measure Again
Once you’ve completed all of these steps, it’s important to measure for radon one more time to make sure that your remediation was effective. If the results are still high, then you will need to look into other solutions such as sealing your walls or using an adsorption system. It’s important to keep testing regularly as radon levels can vary over time. This will help you determine if additional action is needed.
Step 9: Regular Monitoring
It’s also important to monitor radon levels in your home on a regular basis, especially if you live in an area where the levels tend to be high. The EPA recommends testing for radon every one to two years depending on the results of your initial test. It’s also a good idea to test after any major renovations or repairs have been done. This will help you stay on top of any potential radon problems.
Step 10: Know Your Environment
Knowing the environmental factors that could contribute to elevated radon levels is also helpful when it comes to mitigating the gas in your home.
Areas near uranium deposits or certain areas with soil type can have naturally higher concentrations of radon so if you live in such an area, you should consider taking additional steps to reduce its presence indoors. It’s also important to keep an eye on the local weather, as changes in temperature and barometric pressure can affect radon levels.
Step 11: Use an Activated Carbon Filter
If all else fails, you may want to consider using an activated carbon filter. This will remove radon particles from the air and can help make your home safer if the levels are still elevated after taking other steps.
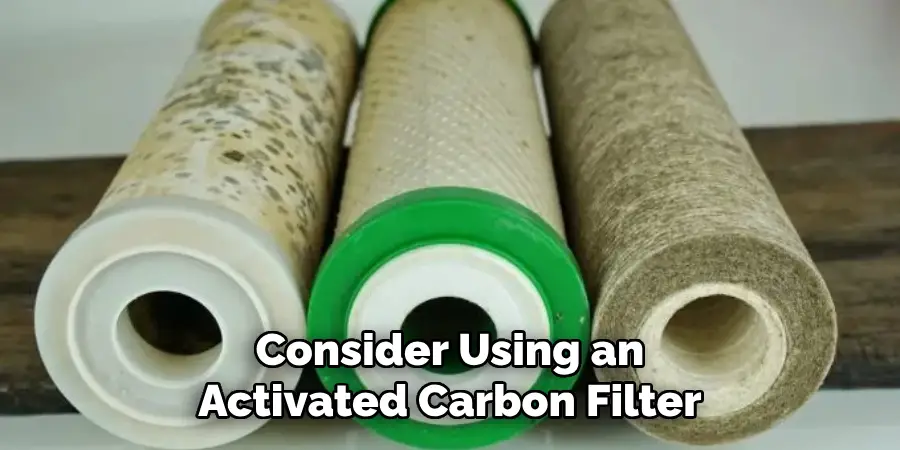
It’s important to note that this type of filter should only be used as a last resort, as it won’t reduce the levels in the soil beneath your home. But it’s still useful for reducing the concentration of radon in the air, which can make living indoors safer. It’s best to have this system professionally installed.
Step 12: Seek Professional Help
When in doubt it’s always best to seek the help of a professional who has experience with radon mitigation. They will be able to assess your situation and come up with the best solution for reducing radon levels as quickly and efficiently as possible. This is especially important if you’ve taken steps to mitigate the gas but are still not seeing results. A professional can give you advice on additional measures you can take.
Following these 12 simple steps on how to remediate radon in basement should help ensure that your basement is free of dangerous levels of radon so you can enjoy a healthy living space without worrying about your safety. If you have any questions or concerns about how to remediate radon in your basement, seek out professional help right away. It’s important to take the necessary steps to make sure that your home is safe and healthy for you and your family!
The information provided here is meant only as a guide and should not be taken as professional advice. If there are any questions or doubts about how to remediate radon in a basement space, it is best to contact an experienced specialist who can provide more accurate guidance tailored specifically to your situation. Take the necessary precautions, stay safe, and enjoy your home free of hazardous levels of radon.
Frequently Asked Questions
Q: How Often Should I Test My Basement for Radon?
A: The EPA recommends testing for radon every one to two years depending on the results of your initial test.
Q: How Do I Reduce Radon Levels In My Home?
A: Sub slab depressurization systems, sealing cracks and leaks, using ventilation systems, increasing air flow, installing a radon mitigation system and using an activated carbon filter are all effective ways to reduce radon levels in the home.
Q: What Should I Do If My Radon Levels Are High?
A: If your radon levels are higher than 4pCi/L then it’s time to take action to remediate the gas. Seek out professional help from experienced specialists who can provide more accurate guidance tailored specifically to your situation so you can make sure that your home is safe and healthy for you and your family.
Q: What Is The Recommended Level Of Radon In A Home?
A: The EPA recommends that all homes maintain radon levels below 4pCi/L in order to be considered safe. If levels exceed this, then it’s time to take action to reduce the presence of the gas indoors.
Conclusion
Radon is a serious concern, as it is the second leading cause of lung cancer and can present an elevated risk for people living in homes with high levels. Taking the right steps on how to remediate radon in basement to reduce radon in your basement will help protect you and your family from this invisible danger.
With thoughtful remediation, such as sealing up penetrations and cracks, installing a vent pipe system for radon drainage, and having a professional inspect and fix any issues, you can feel confident that your basement is free of unhealthy levels of radon gas. Don’t let the fear of this odorless gas stop you from creating a wonderful area in your home – be informed and take action today!
