
If you’re planning to add electrical wiring to your basement, it’s essential to understand how to rough it in. Rough-in electrical wiring refers to running electrical wires to your devices before they are connected and walls are closed. This step saves time, effort, and money in the long run. In this post, We’ll guide you through the necessary steps for how to rough-in electrical wiring in basement.
Can You Rough-In in Electrical Wiring in The Basement?
When it comes to renovating your basement, one of the key considerations is electrical wiring. The question is, can you rough in the electrical wiring in the basement? The answer, thankfully, is yes! A rough-in refers to the installation of electrical wires and boxes before the actual fixtures and devices are put in place.
This step is important because it lays the groundwork for your entire electrical system. With careful planning and expert execution, roughing in the wiring in your basement can help ensure that everything runs smoothly, safely, and efficiently when it’s time to complete the project. Whether you are planning to install new lights, outlets, or appliances, rough-in wiring is an essential part of the process. So if you’re thinking about a basement renovation, don’t forget to factor in this crucial step!
Why Should You Rough-In Electrical Wiring in The Basement?
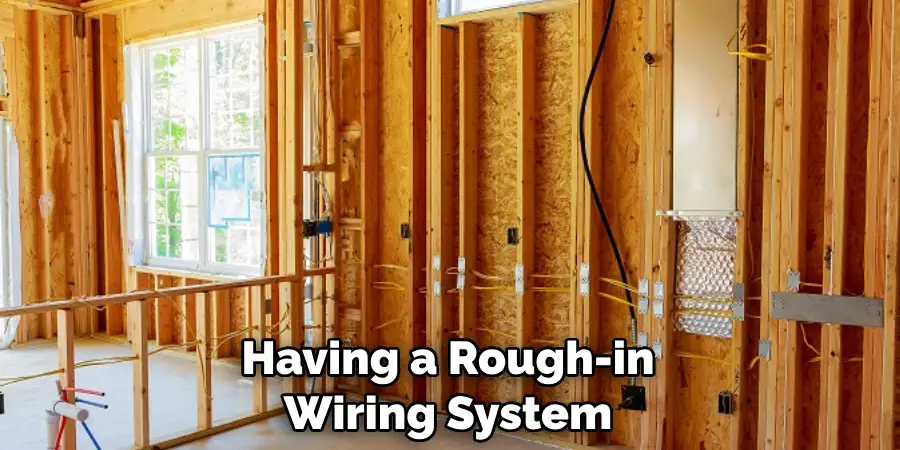
Rough-in electrical wiring is an essential step when it comes to renovating or building your home. Specifically, when it comes to the basement, rough-in wiring should not be overlooked. There are several reasons why it’s important to install rough-in electrical wiring before completing the final wall and ceiling finishes.
Firstly, this process allows you to add additional outlets, lighting fixtures, and switches in the future without the need to demolish the walls. Secondly, if you plan to have a finished basement that includes a kitchen, laundry room, or home theater, rough-in wiring can help ensure that you have the necessary circuits and wiring to power these areas.
Lastly, having a rough-in wiring system in place also increases the value of your home and gives you peace of mind, knowing that your electrical system is safe and up-to-date.
How to Rough-In Electrical Wiring in Basement Step-by-Step Guide
Step 1. Assess your Electrical Needs
Before starting the electrical work, it’s essential to determine what devices you’ll add to your basement. Determine the number of outlets, switches, and light fixtures you need. Consider if you need dedicated circuits to power any larger devices, like a home theater, hot tub, or sauna. This step will help you acquire the right materials and wiring capacity.
Step 2. Create a Wiring Plan
With your electrical requirements in mind, create a wiring plan. The plan should indicate where to run the wire, how many devices each circuit would handle, and all the needed connections. This critical step ensures that wiring is done right the first time and that you meet all safety regulations.
Step 3. Gather the Necessary Materials
Gather all the materials needed for the wiring job. This typically includes wires, conduits, junction boxes, switches, and outlets. Ensure that you get specific wire gauges and materials that meet local electrical codes. Have the necessary tools, including wire strippers, cable cutters, drill, and bits, ready to work.
Step 4. Wiring the Basement
It’s time to rough in the electrical wiring. Start with running the wires from the breaker panel to your devices. Use conduit where possible and secure the cables with J-hooks or staples where necessary. Make sure that you leave an additional 12-18 inches of cable at each outlet for easy connections during the final wiring. Once all rough-in wiring is complete, label the boxes and all wires according to the wiring plan.
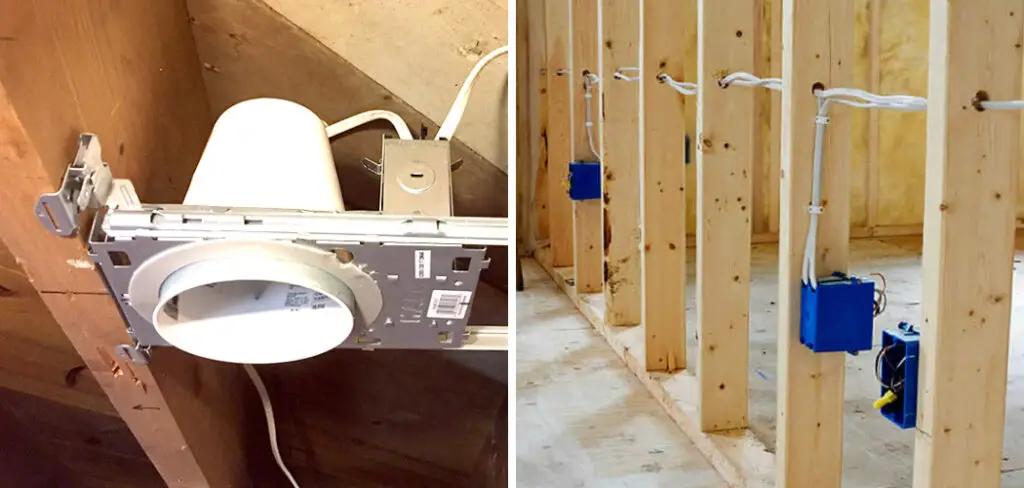
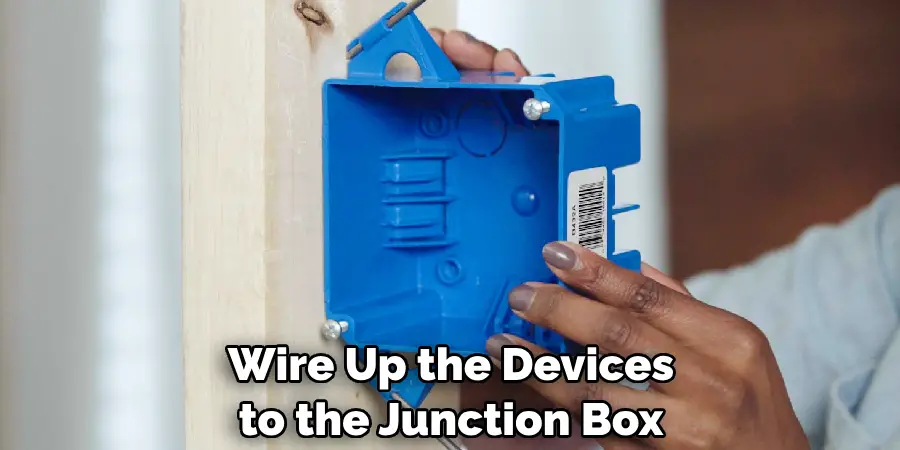
Step 5. Install the Junction Boxes
Install junction boxes where wires will connect at each location, like switches and outlets. Check that the boxes are firmly mounted in place with screws or nails, and cover any exposed wiring with a cable sheath. Then, wire up the devices to the junction box by connecting existing cables to the new ones according to the wiring diagrams.
Step 6. Install Switches and Outlets
Now, install the switches and outlets in their boxes. Use a voltage tester to ensure all wires are dead before starting work. Connect the switch correctly, then attach it to its box with screws while making sure that any exposed wires are encased in an insulation sleeve. For outlets, align the box with the mounting screws and attach the outlet to the box using screws.
Step 7. Test Your Wiring
Once all wiring is complete, it’s time to test your work. Check that each junction box has only one cable coming in and out of it, as this helps prevent short circuits. Ensure that the wires are in their correct positions and that all switches and outlets work correctly with a voltage tester.
That’s it! You’ve now learned how to rough-in electrical wiring in basement. Make sure to follow all safety protocols and local regulations when dealing with electricity. Now, you can safely move on to finishing off the wiring, connecting it to its intended devices and appliances.
5 Things You Need to Know Before Rough-In Electrical Wiring in Basement
1. Get a Permit
The first thing you need to do before roughing in your electrical wiring is to get a permit from your local building department. This will ensure that your work meets all the code requirements and that a qualified electrician inspects it.
2. Plan Your Work
Before you start any work, it is important to plan what you will do. This includes drawing a diagram of your work and ensuring you have all the materials and tools you need.
3. Install the Outlets
Once you have planned your work and gathered all the necessary materials, you can start installing the outlets. It is important to install them at the correct height and spacing so that they meet code requirements.
4. Install the Wiring
After the outlets are installed, you can then start installing the wiring. It is important to run the wires through the correct channels to protect them from damage.

5. Inspect Your Work
Once you have finished installing the wiring, it is important to inspect your work to make sure that everything is up to code. This includes testing all the outlets and switches to ensure they are working correctly.
Benefits of Rough-In Electrical Wiring in Basement
Adding electrical wiring to your basement can be daunting, but it comes with many benefits. By investing in rough-in electrical wiring, you are laying the groundwork for a fully functional space that can be used for a variety of purposes. The initial installation of electrical wiring may seem like a pricey investment, but it will save you time and money in the long run.
Since rough-in wiring is installed before walls and ceilings are put up, you have the flexibility to add outlets, switches, and light fixtures wherever you need them. This will make it easy to configure your space in the future without having to worry about expensive rewiring projects. Furthermore, by incorporating electrical wiring into your basement, you can create a comfortable and inviting living space that is suitable for any occasion.
From watching movies to cooking meals, the possibilities are endless with rough-in electrical wiring in your basement.
Some Common Mistakes People Make When Trying to Rough-In Electrical Wiring in Basement
Many homeowners make the mistake of taking on electrical wiring projects in their basements without proper knowledge and training. This often results in electrical problems or even safety hazards. One of the most common mistakes is not grounding the electrical system. If electrical devices are not properly grounded, they can cause fires or electric shocks, which can be dangerous.
Another mistake is not using the right type of wiring for a specific application. Not all wires are created equal, and using the wrong type of wire for a given job can cause problems down the line. Lastly, cutting corners and skipping necessary safety measures, such as installing GFCI (ground-fault circuit interrupter) outlets in areas with high moisture, is a mistake that can have serious consequences.
It is important to prioritize safety and hire a licensed electrician if you are not confident in your ability to properly rough in electrical wiring projects.
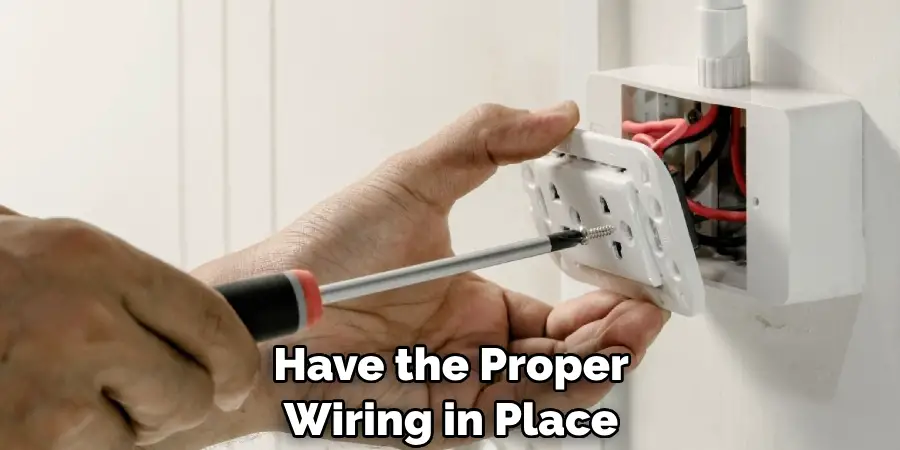
How Many Wirings Will I Need for A Basement Renovation?
Before beginning any basement renovation project, knowing how many wirings you’ll need is important. The answer will depend on a variety of factors, such as the size of the basement, the types of appliances and electronics you’ll be using, and the layout of your electrical systems.
To ensure that you have the proper wiring in place, it’s best to consult an experienced electrician who can assess your needs and recommend the safest and most efficient approach. With the right wiring plan, you can transform your basement into a comfortable and functional living space that meets all of your electrical needs.
Conclusion
Rough-in electrical wiring is an essential step before closing the basement walls. Doing it right the first time will save time, effort, and money. Planning, gathering materials, and creating a wiring plan can make the work easy, even for amateurs. Make sure to verify your work to ensure safety and compliance with local codes. With the steps mentioned above, you’re good to start rough-in wiring in your basement. Thanks for reading our post about how to rough-in electrical wiring in basement.
