Running electrical wire in a finished basement can be a daunting task. However, it is worth considering doing this when the need arises. Electrical wiring is essential to any renovation project, whether installing new outlets or changing the lighting systems. In this blog post, we will discuss some essential steps for how to run electrical wire in finished basement. So keep reading to learn more!

Can You Run the Electrical Wire in The Finished Basement?
Finishing a basement is a great way to add some extra living space to your home. However, before diving into any renovations, it’s important to make sure you know what you’re getting into. One common question homeowners have is whether or not they can run electrical wires in a finished basement.
The short answer is yes, but it’s not as simple as just running the wire through the walls. There are specific codes and regulations that need to be followed to ensure everything is done safely and correctly. It’s always a good idea to consult with a licensed electrician before attempting any electrical work in your home. Safety should always be your top priority.
Why Should You Run Electrical Wire in A Finished Basement?
A finished basement is often a great space to use as a living area or even a home office. But if you’re considering adding electrical outlets, lighting fixtures, or even entertainment systems, you’ll need to run electrical wire through your walls and ceiling. While the thought of cutting holes in finished drywall may be daunting, running electrical wire is necessary to ensure the safety and longevity of your electrical devices.
Proper installation by a licensed electrician will help prevent potential fire hazards, electrocution, and damage to your electronics. Plus, a finished basement with ample electrical options can greatly increase the functionality and value of your home.
How to Run Electrical Wire in Finished Basement – in 7 Easy Steps
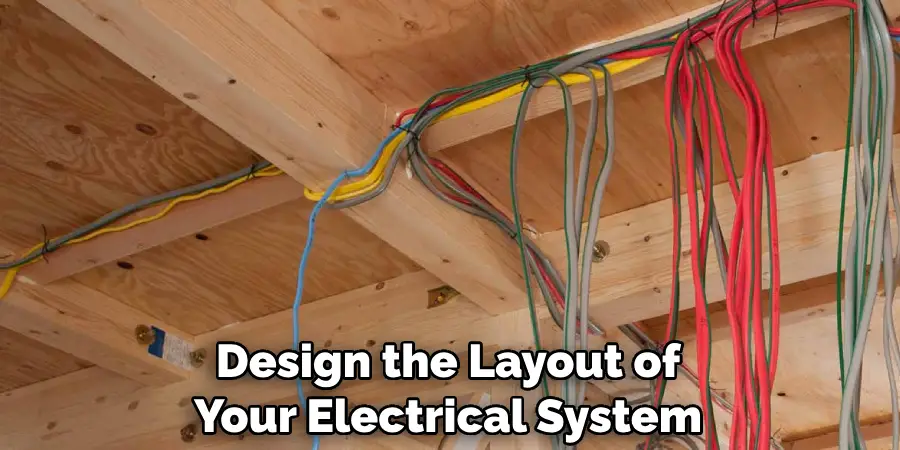
Step 1: Plan and Design
Before you start running electrical wire in your finished basement, it is vital to plan and design the layout of your electrical system. Consider the power requirement of your lighting system, heating and cooling, and any other appliances that might need an electrical connection. This will help you decide on the kind of wiring and the number of circuits needed to cater to your power needs. Remember to follow the building codes and safety regulations when planning your design.
Step 2: Acquire the Necessary Equipment
To run electrical wire in your finished basement, you will need some essential tools and equipment, such as a voltage tester, a wire stripper, junction boxes, and so on. Ensure that you have all the necessary equipment before you start the job. This will save you time and ensure that you do the job correctly.
Step 3: Mark and Trace the Walls
The next step is to mark and trace the walls where you plan to run the wires. This will help you avoid drilling into wires or critical structures such as beams. Use a stud finder to locate the beams, cables, or pipes behind the walls. This makes it easy to identify the areas where you can drill without causing any damage to the existing structures.
Step 4: Running the Electrical Wires
With the walls marked and the equipment ready, it’s time to start running the electrical wires. Start by drilling a small hole close to the junction box and feeding the wire through it. Ensure that the wires are not tangled or tangled when doing this. Use conduit pipes to cover the wires and ensure that they are well protected. This will prevent any damage to the wires and make it easy to identify them in the future.
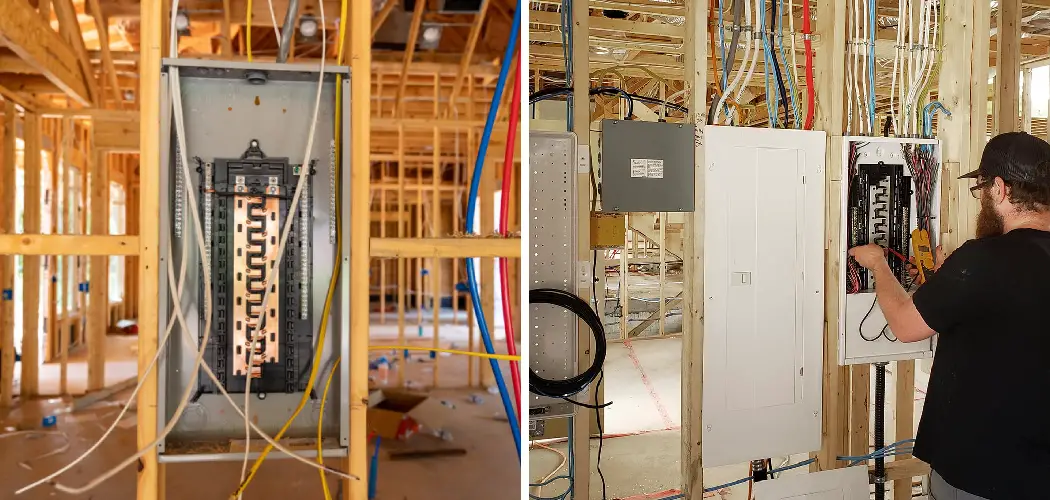
Step 5: Testing and Inspections
After running the electrical wires, it is crucial to test the circuits before you connect any appliances or devices. Use a voltage tester to check the circuits and ensure that each wire is connected and functioning. Get a professional inspector to assess and check your work. This ensures that your wiring system is up to the building codes and safety regulations.
Step 6: Installing the Junction Boxes and Switches
Once the testing is completed, you can start installing the junction boxes and switches. Make sure that they are securely mounted to the wall using screws or nails. This ensures that they do not move when pressure is applied to them, which could cause a short circuit. Also, make sure that the wires are not tangled or overstretched when you connect them to the switches.
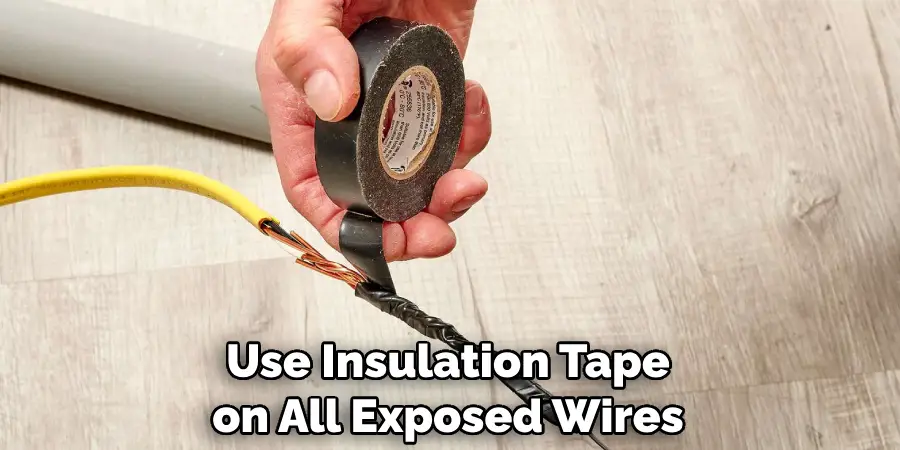
Step 7: Finishing Touches
Finally, finish off by replacing any wall plates and securing any exposed wiring. Remember to use insulation tape on all exposed wires, as this will ensure the safe operation of your electrical system. Congratulations! You have successfully run electrical wire in your finished basement. Now you can enjoy all the benefits of a safe and secure electrical system.
Follow these seven steps to run electrical wire in your finished basement successfully. With the right tools, planning, and execution, you can ensure your wiring job is up to safety standards while avoiding costly mistakes.
Keep this guide handy for future reference, and you’ll be set to tackle any electrical wiring project.
5 Considerations Things When You Need to Run Electrical Wire in a Finished Basement
1. The first thing you need to consider when running electrical wire in a finished basement is the type of wire you will need. There are two main types of electrical wire, Romex and THHN. Romex is a newer type of wire made from multiple strands of copper wire twisted together. THHN is an older type of wire that is made from a single strand of copper wire.
2. The second thing you need to consider is the size of the wire you will need. The size of the wire is measured in gauge, and the larger the gauge number, the smaller the diameter of the wire. The size of the wire you need will depend on the amperage rating of the circuit breaker you are using.
3. The third thing you need to consider is how you will route the wire through your basement. There are several ways to route electrical wire, and the best way for you depends on your specific situation. You will need to take into account any obstacles in your way, such as walls, floors, or ceilings.
4. The fourth thing you need to consider is what type of conduit you will use to protect the wire. A conduit is a tubing that surrounds and protects electrical wires. Several types of conduit exist, including PVC, metal, and fiber optic. Each type has its advantages and disadvantages, so you must choose the one that best suits your needs.

5. The fifth and final thing you must consider is whether you need to use junction boxes. Junction boxes are used when two or more wires need to be spliced together or when a wire needs to be terminated. If you run a single circuit through your basement, you probably will not need to use junction boxes. However, if you are running multiple circuits, then it is a good idea to use junction boxes to protect the wires from damage.
By taking the time to consider all of these things before you start running your electrical wire in a finished basement, you can ensure that everything will go smoothly and that your wiring job will last for years to come.
Always make sure to follow all safety guidelines and local codes when running electrical wire in a finished basement. Only a licensed electrician should perform any work on electrical wiring, so it is important to hire one if you need help with your wiring job. Running electrical wire can be dangerous, so always proceed with caution!
Benefits of Run Electrical Wire in Finished Basement
Are you looking to spruce up your finished basement and add extra comfort to your home? Consider running electrical wires throughout your space to enhance your living experience. With the addition of electrical outlets, you can easily power all your favorite electronics, including a TV or sound system for movie nights and a treadmill or workout equipment to get your sweat on without leaving your home’s comfort.
Installing wiring also allows for the addition of stylish lighting fixtures, creating a warm and inviting atmosphere to make your space even more inviting. Don’t miss out on the many advantages of running electrical wire throughout your finished basement and transforming it into the ultimate relaxation oasis.

Conclusion
Running electrical wire in a finished basement is crucial to any renovation project. With proper planning, design, and use of the right equipment, you can successfully run electrical wire in your basement without causing damage to the existing structures.
These five essential steps should guide you in the process of running your electrical wire and ensure that your basement has an efficient and safe electrical system. Observing the building code and safety regulations when working on electrical systems is crucial to avoid hazards and electricity-related risks. Thanks for reading our post about how to run electrical wire in finished basement.