
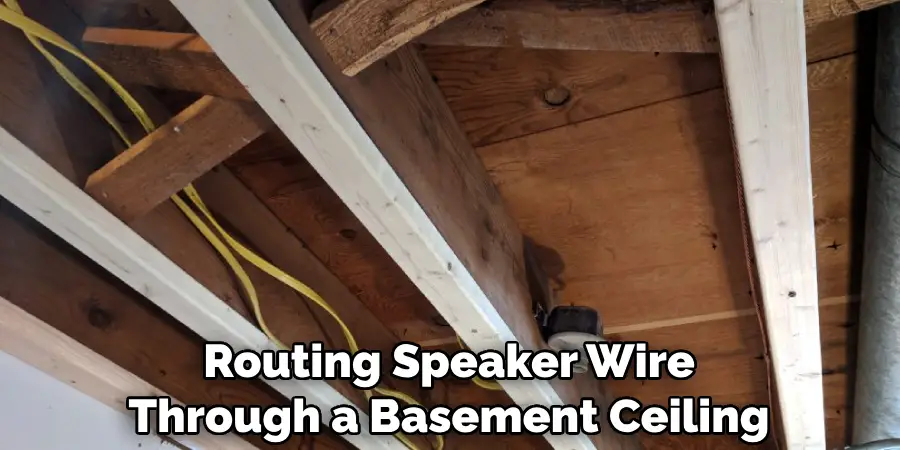
Running speaker wire through a basement ceiling is an efficient way to ensure that you get high-quality sound in your home. When properly installed, it eliminates the need for long runs of cable and provides a clean, professional look to your audio system. It also ensures that the wires are securely fastened and won’t be damaged by vibration or regular use.
The main advantage of running speaker wire through a basement ceiling is that it allows for more flexibility in terms of placement. This can be especially useful if obstacles such as ductwork or beams make placing speakers in certain locations difficult. It also gives you the ability to access and replace speaker wires easily should they become damaged or need replacing. You can find step-by-step instructions on how to run speaker wire through basement ceiling in this blog article.
Step by Step Processes for How to Run Speaker Wire Through Basement Ceiling
Step 1: Inspect the Ceiling
Carefully examine the basement ceiling for any obstacles that may get in the way of routing the speaker wire. Look for pipes, joists, and other obstructions like walls or insulation. Determine how much length you need for your speaker wires before cutting them.
Step 2: Cut the Speaker Wire
Cut the speaker wire to the required length. Mark the route you want to take with a pencil or tape measure before beginning. This will help ensure that your wire is routed in an efficient manner and avoid any obstructions.
Step 3: Threading Through Joists
If needed, thread the speaker wire carefully through the joists. Be sure to avoid any sharp edges that could potentially damage your wire. If you come across any obstructions, such as pipes or walls, bend the speaker wires around them in a smooth manner.
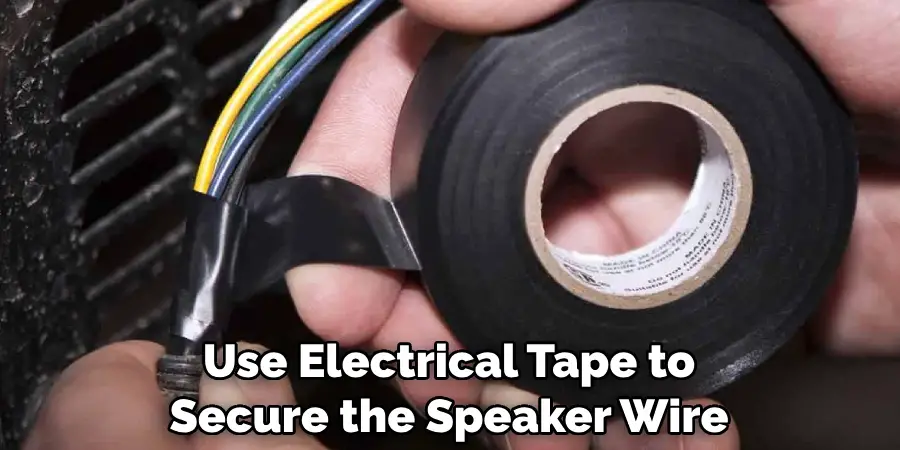
Step 4: Securing with Tape
Use electrical tape to secure the speaker wire around any obstructions you may have encountered. If possible, conceal the speaker wires using insulation or drywall. This will help protect them from damage and ensure a clean installation.
Step 5: Connecting to Amplifier
Connect the speaker wires to your amplifier once the speaker wires have been routed through the ceiling. Finally, test that everything works properly before proceeding with other steps. Ensure all connections are secure and no wire has been damaged during installation. Once everything is functioning as it should be, you are ready to enjoy your music.
By following these steps, you can successfully run speaker wire through your basement ceiling. This will give you high-quality sound and a professional and secure installation that will last for years to come.
Safety Tips for How to Run Speaker Wire Through Basement Ceiling
- Wear protective eyewear and gloves when handling speaker wire.
- Use a stud finder to ensure you don’t drill into any electrical wires or plumbing lines while running the wires in your ceiling.
- Ensure the path you choose does not go underneath any furniture or heavy objects that could cause extra strain on the speaker wires.
- When running it through the ceiling, use a UL-rated electrical box to house your speaker wire.
- If possible, try to run the speaker wire along walls and around obstacles rather than drilling new holes directly into the ceiling joists or rafters.
- Use cable staples or straps to secure the speaker wire along its path in order to prevent any snags that may occur.
- Watch out for sharp edges when drilling holes in your ceiling, and wear protective clothing if necessary.
Following these safety tips will help ensure a successful installation of speaker wires through the basement ceiling while preventing any accidents that could occur in the process. If you feel overwhelmed by this project, hiring a professional electrician who can properly and safely install the speaker wires for you is best.
Are There Any Safety Concerns When Routing the Wires in a Basement Ceiling?
When routing speaker wire through a basement ceiling, safety should always be taken into consideration. It’s important that the wires are properly secured and insulated to avoid any potential hazards, such as electric shock or fire. Additionally, it’s important to ensure that the wires are not exposed in any way which could create a potential tripping hazard. When running the wires, make sure to keep them away from any potential sources of moisture, such as water pipes or condensation.
Finally, when drilling holes in the ceiling for the wires to pass through, be sure to seal the openings with caulking or something similar to avoid any air leaks, which could increase energy costs. Taking these precautions will help ensure that running speaker wire through a basement ceiling is safe and efficient. By taking the necessary steps to route speaker wire in a basement ceiling properly, you can create an effective audio experience that’s both safe and secure.
How Do You Properly Secure the Wires Into the Ceiling Joists?
When it comes to properly securing the speaker wires into the ceiling joists, you have a couple of options. The first option is to use special clips that are designed for this purpose. These clips can be secured onto the joists with nails or screws and securely hold the wires in place without damaging them. Another option is to run the wires through plastic conduit. This will provide additional protection for the wires and also make them easier to access in case of repairs or maintenance.
To do this, you’ll need to drill a hole into the joists that are slightly larger than the diameter of the conduit pipe. Then, insert the conduit pipe into the hole and secure it with screws or nails. Once the conduit is in place, you can thread the speaker wires through without issues. Finally, you may want to consider using zip ties or other fastening methods to ensure that the wires are secured properly and won’t fall out of place.
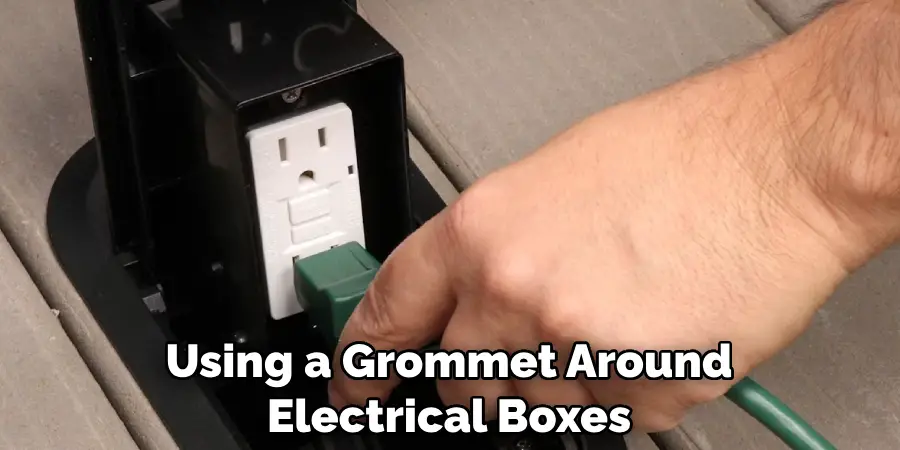
How Do You Make Sure the Wiring is Hidden and Out of Sight?
The best way to ensure that the wiring is hidden and out of sight is to use a conduit system. This means running metal piping through the walls and ceilings, which can be painted so it blends in with the surrounding décor. If you use an exposed speaker wire, ensure it’s rated for in-wall installation, as this will help protect it from heat, moisture, and physical damage. When running conduit, make sure you use fasteners that can hold the weight of the wiring and support the piping.
You may also want to consider using a grommet around electrical boxes for even more protection. Additionally, wire ties or cable clips are used to secure the wires against the wall or ceiling, so they won’t be damaged when running over them. You may also want to insulate the wiring with electrical tape, as this can help keep it secure and away from any moisture.
Additionally, if you are running speaker wire through basement ceilings, make sure to use waterproofing methods like sealing the wiring with silicone caulk or liquid tape. This will help protect the wiring from humidity and prolong its life.
How Should You Label Your Wires So That You Can Easily Identify Which One is Which?
Labeling your wires is important when running speaker wires through the basement ceiling. This will help you easily identify which wire runs to each speaker so that you can avoid any confusion or miswiring in the future. The best way to label your wires is by labeling them according to their source and destination. For instance, if you have a speaker in the living room connected to an amplifier in the basement, you can label the wire “Living Room Speaker – Basement Amp.”
This will help you easily identify which wire connects each audio system component. You can also use color-coded labeling for speakers and amplifiers in different rooms of your home. For example, you can assign green to the living room and red to the bedroom so that you know which wire is connected to each component. You can also use a numbering system such as 1-10 or A-J for further clarification in case there are any similar-looking wires or multiple speakers in one room.
How Do You Troubleshoot Potential Problems With the Wiring After Installation is Complete?
Once the speaker wire has been successfully run through your basement ceiling, there are a few steps you can take to troubleshoot any potential problems with the wiring. First, use an ohm meter to confirm that each end of the wire is correctly connected and that there are no breaks in the connection. If you find any issues, re-check all your connections to ensure everything is properly connected.
If the wiring does not seem to be correctly connected, check for any loose screws or frayed wires that may have developed during installation.
Make sure each connection is secure and free of any damage before continuing troubleshooting. If you find a break in the wire, you can use electrical tape to repair it. Finally, after the connections are secure, you can test the wiring for any additional issues by running a sound test.
If everything is working properly, you should get clear and strong sound from your speakers. If there is any distortion or interference, you may need to investigate further to determine the source of the problem.

Conclusion
In conclusion, running speaker wire through your basement ceiling is a relatively simple task that can be completed with the proper tools and materials. It is important to keep in mind that you should always ensure that all wires are properly secured at both ends so as not to create a hazard for yourself or those around you.
Additionally, it is wise to label each wire once it has been attached to the ceiling so as to make identifying them easier in the event of any issues. I hope this article has been beneficial for learning how to run speaker wire through basement ceiling. Make Sure the precautionary measures are followed chronologically.
