
Repairing a hole in a concrete foundation is an important step in preserving the structural integrity of your home. If left untreated, water can seep through these holes and weaken its foundation. Not only can this cause damage to the structure, but it can also lead to increased energy costs as well as health hazards due to mold and mildew growth.
Learning to patch a hole in a concrete foundation is a simple and cost-effective way to ensure your home’s structural integrity remains intact. It can also help improve the foundation’s overall look, restoring it to its original condition. In this blog post, You will learn in detail how to patch a hole in concrete foundation.
Tools You Will Need
- Mixing paddle
- Bucket
- Putty knife
- Wire brush
- Clean rags
- Hammer and chisel (for larger holes)
- Paintbrush
- Caulk gun
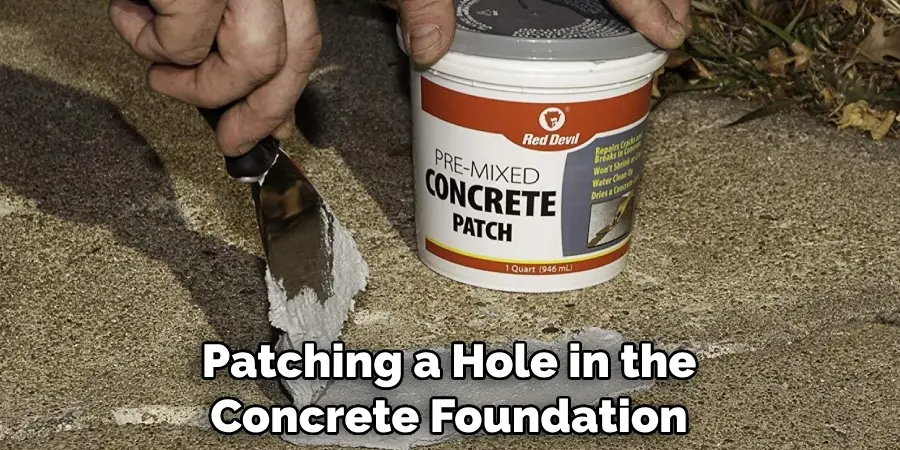
- Concrete patching compound
- Waterproof sealant (optional)
Step-by-Step Processes for How to Patch a Hole in Concrete Foundation
Step 1: Inspect and Clean the Hole
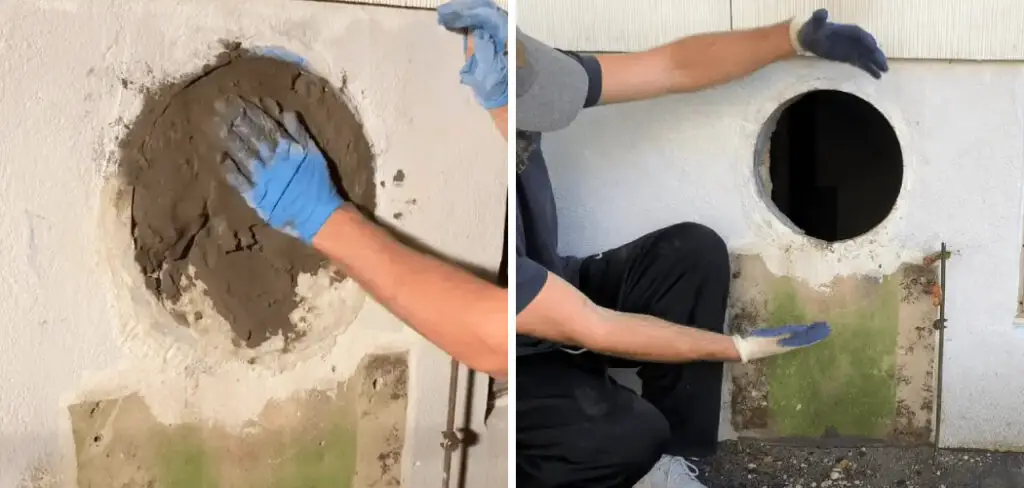
Start by inspecting the hole and its surrounding area. Make sure to remove any dirt, debris, or loose pieces of concrete from within the hole. Use a hammer and chisel to break away any areas around the hole that are too weak or damaged to repair. Be sure to wear safety goggles while doing this.
Step 2: Install a Bonding Agent
Apply an epoxy-based bonding agent to the entire area around the hole and its perimeter. This will make sure that the patch is bonded securely with the existing concrete. Follow the instructions on your chosen patching material to mix the cement and other ingredients together. Pour the mixture into the hole until it is level with the existing concrete.
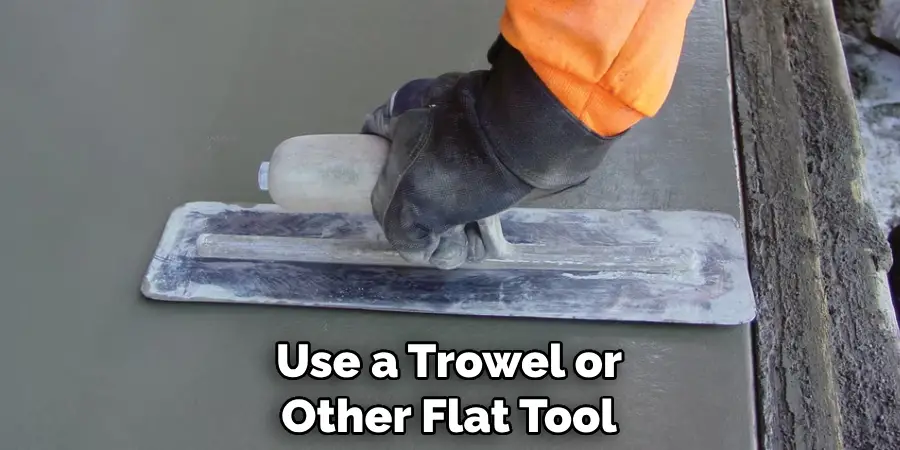
Step 3: Smooth Out Your Patch
Use a trowel or other flat tool to smooth out your patch, and make sure that it blends in with the surrounding surface. Make sure to apply pressure evenly to avoid any air pockets. Allow your patch to cure and dry completely before moving on to the next step. This could take several hours or even a few days, depending on the hole’s size.
Step 4: Apply Sealer if Desired
If desired, apply a coat of sealer to your patch and the surrounding area. This will help protect it from damage or moisture in the future. If you are patching a large hole, use a spacer such as foam strips to ensure that the concrete does not slump while drying. Place them around the patch and remove them once the patch has dried.
Step 5: Apply Finishing Touches
Once the patch is completely dry, use a damp sponge to smooth out any imperfections or rough edges lightly. If needed, you can also apply a bit of paint to make sure it blends in with the surrounding area. Once you’ve completed all of the above steps, test your repair by lightly pressing on the patched area. If it feels solid and secure, then your patch has been successful.
By using these steps to patch a hole in the concrete foundation, you can be sure that your repair will last for years. Be sure to follow all safety precautions and instructions when completing this project, as a successful repair depends on proper preparation and execution.
Tips for How to Patch a Hole in Concrete Foundation
- Wear safety glasses, gloves, and a dust mask to protect your eyes, hands, and lungs from debris when chiseling or drilling the concrete.
- Make sure you have adequate ventilation in the area where you are working.
- If using power tools for the job, be sure to unplug them when not in use.
- Disconnect all power sources before starting work.
- Only use tools that are made for the job and are properly maintained and inspected periodically.
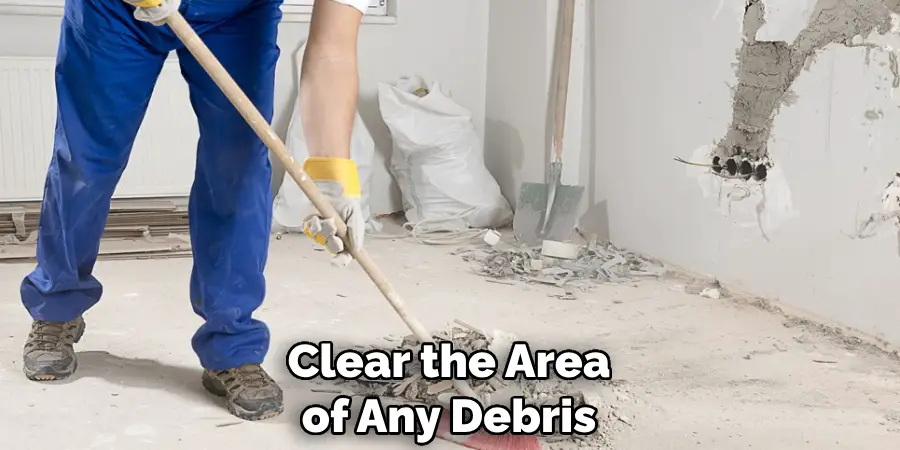
- Clear the area of any debris, dust, or dirt before you start to patch a hole in the concrete foundation.
- Be sure to follow all manufacturer’s instructions when using any products for patching the hole.
The last thing you want is to cause more damage than before you begin your repair. Ensure that everything is secure and the surface is completely dry before starting to repair it.
What Are the Common Mistakes to Avoid When Patching a Hole in Concrete Foundation?
Although patching a hole in a concrete foundation is a relatively straightforward process, there are some common mistakes that can be made. Below are a few of the most common errors to look out for when tackling this DIY project:
- They are not preparing the surface properly. Before patching, it’s important to make sure that the surface is clean and free of dirt, dust, oil, and other debris. If these contaminants are not removed prior to patching, they can interfere with the adhesion of the patch material.
- Not using a concrete bonding agent. Using a concrete bonding agent helps the patch material adhere more firmly to the adjoining surfaces for a strong, lasting hold. Failing to use the bonding agent may result in weakened adhesion and a less secure patch job.
- I was applying too much pressure when troweling. When using a trowel to spread the patch material on the surface, it’s important not to apply too much pressure – doing so can cause the patch material to become too thin, leading to a weaker bond.
- You are not allowing for ample curing time. After applying the patch material, it is important to allow the concrete sufficient time to cure before testing or using it in any way. Otherwise, the patch may not have had enough time to harden and could fail prematurely.
Keeping these common mistakes in mind can help ensure that your patch job is strong and secure. With patience and careful preparation, it’s possible to patch a hole in the concrete foundation successfully.
Is There Any Special Technique or Way to Ensure the Best Results When Patching a Hole in Concrete Foundation?
Yes, there are a few specific steps to follow when patching a hole in the concrete foundation. First, you’ll want to ensure the area around the hole is clean and dry before beginning any work. Additionally, it’s important to use materials specifically designed for concrete patching that can stand up to moisture and other environmental factors.
Once the area is clean, you’ll want to cut away any loose material or damaged concrete from around the edges of the hole. This will ensure that your patching material has an optimal foundation to adhere to.
Then, use an appropriate putty knife or trowel to apply the patching compound directly into the hole and spread it evenly across the entire surface. After that, use a trowel to smooth out the patching material so it is completely flat with the foundation. Finally, leave your patch to dry for several hours before painting or staining the area to match any existing color on your foundation.
Following these steps will help ensure that when you’re patching a hole in the concrete foundation, you’ll get the best results possible. It’s also important to note that repairing holes in concrete foundations can be tricky. To avoid costly mistakes or inadequate repairs, it’s often best to call a professional for help.
What Kind of Maintenance Do You Need to Do After Patching a Hole in Concrete Foundation?
After patching a hole in the concrete foundation, it is important to maintain the patched area for optimum longevity. This could include regularly cleaning the area with soap and water, applying sealant or masonry paint every few years, and ensuring that no additional damage is caused to the patched area by landscaping tools or other objects. If there is any sign of water seepage or other damage, it should be addressed immediately to avoid further damage.
Additionally, checking the patched area periodically for signs of cracking or loosening is recommended in order to prevent these problems from developing. If any cracks are found, they should be repaired as soon as possible with an appropriate patching material.
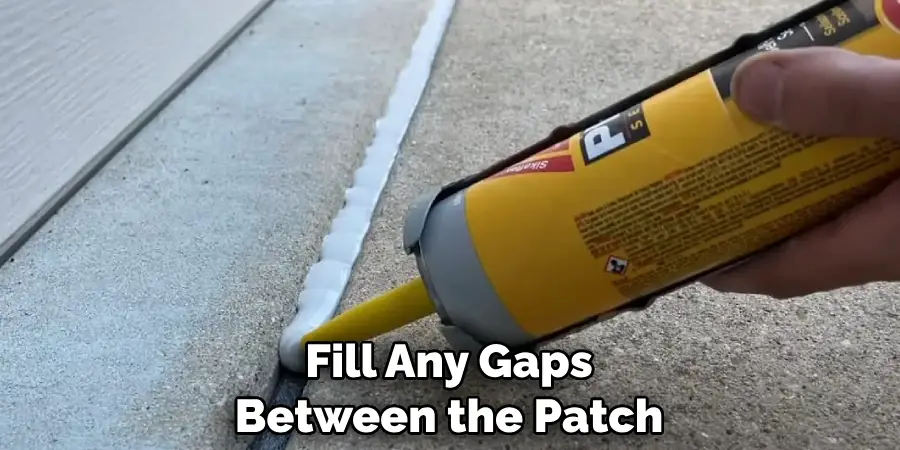
Finally, it is important to fill any gaps between the patch and surrounding concrete with a sealant or caulk. Following these steps should help ensure that the patched area remains strong, secure, and watertight for many years to come.
Conclusion
In conclusion, patching a hole in a concrete foundation is an easy task that anyone can do at home. It requires minimal supplies, and the instructions are simple and straightforward. With the right tools, you can easily patch a hole in your concrete foundation to protect it from further damage. Remember to take safety precautions when working with concrete and always wear protective gear such as goggles, gloves, and masks.
With the right supplies and a bit of effort, you can easily patch a hole in your concrete foundation to protect it from further damage. I hope reading this post has helped you learn how to patch a hole in concrete foundation. Make sure the safety precautions are carried out in the order listed.
