
Do you dream of having a finished basement with extra space for entertaining or leisure activities? Or perhaps you could use the additional storage that finishing your basement can provide. Regardless, semi-finishing your basement is an excellent DIY project for homeowners looking to spruce up their living quarters without having to go through major renovations.

With some time and effort, it’s possible to transform an old unfinished basement into a stylish part of your home, all while saving money as well! Keep reading if you’re interested in learning how to semi finish a basement on your own.
Step-by-Step Guidelines on How to Semi Finish a Basement
Step 1: Preparing Your Basement
Before you start semi-finishing your basement, it’s important to make sure the area is safe and suitable for the project. This includes checking for structural damage that could be caused by water or pests, as well as making sure there are no safety hazards like exposed electrical wires or rusted pipes. Additionally, inspect the existing frames, floors, walls, and ceilings to ensure that they’re all in good condition before continuing.
Step 2: Cleaning Up the Space
Once you have determined that your basement is suitable for semi-finishing, it’s time to start cleaning! Vacuum and sweep the floors, wipe the walls and frames down with a damp cloth, and remove any unnecessary objects from the space. Make sure the area is completely clear before you start working on it.

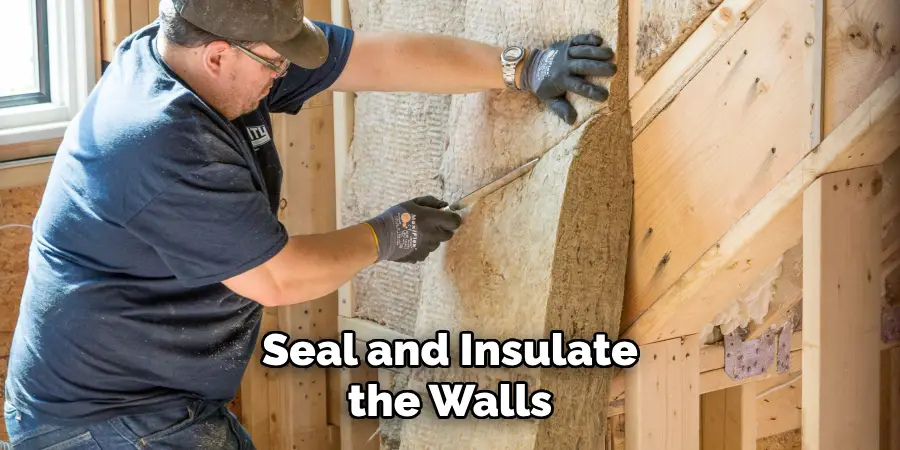
Step 3: Sealing and Insulating
The next step in semi-finishing your basement is to seal up any cracks or holes that may be present, as well as properly insulate the walls. This will help protect against moisture buildup and ensure a comfortable temperature in your basement. It’s also important to install a vapor barrier to the walls, as this will keep condensation from forming and leading to mildew or mold growth.
Step 4: Installing Flooring
The fourth step in semi-finishing your basement is installing the flooring of your choice. You have several options when it comes to flooring, such as laminate or vinyl. However, the most popular choice is carpeting, which adds warmth and helps create a more inviting atmosphere. Be sure to choose the flooring that will be comfortable and durable for your space.
Step 5: Adding Finishing Touches
Once all of the major steps are complete, it’s time to add a few finishing touches to your semi-finished basement. You can paint the walls in a color of your choice, hang up artwork or mirrors, and add furniture such as chairs, couches, and tables. These finishing touches will help make the space more inviting and comfortable for you and any guests that may come over.
Step 6: Enjoy Your Semi-Finished Basement!
Once all of the steps above are completed, it’s time to enjoy your newly semi-finished basement! Whether you’re using this area for additional living space or as an extra storage room, by following these guidelines you should have a comfortable and stylish space.
By following these simple steps, you can easily and quickly semi-finish your basement on your own! Take the time to prepare the area, clean it up, seal and insulate the walls, install the flooring of your choice, and add a few finishing touches.
You’ll be amazed at how much a difference it makes when you take matters into your own hands. With some effort and creativity, you can have a semi-finished basement that looks great and adds value to your home. Good luck!
Additional Tips and Tricks to Semi-Finish a Basement
- Start with the basics. Make sure you have functional electricity for lights and appliances, as well as running water if possible. Your local building codes will often dictate how many outlets and switches you need to install for everything to be up to code.
- Install a vapor barrier and insulation on the walls of the basement in order to keep out moisture as well as help maintain temperature regulation. This will also help with soundproofing, as it can dampen noises from outside sources.
- Consider adding a dehumidifier to the basement, especially if it is prone to high humidity or moisture. This will help protect any items stored in the basement and keep it feeling comfortable for those using it as a living space.
- Paint the walls and area with waterproof paint. This can help prevent mold, mildew, and other issues that can arise from damp conditions. Choose colors that reflect light and brighten up the space for an inviting look.
- Choose flooring materials that will stand up to wear and tear, such as tile, laminate, or vinyl plank flooring. Carpet may also be used if it is properly installed with the right padding.
- When installing a ceiling in your basement, make sure it is made of at least two layers of material and is well insulated. You can also add a drop ceiling to lower the height of the ceiling, as well as provide a finished look.
- Install cabinets or shelves to store items, such as tools, books, and games. This will free up valuable floor space for furniture or other activities.
- Finally, don’t forget the finishing touches like plants, rugs, and artwork. These items can make a big difference in bringing life to your basement and making it feel like home.

By following these tips and tricks, you can semi-finish your basement into an inviting living space or recreational area for all to enjoy. With just a few simple steps you can transform your basement into a comfortable, functional area that you and your family can enjoy for years to come.
Precautions Need to Follow for Semi-Finishing a Basement
- Make sure the area is dry and free of moisture. Check for any signs of leaking in the walls or floors, as moisture can create further problems with mildew.
- A good rule of thumb when semi-finishing a basement is to keep all finishes at least six inches above the floor. This will help prevent mold growth from seeping into your new finishes.
- Ensure any electrical appliances in the area are up to code and you have sufficient outlets for lighting, televisions, and other electronics.
- Verify that your walls are insulated to keep heat or cool air from escaping into the basement. This will also help prevent moisture from getting in through the walls as well.
- Invest in a dehumidifier to keep the air in the basement dry and comfortable. This will also help prevent mold from growing on your new finishes.
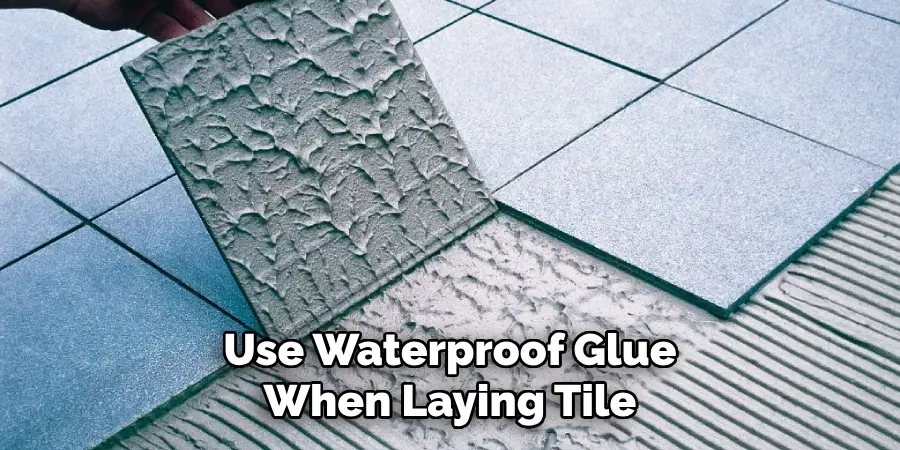
- Before adding any new flooring, make sure the subfloor is level and secure for your new materials. Make sure to use waterproof glue when laying tile or other materials that could be affected by moisture.
- Check existing pipes and wiring in the area for any signs of leaking or rust. If found, it’s best to replace these pipes before adding new finishes.
- Make sure any windows are properly sealed with waterproof caulk and that they have weather stripping around them.
Following these precautions will help ensure your basement semi-finish project runs smoothly and the result is a safe, comfortable space. With careful planning and preparation, you can have a beautifully finished basement that will last for years to come!
Frequently Asked Questions
What Should I Know Before Starting a Semi-finished Basement Project?
Before you start a semi-finishing project, it’s important to assess the condition of your basement. Check for any water issues or dampness and look for cracks in your foundation walls and floors. Make sure you also review local building codes that may affect your project.
What Are the Benefits of Semi-finishing a Basement?
Semi-finished basements provide an affordable way to turn your basement into a usable, livable space. They also allow homeowners to finish their spaces in stages, so they can get more bang for their buck as they are able to upgrade and add new features gradually. Semi-finished basements are also great for increasing the resale value of your home.
What Are Some Creative Uses for Semi-finished Basements?
Semi-finished basements can be used for a variety of purposes. They make great family rooms or entertainment spaces and you can add a wet bar or even create a home theater. You could also use your semi-finished basement as an additional bedroom or for a home office. The possibilities are endless!
Conclusion
As you can tell, when it comes to semi-finishing your basement, there is a lot of thought and effort that must go into the process. From proper planning to avoiding costly mistakes, it’s important to understand what you’re getting into beforehand. Taking your time and doing things right will ensure a smooth project and a successful end result.
By following these guidelines, you should have no problem with how to semi finish a basement like a pro! These tips are sure to help make the entire process stress-free and worth it in the end. So take some time to plan out your project, choose the right materials, gain access to essential tools, and get started on semi-finishing your basement today! How will you make your home’s potential come alive?
