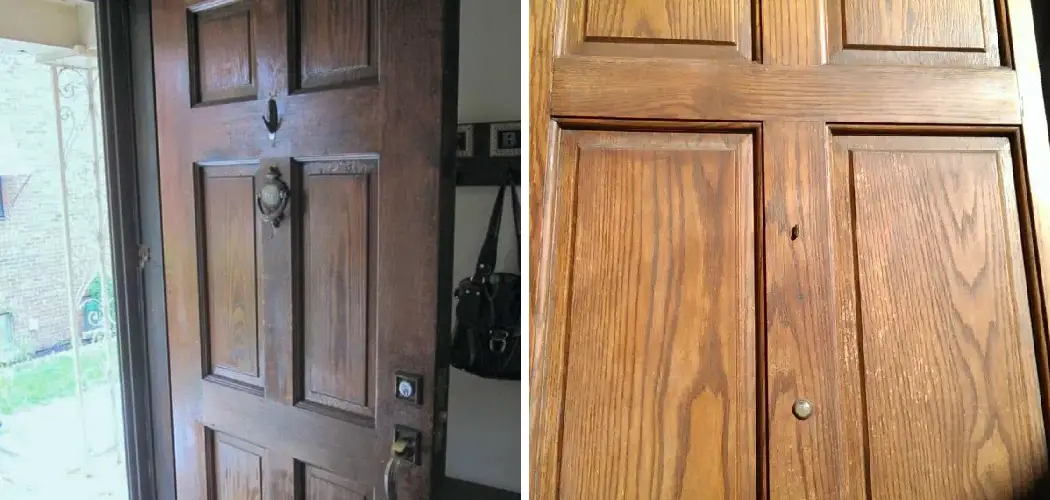
Staining an already stained door can be a great way to give your home an updated look. It also allows you to customize the color of the door without having to buy a brand-new one. With the right products and techniques, you can effectively stain a door without worrying about damaging it. Doing this yourself is often more cost-effective than hiring a professional to do the job.

Staining a door that is already stained has a few distinct advantages. First, it prevents the need for stripping and sanding the existing finish. This saves time, money, and labor costs since you don’t have to start from scratch with fresh wood. Additionally, staining over an existing finish allows you to adjust the color of the door to match the surrounding decor. In this blog post, You will learn in detail how to stain a door that is already stained.
Step-by-step Instructions for How to Stain a Door That is Already Stained
Step 1: Inspect the Door
Check the door for any existing blemishes or imperfections. Make a note of any areas that need extra attention when staining. Remove any dirt, dust, or debris from the surface of your door using a damp cloth. Then, lightly sand the entire door to remove any leftover residue and create a smooth surface.
Step 2: Apply a Stain Primer
Brush on an even coat of wood stain primer and allow it to dry for about 48 hours before staining. Dip a small paintbrush into the wood stain and brush it onto the door in long, even strokes. Make sure to brush along the grain of the wood.
Step 3: Allow the Stain to Dry
Let the stain dry for at least 24 hours before moving on to the next step. Once the door is dry, use fine-grit sandpaper to sand lightly and remove any excess stain. Use a damp cloth to remove any dust or residue.
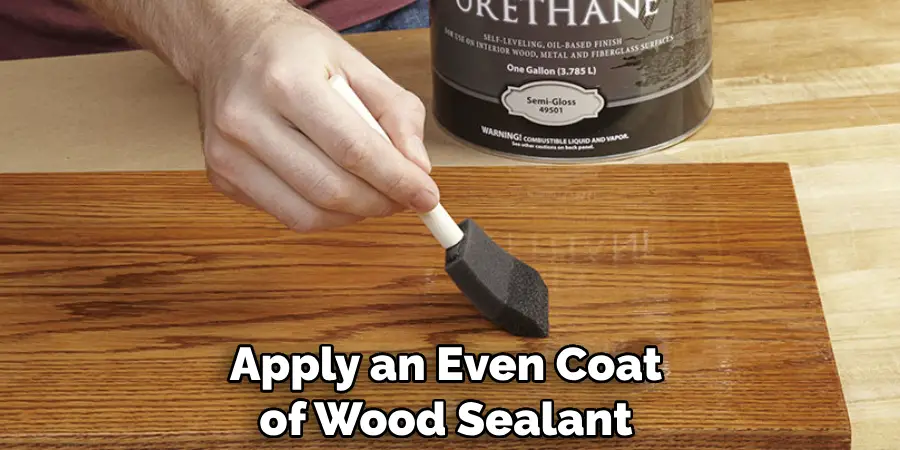
Step 4: Apply a Sealant
Once the door is completely dry, apply an even coat of wood sealant using a clean paintbrush. Allow it to dry for at least 24 hours before moving on to the next step. Choose fine-grit sandpaper to lightly sand the door again. Remove any excess sealant with a damp cloth.
Step 5: Apply a Top Coat
Brush on an even coat of wood finish or other top coat and allow it to dry for at least 24 hours before moving on to the next step. Check the door for any imperfections or inconsistencies. Make sure all areas are even and the desired finish is achieved. If needed, sand lightly and apply additional coats of wood stain, sealant, and top coat until the desired look is achieved.
Tips for How to Stain a Door That is Already Stained
- Wear the proper safety gear when staining a door that is already stained. This includes gloves, eye protection, and a respirator mask to protect your lungs from the fumes of the stain.
- Make sure you have adequate ventilation while working on staining your door. Open windows in the area or use an exhaust fan if possible.
- Test the stain you plan to use on a hidden area of the door if possible, to ensure it is compatible with the tinted wood finish already present on your door before applying it to the entire surface.
- Prepare the surface of your door for staining by sanding and cleaning it thoroughly with a damp cloth or degreaser if necessary.
- Always start staining in the middle of the door and work your way out to avoid lap lines or overlapping areas.
- Make sure to apply a clear sealant to protect and preserve the finish of your stained door once you are done with the staining process.
- Allow plenty of time for the stain to dry completely before touching it or closing the door. This could take up to 24 hours, depending on the type of stain used.
Following these tips will help ensure that your staining project is successful and safe.
How Long Should the Stain Sit on the Door Before Being Wiped Off?
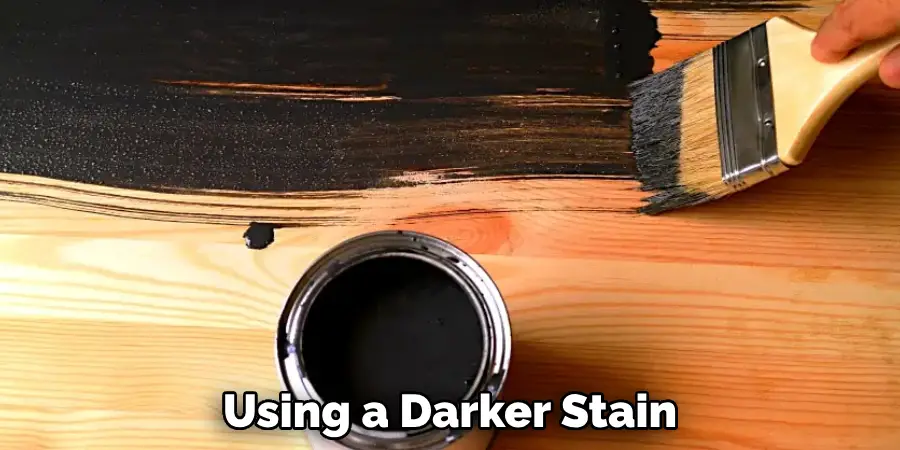
When staining a door that is already stained, you should let the stain sit for at least 8-12 hours. Keep in mind that when using a darker stain, you should allow it to cure longer before wiping off the excess. After 8-12 hours have passed, you can use a clean cloth or brush to wipe off any excess stains.
If you’re using a brush to wipe off the excess, ensure it is only slightly damp with a small amount of water to reduce the risk of streaking or lifting any wood fibers. Allow the door to dry completely before applying any finish coatings or sealants.
You will likely notice an uneven result when staining an already-stained door. To even out the stain, you can make adjustments to the application process and use multiple coats of stain. When making adjustments, apply a light coat of stain in an “X” pattern, as this will help minimize streaking or warping.
Be sure to allow enough time between each coat for it to dry completely before applying the next. Additionally, consider using a stain with a light color so that any existing stains are still visible. This will ensure your door looks uniform and consistent after staining is complete.
How Should the Door Be Cleaned and Prepared Before Applying a New Layer of Stain?
Before applying a new layer of stain to an already stained door, it is important to make sure that the surface is clean and free of dirt or debris. This can be done with a damp cloth or by using a mild detergent and warm water. Once the surface has been thoroughly cleaned and dried, it’s time to begin staining the door.
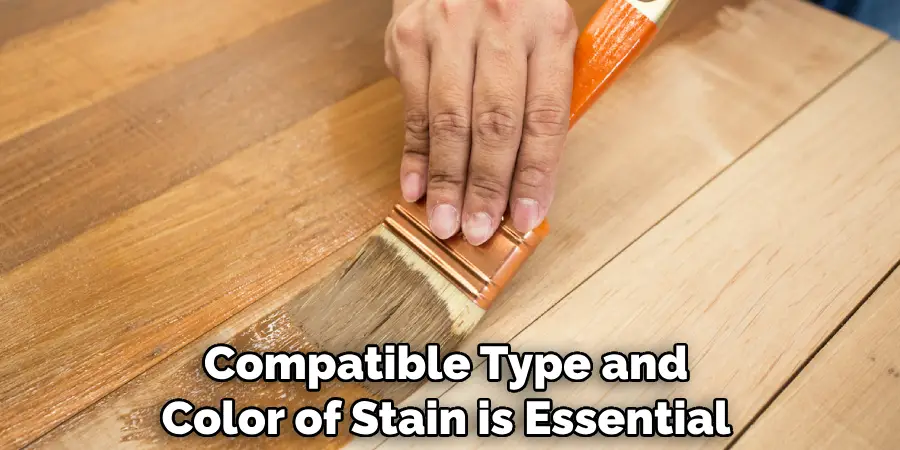
When applying a new layer of stain to an already stained surface, it is important to use a compatible color and type of stain. After selecting the proper product, use a clean brush or rag to apply the stain evenly along the entire door, taking care not to miss any spots.
Allow proper drying time according to product directions before applying additional coats of stain. Using a compatible type and color of stain is essential for achieving the desired finish. When staining an already stained door, always be sure to use a light or medium-colored stain over a dark color to avoid creating an overly dark finished look. Additionally, if you are uncertain about which type of stain to use, consult with a professional or speak to the manufacturer.
How Do You Protect a Stained Door From Damage and Wear?
The best way to protect a stained door from damage and wear is to ensure that the surface has been properly sealed with a clear sealant. This will provide an extra layer of protection between the wood and any liquids, such as cleaning products or water, that might come into contact with it. It also helps prevent dirt and other debris from becoming embedded in the pores of the wood.
If your door is already stained, it is important to make sure that you use a sealant made specifically for staining or finishing. This will help ensure that the stain lasts longer and helps protect it from damage.
Another way to protect a stained door is to regularly clean and dust it using a soft, damp cloth. This will help remove any dirt or dust particles that may be stuck in the wood grain and prevent any further damage from occurring. It is also important to avoid using harsh chemicals or abrasive cleaning products as these can strip away the finish, leaving the door vulnerable to damage.
Is There Any Special Maintenance Required for a Newly-stained Door?
Yes, there is special maintenance required for a newly-stained door. After staining the door, applying an appropriate sealant that will protect the wood and ensure that the stain does not peel or flake off is necessary. Sealants come in a variety of forms, such as varnishes, urethanes, and lacquers. Depending on the type of sealant used, it may need to be reapplied every six months or every few years.
Additionally, it is important to keep the door clean and free of dirt or debris that could damage its finish. If you are unsure of what type of sealant to use on your stained door, consult a professional for advice.
It’s also important to note that using a sealant specifically designed for exterior wood surfaces is essential if you are staining an exterior door. This will protect the door from damage caused by weather and sun exposure. With the right care and maintenance, your newly-stained door should last many years.

Conclusion
In conclusion, staining a door that is already stained can be tricky. However, with the right preparation and execution, your door will look as good as new or even better! Before you begin, assess the existing stain’s condition by testing it in an inconspicuous area. Make sure you use quality supplies and take your time to ensure a perfect finish.
Always follow the manufacturer’s instructions when applying the new stain to avoid any mistakes or damages. I hope this article has been beneficial for learning how to stain a door that is already stained. Make Sure the precautionary measures are followed chronologically.
